From Day One to Long-Term Success: Onboarding Strategies for Contractors

From Day One to Long-Term Success: Onboarding Strategies for Contractors

The construction industry is facing one of its toughest challenges in decades. Companies are struggling to find enough skilled workers while competing to keep the ones they have. At the same time, projects are becoming more complex, deadlines are tighter, and expectations are higher. In this environment, contractors cannot afford to lose good talent.

That is why onboarding matters more than ever. An effective onboarding program does more than welcome a new hire; it sets the tone for their future, builds confidence, and demonstrates that the company values their contribution. Done right, it can mean the difference between an employee who leaves within a few months and one who stays for years.

According to the Bureau of Labor Statistics (BLS) Job Openings and Labor Turnover Survey (JOLTS), the construction industry continues to rank among the highest in employee turnover. Each worker who leaves costs a company an average of $11,500, not counting the disruption to projects and team morale. Only 53 percent of construction workers stay with the same employer beyond two years, and nearly 40 percent of new hires leave within their first 90 days. At the start of 2025, there were still 236,000 open positions across the industry, showing just how competitive the market has become.

Despite these challenges, we must treat every new hire as a potential long-term team member. Remember, you’re building a lasting relationship where their success directly contributes to yours. That’s when onboarding becomes a powerful tool. It is not just about paperwork or orientation, but about making new hires feel connected, valued, and equipped to succeed. Preparation even starts before the employee’s first day.

The Pre-Onboarding Foundation

The success of a hire begins before their first day. Two elements make a big difference.

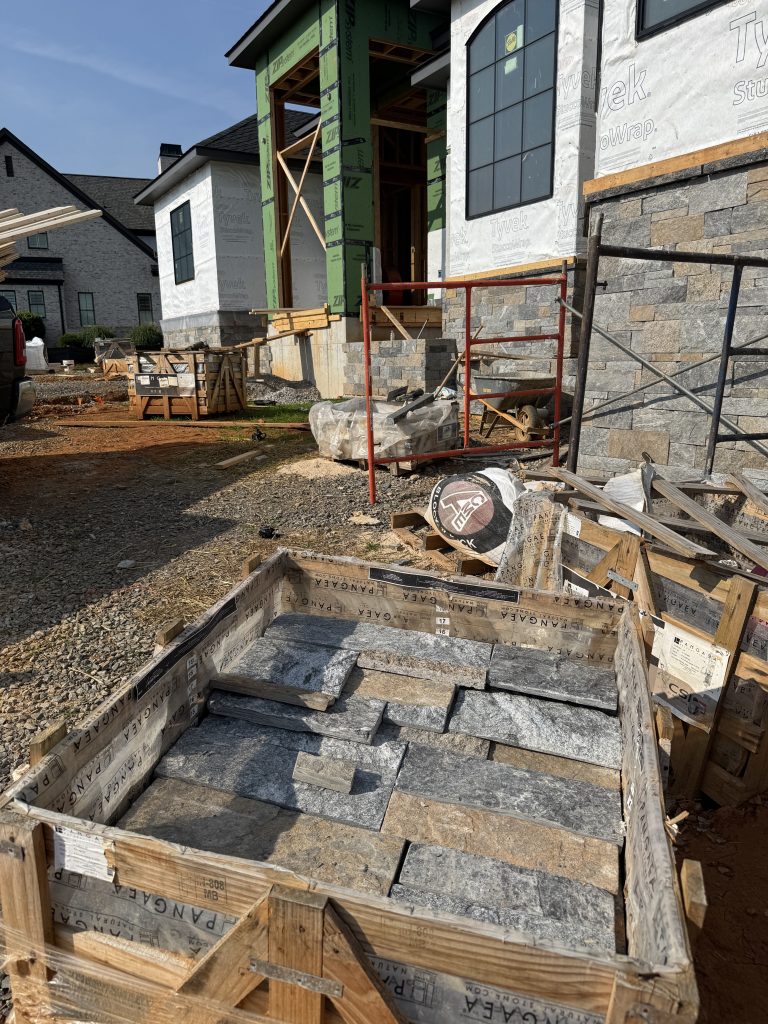
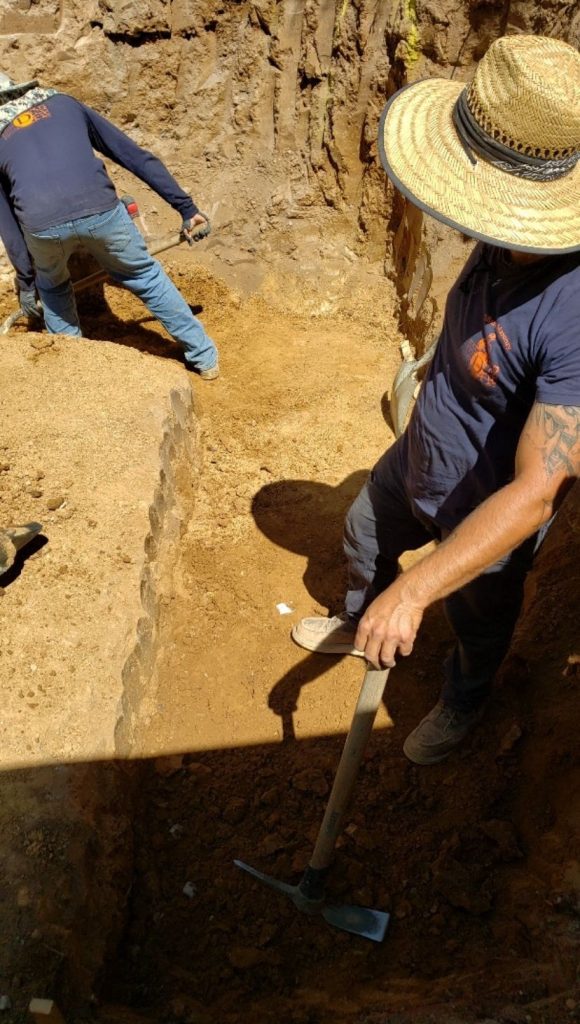
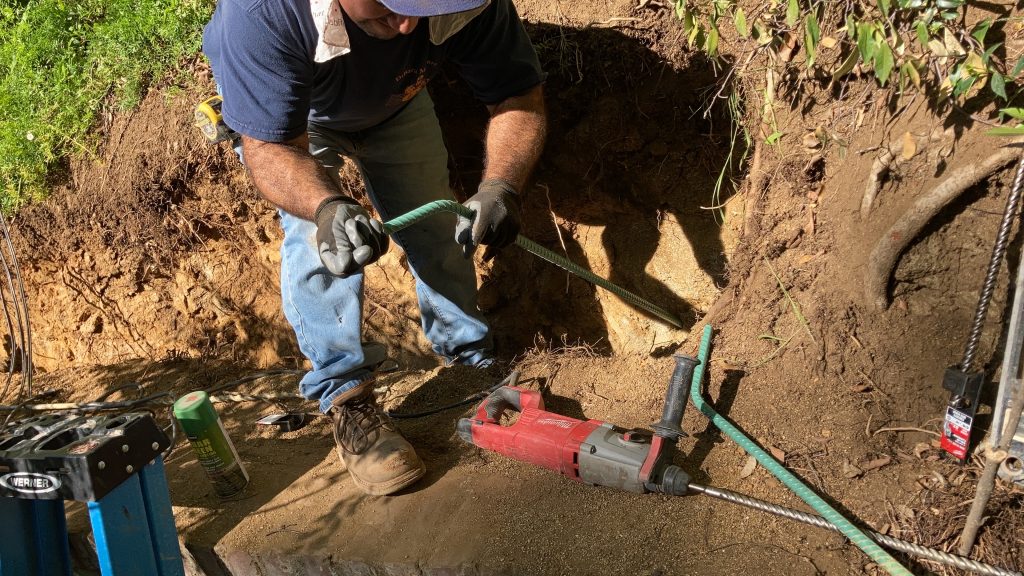
First, validate skills through comprehensive paid skills assessments to maximize the likelihood that you’ve hired the right candidate rather than relying solely on interviews or resumes. For field roles requiring specialized trades, hands-on tests are crucial. For example, having masonry foremen build a brick or block wall (these are masonry materials) in your yard is an excellent way to validate skills and demonstrate expertise. These tests reveal technical ability, attention to detail, and workmanship.

Every trade should have practical evaluations tailored to its standards.

Office roles should test job-specific tasks, such as accountants completing QuickBooks assessments. Hybrid positions like sales executives can be evaluated through project scenarios that require workflow breakdowns, labor hour estimates, and materials lists. Assessments must be challenging enough to reflect real job demands. Using examples from difficult past projects provides the best benchmark.

But pre-onboarding is not only about testing. It is also about discovery. By identifying each person’s strengths from day one, companies gain insights into where new hires can contribute most effectively. Someone may excel in technical execution, while another might shine in organization or communication. Knowing this early helps leaders assign the right responsibilities, foster stronger collaboration, and build healthier work relationships. In short, pre-onboarding is both a tool for preparation and a foundation for team synergy.

But onboarding cannot stop at assessment. Once you know what someone can do, the next step is to give them a clear structure for how they will grow in the role.

Clear KPIs and Mentorship System

A comprehensive 30, 60, 90-day roadmap is essential before onboarding begins. This plan should outline expectations, responsibilities, and milestones for the first three months. Having it ready demonstrates professionalism and respect for the new hire, while also providing a clear path to success from day one.

High-performing employees need clear standards. Defining KPIs allows new hires to track their progress and understand exactly what success looks like. Transparency in metrics reduces uncertainty and builds motivation.

For example, a masonry apprentice might have KPIs tied to learning and applying three core techniques within the first 30 days, such as mixing mortar, tooling joints, acid washing, and proper brick cleaning and alignment. A project manager, on the other hand, might be measured by submitting accurate weekly progress reports and project schedules on time, coordinating at least two successful subcontractor meetings within their first month. An estimator could have a KPI focused on producing three bid proposals each week for a total three-dimensional track against their 90-day period.

Pairing each new hire with a mentor also makes integration smoother. Ideally, the mentor should be at the same level but not the direct supervisor. This encourages open communication without fear of judgment. In construction, where hands-on experience matters most, mentors can pass down practical knowledge that is rarely documented but essential for success.

Once expectations are set and a support system is in place, the next step is to focus on the employee’s early experience, especially during the first week.

Check In Early, Check In Often

The first week sets the tone for the entire relationship. Begin with a “communication check” to confirm all channels and logins work properly and that the employee has every necessary tool. Make expectations about communication frequency clear, and schedule weekly manager meetings to review goals. Remember, “communicate early, communicate often” should guide the process. Regular check-ins prevent small issues from becoming major problems.

The week should follow a structured plan. Start with HR formalities like document review and handbook orientation, then move to introductions, team announcements, or a welcome lunch.

Beyond logistics, the first week is also about making employees feel genuinely valued. Surveys show that the top reasons employees leave include insufficient pay (38 percent), lack of development opportunities (27 percent), poor working conditions (25 percent), and ineffective onboarding (21 percent). Addressing these issues starts early, and even small actions can make a difference.

One effective practice is offering a small but thoughtful welcome gift on the first day. You should know the new hire well enough through the hiring process to personalize the gesture, which makes it feel more authentic. This simple act reinforces that the company sees them as more than just a worker; it shows appreciation and builds early loyalty.

Authenticity is key. A gift should never feel like a gimmick but rather a true reflection of company culture. Yes, even in today’s economy, small investments in people matter.

After the first week, onboarding should not stop. The program needs to continue in a structured way that builds confidence step by step.

Prepare Strategically: A Ship Without Direction Drifts Aimlessly

Breaking onboarding into weekly phases allows employees to gradually absorb information without overload. In construction, this is especially important for learning safety protocols and quality standards.

With 80 to 90 percent of construction companies reporting hiring difficulties, adopting this structured framework can give employers an edge. Preparation, phased training, mentorship, and consistent check-ins are not just theory; they are proven strategies. I have seen companies turn retention problems around by applying these methods and building long-term, reliable teams one successful hire at a time.

But onboarding is about more than just keeping people. It is about raising the bar for the entire construction industry. When companies invest in people, treat them with respect, and provide the tools to succeed, the impact goes beyond retention. It creates safer job sites, stronger project outcomes, and a culture that attracts the next generation of builders. Every contractor who commits to thoughtful onboarding is not only strengthening their own business but also helping to elevate the industry as a whole.

References
Bureau of Labor Statistics. (2025, July). Job Openings and Labor Turnover Survey (JOLTS). https://www.bls.gov/jlt/

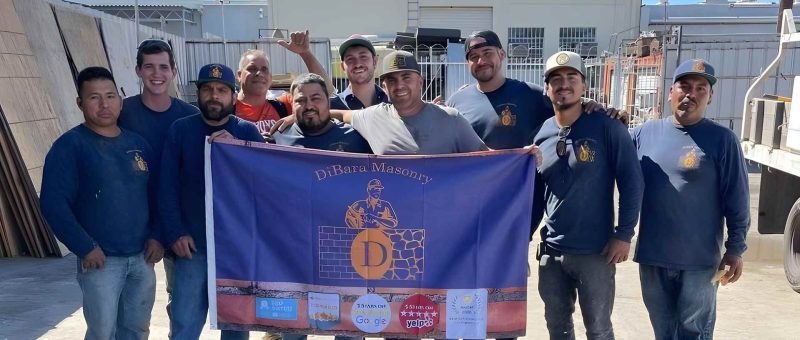
original article written by Matt DiBara with photos provided by DiBara Masonry and courtesy of MASONRY Magazine and curated by the MCAA

Why Polymeric Sand Matters: Installation, Common Issues, and How to Replace It the Right Way

Why Polymeric Sand Matters: Installation, Common Issues, and How to Replace It the Right Way

When installing stone pavers—whether for a patio, walkway, or driveway—polymeric sand plays a critical role in achieving long-lasting results. It may seem like a simple material, but polymeric sand is essential for locking pavers in place, preventing weeds, and keeping your hardscape looking clean and well-maintained. However, its performance depends heavily on proper installation. When applied incorrectly, polymeric sand can cause a range of issues that compromise both the function and appearance of your paver project.

In this article, we’ll break down why polymeric sand is so important, the problems that occur when it’s not applied correctly, and what’s involved when it’s time to remove old sand and replace it with a new layer.

What is Polymeric Sand and Why Is It Important?

Polymeric sand is a blend of fine sand and binding polymers. When activated with water, these polymers harden, forming a semi-solid, flexible joint between pavers. These joints serve several important functions:

1. Stabilization

The hardened sand keeps pavers from shifting over time—especially in high-traffic areas or climates with freeze-thaw cycles.

2. Weed and Pest Prevention

Properly filled joints leave little room for weeds to sprout or insects to burrow.

3. Water Management

Polymeric sand helps reduce erosion and prevents water from washing out the joints during heavy rain.

4. A Clean, Finished Appearance

Filled joints give your hardscape a clean, uniform look and help maintain even spacing between pavers.

Why Proper Installation Matters

Although polymeric sand is widely used, many of the problems that arise in paver installations come from poor application or rushed installation. Polymeric sand is highly sensitive to moisture and requires careful preparation.

Below are the most common issues that appear when it’s installed incorrectly.

Common Problems Caused by Incorrect Polymeric Sand Installation

1. Haze or Staining on Paver Surfaces

If polymeric sand dust is not completely blown or swept off the pavers before wetting, it can create a white or cloudy haze.
This haze may be difficult to remove and can permanently affect the appearance of the surface.

2. Soft or Crumbling Joints

Polymeric sand needs the correct amount of water to activate.
Too much water washes the polymers away; too little prevents proper curing.
The result is weak joints that break apart, wash out, or never fully harden.

3. Uneven or Sunken Joints

If joints aren’t filled completely or the sand isn’t compacted, the sand will settle over time. This can create gaps that collect debris or allow weeds to grow.

4. Weed Growth Despite Using Polymeric Sand

While polymeric sand helps prevent weeds, incorrect installation—especially shallow joints or washed-out polymers—makes weed growth likely.

5. Sand Washout After Rain

Before the polymer fully cures, the joint is vulnerable. If heavy rain occurs too soon after installation—or the sand gets over-watered during activation—washout can occur quickly.

6. Hard Surface Crusting

If the top layer of sand gets over-watered while deeper layers remain dry, a crust may form on the surface while the lower joint stays soft. This eventually leads to cracking and failure.

Maintenance: When and Why to Replace Polymeric Sand

Polymeric sand does not need frequent replacement, but over time joints may deteriorate due to:

  • Normal wear
  • Erosion from water runoff
  • Heavy traffic
  • Freeze-thaw cycles
  • Poor previous installation

When joints become cracked, hollow, or loose—or when weeds begin to take over—it may be time to remove the old sand and replace it.

How to Remove Old Polymeric Sand Before Installing New Sand

Removing old joint sand is essential. Adding new polymeric sand on top of deteriorated joints will not bond or cure properly. Here’s the standard process professionals use to remove old polymeric (or traditional) sand:

1. Inspect and Prepare the Area

Remove furniture, debris, and weeds to expose all joints.

2. Loosen the Old Sand

Polymeric sand hardens like grout, so start by breaking it up:

  • Insert the weeding tool or the flat/pointed edge of the 5-in-1 between the pavers.
  • Gently pry upward or scrape along the joint to fracture the old sand.
  • Work in short sections so you don’t chip the edges of the pavers.
3. Scrape Out the Joints

Once the surface layer is loosened:

  • Use the hook side of a weeding tool to pull debris out of deeper joints.
  • Use the scraper edge of the 5-in-1 to push or scoop the material out.
  • You don’t have to remove every last grain—just deep enough to add new sand (typically ½” to 1″).

4. Blow Out Residue

  • Use a leaf blower to clear the loosened sand from the joints.
  • Blow at a shallow angle so you don’t dislodge additional material you want to keep.

5. Allow the Area to Dry Completely

Polymeric sand should never be installed in damp joints. Allow the surface to dry 24–48 hours depending on weather.

6. Refill the Joints With Fresh Polymeric Sand

Rather than pour the sand into a big pile, pour the sand as you move across the surface, then lightly sweep the new sand in to the top of the pavers. Use a leaf blower to remove excess sand from the patio.

7. Compact the Sand

Particularly with large format, natural stone pavers, it is recommended to use a roller compactor with a pad to compact and consolidate the sand in the paver joints.

8. Resand and Sweep

Lightly resand the and sweep the surface with pressure, this time at a 45 degree angle to properly set the height at a minimum depth of 1/8 inch below the surface of the paver. Remove all excess sand

9. Activate With Water Carefully

Follow the manufacturer’s watering instructions precisely.
Over-watering or under-watering during curing is the number one reason for failure.

Final Thoughts

Polymeric sand is a simple but powerful component of any paver installation. When installed correctly, it enhances stability, reduces maintenance, and keeps your hardscape looking sharp for years. But mistakes—especially with moisture control and cleanup—can lead to frustrating issues like haze, weed growth, and joint failure.

Follow the link below for more industry insights from across the building products world.

From Farmhouse to Cottage: A Shift Toward Comfort & Character

From Farmhouse to Cottage: A Shift Toward Comfort & Character

Where modern farmhouse design leans on bright whites, straight lines, and rustic-industrial touches, modern cottage style embraces warmth, charm, and a curated mix of textures. The palette softens, welcoming gentle hues like sage, mushroom, and terracotta. Furnishings become more relaxed and inviting. Materials lean natural and earthy—think reclaimed woods, woven fibers, cozy fabrics, warm-toned metals, and most of all, stone and brick.

The result? Spaces that feel nostalgic yet updated, soothing yet expressive—homes that look like they’ve evolved over time rather than being built all at once.

Why the Switch? A Desire for Authentic, Lived-In Spaces

The movement toward modern cottage is rooted in the craving for authenticity and comfort. After years of streamlined interiors, homeowners are embracing spaces that feel:

  • Warm and welcoming
  • Collected rather than curated
  • Imperfect in all the right ways
  • Connected to nature and natural materials

This trend aligns with the rise of cottagecore, biophilic design, and the broader cultural shift toward slower, simpler living. People want their homes to feel like sanctuaries—not showrooms. And few materials ground a space or evoke that connection to nature as effectively as stone and brick.

Stone & Brick: The Timeless Link Between Farmhouse and Cottage Style

Even as design trends shift, stone and brick remain staples because they offer:

1. Authentic Texture

Stone and brick introduce tactile richness that immediately warms up a room. Their natural imperfections tell a story and make a space feel lived-in.

2. Enduring Character

Whether used sparingly or as a focal point, these materials add visual depth that synthetic alternatives can’t replicate.

3. Versatility Across Styles

While modern farmhouse uses stone and brick to create a clean, rustic look, modern cottage leans on them for coziness and old-world charm. Their adaptability makes them ideal for evolving design trends.

4. Long-Term Durability

Beyond beauty, stone and brick last for decades with minimal maintenance—making them as practical as they are stylish.

How Stone & Brick Enhance Today’s Modern Cottage Aesthetic

Whether used indoors or out, these materials elevate modern cottage design in ways other elements simply can’t.

Cozy Fireplaces

Nothing captures cottage charm like a stone-clad fireplace. Rough-cut stone brings rugged warmth, while tumbled or whitewashed brick offers a softer, more subdued look.

Textured Accent Walls

A brick or stone feature wall can transform a simple room into a character-rich retreat—perfect for dining rooms, bathrooms, or entryways.

Timeless Exteriors

Stone foundations, brick façades, and cottage-style chimneys evoke a sense of permanence and storybook appeal that pairs beautifully with today’s trending soft colors and natural landscaping.

Outdoor Living Spaces

From patios and garden walls to outdoor fireplaces, stone and brick help create inviting spaces that blend seamlessly with nature.

Looking for Inspiration? Start Here.

To help spark ideas, we’ve gathered a collection of interior and exterior projects that highlight the shift from modern farmhouse to modern cottage—each showcasing how our stone and brick products can bring that warm, layered, story-rich aesthetic to life.

Explore examples of:

  • Stone-wrapped fireplaces
  • Brick kitchen accent walls
  • Cottage-inspired entryways
  • Stone-clad exteriors and porches
  • Outdoor fireplaces and gathering spaces

Each demonstrates how these classic materials can transform a space, adding warmth, depth, and timeless character.

Rustic stone veneer kitchen with bay leaf accents creating a cozy and elegant interior design. Modern cooking appliances,countertops.

Ready to Embrace the Modern Cottage Movement?

Whether you’re updating a single room or designing a new home from the ground up, now is the perfect time to welcome the warmth, charm, and authenticity of modern cottage style into your space. And with the help of classic materials like stone and brick, achieving that inviting, character-filled look has never been easier.

Follow the link below for more industry insights from across the building products world.

Why Manufactured Stone Veneer is an ideal option for Designing Restaurants

A restaurant’s appeal, and ultimate success, of course begins with the food. But that’s not the only factor that draws patrons in and keeps them coming back—the atmosphere and ambience are nearly as important. Good design creates a vibe that can make people feel welcome and sets the tone for the food and drink they are about to partake in.

Manufactured stone veneer offers a number of advantages that make it a go-to option for the interiors and exteriors of independent eateries and chain restaurants alike.

Advantages of Manufactured Stone Veneer for Restaurants

Architects designing restaurants will find both aesthetic and performance benefits with manufactured stone veneer.

Versatile design options

Because manufactured stone veneer comes in a range of profiles, textures, and colors, it can be used to enhance a variety of exterior and interior styles. Perhaps an organic-feeling rough-cut fieldstone profile in earth tones for a cozy comfort-food establishment, dark brown ledgestones for a steakhouse, dry-stacked white stones for a contemporary kitchen, or wood-look shiplap for a small bakery. The options to set a tone with MSV are endless.

With this versatility, the manufactured stone can be a focal point or a complement. Try accent walls, bar surrounds, fireplace surrounds, or half walls on the interior, and anything from an entryway to a full façade on the exterior.

Replicability

Though manufactured stone is molded from and accurately mimics natural materials, it avoids many of the geographic limitations that natural stone can have. Because it’s manufactured, MSV profiles can be made far from where the natural equivalent would need to be quarried.

This also means that profiles and stones are typically consistent and readily available, so they can be specified as part of a restaurant company’s brand palette, ensuring buildings are easily recognizable as part of the chain and bringing familiarity to patrons. In addition, this detail makes it easier to replace a stone in the rare event it is damaged.

Durable performance

Manufactured stone can be used in both interior and exterior applications, able to withstand high traffic areas as well as weather. Depending on the product, MSV often carries high fire and wind resistance.

Easy to maintain

Cleanliness is a top priority for restaurants, and manufactured stone is simple to maintain. On the interior, dusting and an occasional wipe-down with water will keep it looking new. On the exterior, debris and light dirt can be rinsed with water. If a deeper clean is required, it usually just needs a soft brush and a bio-safe cleaner recommended by the manufacturer.

Restaurant Projects Using Manufactured Stone Veneer

Thinking about manufactured stone for your next restaurant project? Here are a few examples to help you get inspired:

The exterior of this Wedny’s restaurant is easily recognizable and replicable. It features Chardonnay Country Ledgestone from Cultured Stone. The MSV has a rustic, striated surface and angle-cut edges.

With rustic charm and a warm color palette, Bucks County Southern Ledgestone from Cultured Stone offers a welcoming appeal for this Midwest restaurant.

Texas Stone Designs’ Ciloso Luxbrick, installed in a traditional pattern and a chevron pattern, has an aged look that brings the wall of this restaurant to beautiful life.

For Petro’s restaurant, the design team specified Horizon Stone’s Handcrafted manufactured stone in Smoky Mountain, which combines rugged symmetry with precise lines for an ageless appeal.

An aesthetic familiar to many, the exterior of this Starbucks franchise features Prestige Stone Products’ Weatherledge profile in Harvest.

Want to learn more about the possibilities of manufactured stone veneer? Visit our MSV page here.

Follow the link below for more industry insights from across the building products world.

How Grout Installation Styles Transform the Look of Stone Veneer

How Grout Installation Styles Transform the Look of Stone Veneer

When it comes to designing with stone veneer, most of the attention goes to the stone color, shape, and texture—but there’s another design element that can dramatically change the final look: the grout installation style. The way mortar is applied between your stones can shift the entire aesthetic of a wall from sleek and modern to rustic and old-world.

There are three main types of grout installations used in stone veneer projects: Tight Joint (Dry Stack), Standard (Raked Joint), and Over-Grout (Full Joint). Each creates a distinct appearance and adds its own personality to the design.

1.Tight Joint (Dry Stack) – Clean, Modern, and Minimalist

If your goal is a sleek, contemporary look, a tight joint or dry stack installation is the way to go. In this method, stones are set very close together—sometimes touching—with little to no visible mortar. The gaps are minimal, and the emphasis is entirely on the texture and profile of the stone itself.

This style works beautifully with sawn-edge or panelized veneer systems and pairs well with modern architecture, clean lines, and minimalist design palettes. The end result feels refined and architectural—perfect for fireplaces, feature walls, or exterior facades where you want the stone to stand out on its own.

Aesthetic impact:

  • Ideal for modern or transitional designs
  • Sleek and linear
  • Highlights stone shapes and color variation
Toro Stone™ Bighorn / Mountain Ledgestone

2. Standard (Raked Joint) – Balanced and Traditional

A standard joint, sometimes called a raked joint, is the classic look most people associate with traditional masonry. Here, stones are spaced slightly apart—typically about ⅜ to ½ inch—and the grout is applied between them, then raked back slightly from the stone face.

This technique creates a subtle shadow line that defines each individual stone, giving the wall a sense of structure and rhythm. It’s a versatile style that complements both natural and manufactured stone veneer, and it’s equally at home on the exterior of a Craftsman-style house or the fireplace of a traditional living room.

Aesthetic impact:

  • Perfect for traditional, transitional, or balanced designs.
  • Clean and timeless
  • Emphasizes both the stone and the craftsmanship
Toro Stone™ Alaskan / Mountain Ledgestone

3. Over-Grout (Full Joint) – Rustic and Old-World

For a rustic, hand-crafted look, the over-grout (or full joint) method is a favorite. In this approach, mortar is applied generously between the stones—often spilling slightly over their edges. The grout may be tooled smooth, brushed, or left irregular depending on the desired finish.

This technique creates a sense of age and authenticity, mimicking the appearance of old European farmhouses, Tuscan villas, or historic cottages. It’s especially striking when paired with irregular or rough-faced stone veneer, creating a warm, textured, and time-worn character.

Aesthetic impact:

  • Best for farmhouse, lodge, or Mediterranean styles
  • Hearty and rustic
  • Adds depth and visual weight
Toro Stone™ Blanc / Reclaimed Brick

Choosing the Right Grout Style for Your Design

The grout style you choose is more than a technical decision—it’s a design choice that shapes the entire feel of your project.

  • Go tight joint for modern simplicity and strong lines.
  • Choose a standard joint for a clean, timeless balance.
  • Opt for an over-grout if you love rustic charm and old-world texture.

Whether you’re designing an outdoor feature wall, a cozy fireplace surround, or a full exterior facade, the grout installation style helps tell your story through stone.

Follow the link below for more industry insights from across the building products world.

Luxury That Lasts: Adding Value to Your Home with Natural Stone Veneer

Luxury That Lasts: Adding Value to Your Home with Natural Stone Veneer

When it comes to upgrading a home, few materials offer the elegance, durability, and financial return of natural stone veneer. Homeowners love it for the curb appeal and long-lasting beauty, while installers appreciate how products like Pangaea® Natural Stone streamline their workflow and reduce jobsite headaches.

From increasing resale value to improving installation efficiency, natural stone veneer offers an impressive return on investment (ROI) across the board.

Lasting Value for Homeowners

Natural stone veneer provides homeowners with a unique combination of timeless beauty and unmatched durability. Unlike manufactured products that can fade or crack, natural stone’s authentic color and texture remain stunning for decades with minimal maintenance.

Whether it’s used for a fireplace, accent wall, or exterior façade, natural stone veneer instantly enhances curb appeal, which translates into higher resale value. According to the Remodeling Cost vs. Value Report, stone veneer remains one of the top home upgrades for ROI, often recouping a large portion of the project cost at resale.

Time and Cost Savings for Installers

While homeowners see natural stone as an investment in their property, installers see it as an investment in their business efficiency. Pangaea® Natural Stone has been engineered with contractors in mind, offering features that make projects faster, easier, and more profitable.

  • Pre-Cut and Pre-Sorted Packaging: Stones are organized by size and shape, reducing sorting time on the jobsite.
  • Consistent Thickness: Uniform sizing makes installation smoother and more efficient, minimizing tricky cuts.
  • Reduced Waste: With less trimming required, installers save on both labor time and material waste.
  • Fewer Callbacks: High-quality stone means fewer issues after installation, saving money and protecting reputation.

Every minute saved on a job translates into more projects completed per year—an immediate ROI for the installer’s business.

Sustainability and Long-Term Performance

Both homeowners and installers benefit from natural stone’s low-maintenance longevity. Once installed, it doesn’t require costly upkeep or replacements, which reduces long-term expenses for the homeowner while also limiting warranty calls for the installer.

Additionally, Pangaea® Natural Stone is responsibly quarried, providing a sustainable choice that appeals to today’s eco-conscious buyers and builders.

Design Flexibility for Every Project

Homeowners appreciate the wide range of colors, cuts, and textures that allow natural stone veneer to fit any architectural style. Installers benefit from this same versatility—it means they can confidently recommend solutions for modern, rustic, or traditional designs, knowing they’ll have the right fit for any project.

Pangaea® Natural Stone: Lancaster / Atlas Strip

The ROI of Natural Stone Veneer: Homeowners and Installers Win

Natural stone veneer offers a rare dual ROI:

For Homeowners:

  • Higher property resale value
  • Timeless curb appeal and interior beauty
  • Energy efficiency and low maintenance
  • Long-lasting durability

For Installers:

  • Faster installations and reduced labor costs
  • Less material waste
  • Improved client satisfaction and fewer callbacks
  • More profitable project turnaround
Pangaea® Natural Stone: Lancaster / Ledgestone

Elevate Your Home—or Your Business—with Pangaea Natural Stone

Investing in Pangaea® Natural Stone veneer means homeowners get the luxury and durability of real stone, while installers gain efficiency and profitability with every project. It’s a win-win material that doesn’t just look good—it works smarter.

Luxury that lasts. Value that grows. Efficiency that pays. That’s the power of Pangaea® Natural Stone.

Pangaea® Natural Stone: Cambrian / Fieldstone

Follow the link below for more industry insights from across the building products world.

Seamless Living: Using Natural Stone to Blend Indoor and Outdoor Spaces

Seamless Living: Using Natural Stone to Blend Indoor and Outdoor Spaces

One of the most exciting trends in modern home design is the blurring of boundaries between indoor and outdoor living spaces. Homeowners are embracing designs that extend comfort and style beyond the walls of their homes, creating fluid environments that connect kitchens, living rooms, patios, and outdoor kitchens.

Few materials achieve this seamless transition as effectively as natural stone veneer. With its variety of colors, textures, and profiles, natural stone ties together indoor elegance and outdoor durability. And with Pangaea® Natural Stone, designers and homeowners alike have access to an array of versatile options that make this design approach both beautiful and practical.

The Power of Color Continuity

Color is one of the strongest tools for creating cohesion. By carrying a consistent stone color from an indoor feature to an outdoor element, you create a visual thread that unites the spaces.

  • Warm earth tones can connect a cozy indoor fireplace with a rustic outdoor fire pit.
  • Cool grays and charcoals complement modern interiors and flow effortlessly into sleek outdoor patios.
  • Neutral creams and buffs bring brightness inside while reflecting natural light outdoors.

Pangaea® Natural Stone offers a wide palette—from rich browns and golds to clean whites and modern grays—making it easy to select tones that create a unified, continuous feel.

Profiles that Bridge the Gap

Beyond color, the profile and texture of the stone influence how spaces feel.

  • Ledgestone profiles bring a clean, linear look that suits modern interiors and outdoor kitchens.
  • Fieldstone profiles add natural, organic texture, perfect for creating cozy transitions into gardens or rustic patios.
  • Castle Rock or Ashlar profiles create a bold, architectural feel that works well for both grand foyers and statement-making outdoor facades.

With Pangaea® Natural Stone, homeowners can mix and match profiles strategically—using one indoors and a complementary one outdoors—to create continuity while still giving each space its own personality.

Durability Indoors and Out

One of the greatest advantages of using natural stone for seamless transitions is its versatility and durability. The same stone veneer that enhances your interior walls or fireplace is engineered to withstand the elements outside, ensuring long-lasting beauty and performance in both environments.

This durability means your design choices aren’t limited—you can confidently carry stone from your living room into your outdoor kitchen or from your entryway out to a patio, knowing the material will perform in both spaces.

Creating Lifestyle Value

Designing seamless indoor-outdoor transitions isn’t just about style—it’s about lifestyle. Homes that flow effortlessly into outdoor living areas feel larger, more open, and more connected to nature. For homeowners, this means:

Increased functionality, with outdoor kitchens, fireplaces, and entertainment areas serving as true extensions of the home

Enhanced everyday enjoyment of both indoor and outdoor spaces

Stronger curb appeal and resale value due to high-end, cohesive design

Pangaea® Natural Stone: Sierra Ridge / Roman Castlestone

Pangaea® Natural Stone: The Perfect Choice for Transitional Design

With its wide range of colors, textures, and profilesPangaea Natural Stone is uniquely suited for projects that demand seamless transitions. Whether you want a modern, linear look that flows from a living room feature wall to a poolside bar, or a rustic stone that ties together a kitchen hearth and a backyard fireplace, Pangaea has a solution that balances beauty, durability, and ease of installation.

Pangaea® Natural Stone: Copper Canyon / Ledgestone

Bring the Indoors Out—and the Outdoors In

The best homes don’t just keep you inside—they invite you to live seamlessly between indoors and outdoors. By choosing natural stone veneer, and especially Pangaea® Natural Stone, you create a unified design that looks stunning and performs beautifully across all spaces.

One color palette. One design language. One home. Seamlessly connected with Pangaea® Natural Stone.

Follow the link below for more industry insights from across the building products world.

Granite vs. Sandstone: History, Differences, and Regional Uses in Natural Stone Paving

Granite vs. Sandstone: History, Differences, and Regional Uses in Natural Stone Paving

When it comes to natural stone paving, granite and sandstone are two of the most sought-after materials in landscaping, architecture, and urban design. Both have been used for centuries, yet their origins, physical properties, and ideal applications differ in fascinating ways. Whether you’re a landscape architect, contractor, or homeowner, understanding these differences can help you choose the right stone for your project — and appreciate the history beneath your feet.

A Brief History of Granite and Sandstone in Construction

Granite has a long-standing reputation as a symbol of strength and permanence. Ancient Egyptians used granite in the construction of obelisks and monuments like the pyramids’ inner chambers, thanks to its incredible hardness and resistance to weathering. In Europe, granite became a favored choice for bridges, cathedrals, and city streets — many of which still stand today. Its crystalline composition and variety of colors have made it a decorative and structural mainstay across civilizations.

Sandstone, by contrast, tells a different historical story. Softer and easier to carve, sandstone has been used since prehistoric times for both functional and artistic purposes. Ancient temples in India, such as the Sun Temple in Konark, and iconic structures like the Red Fort in Delhi, are made from richly colored sandstone. In Europe and the Middle East, sandstone was a primary building material for towns and fortresses due to its abundance and workability.

Key Differences Between Granite and Sandstone

From a geological perspective, granite and sandstone differ in composition, durability, and appearance, all of which affect their performance in paving applications.

FeatureGraniteSandstone
CompositionIgneous rock composed mainly of quartz, feldspar, and mica.Sedimentary rock formed from compacted sand and mineral particles.
DurabilityExtremely hard, resistant to scratching, cracking, and weathering.Softer, more porous, can weather faster but easy to shape and work with.
Color RangeTypically grey, pink, black, white, and speckled.Warm earth tones — red, brown, tan, gold, and cream.
TextureFine to coarse grain, often polished or flamed for slip resistance.Gritty, natural matte finish with visible layers and grains.
MaintenanceLow maintenance; resists staining with proper sealing.Requires more frequent sealing; more prone to moss or algae in damp climates.

Regional Uses of Granite and Sandstone in Paving

Different regions around the world favor granite or sandstone based on climate, tradition, and local availability.

Granite in Cold and Wet Climates

In countries like Scotland, Norway, and parts of Canada, granite is the go-to choice for streets, walkways, and memorials. Its low water absorption and freeze-thaw resistance make it ideal for places with harsh winters. Granite cobblestones in European city centers have endured for centuries with minimal wear.

Sandstone in Warm, Dry Climates

Regions like Rajasthan in India and parts of Australia prefer sandstone for patios, courtyards, and garden paths. The warm hues reflect sunlight beautifully, creating an inviting aesthetic. Sandstone’s porous nature helps keep surfaces cooler underfoot in hot climates, making it a favorite in desert architecture.

Mixed Use in Transitional Climates

In places like the American Midwest and Southern Europe, both granite and sandstone are used — granite for high-traffic public spaces and sandstone for decorative residential landscapes. This blend offers both durability and design flexibility.

Choosing the Right Stone for Your Project

When deciding between granite paving and sandstone paving, consider the following factors:

Maintenance Preference: Sandstone needs more upkeep, granite is more hands-off.

Climate: Granite for freeze-thaw cycles; sandstone for sun-drenched, arid regions.

Design Goals: Granite’s polished elegance vs. sandstone’s rustic warmth.

Traffic Load: Heavy foot or vehicle traffic favors granite.

The Timeless Appeal of Both Stones

While granite may win in raw strength and weather resistance, sandstone holds its own with unparalleled natural warmth and historic charm. Both have stood the test of time, not just as paving materials, but as part of our cultural heritage. Choosing between them isn’t about picking the “better” stone — it’s about selecting the stone that tells the right story for your space.

Follow the link below for more industry insights from across the building products world.

Moisture Management for Natural Stone Pavers: What You Need To Know

Moisture Management for Natural Stone Pavers: What You Need To Know

For natural stone pavers, moisture is both a friend and a foe. On one hand, rain, dew, and water features can bring out the beautiful colors and textures of stone. On the other, poor moisture management can lead to staining, surface degradation, and even structural damage over time. Whether you’re working with granite, sandstone, limestone, or travertine, understanding how water interacts with your stone is key to keeping it looking great and performing well for decades.

Why Moisture Management Matters in Natural Stone

Natural stone is inherently porous to varying degrees. This means water — along with dissolved minerals, salts, and organic matter — can penetrate the surface. Without proper planning and maintenance, this can lead to:

Biological Growth: Algae, moss, and lichens thrive in damp conditions, making surfaces slippery and unsightly.

Staining: Minerals and dirt in water can leave behind discoloration.

Freeze-Thaw Damage: In colder climates, water trapped inside stone expands when frozen, causing cracks.

Efflorescence: White, powdery salt deposits can appear on the surface as moisture evaporates.

Understanding the Porosity of Different Stones

Not all natural stone pavers absorb water at the same rate.

Stone TypePorosityMoisture Sensitivity
GraniteLowHighly resistant, minimal sealing needed.
SandstoneMedium-HighMore prone to staining and algae growth.
LimestoneMediumVulnerable to acidic rainwater and freeze-thaw cycles.
TravertineMedium-HighNatural holes can trap water without proper filling and sealing.

Knowing your stone’s porosity helps determine the level of moisture control needed.

Key Considerations for Moisture Management

1. Proper Site Drainage

Before the first paver is laid, ensure the base and surrounding area are designed to shed water effectively. This includes:

  • Installing a graded slope away from structures.
  • Using permeable bedding materials like open-graded aggregate.
  • Avoiding depressions where water can pool.

2. Sealing the Stone

A high-quality breathable sealer helps prevent water penetration while allowing moisture vapor to escape. Non-breathable sealers can trap water and cause more harm than good. The right sealer depends on the stone type and intended use.

3. Joint Filling and Edge Restraints

Using polymeric sand or mortar in joints can reduce water infiltration between pavers. In freeze-prone areas, flexible jointing compounds are better at accommodating expansion and contraction.

4. Managing Water Features

If stone pavers are used near pools, fountains, or ponds, choose low-absorption stones and seal regularly to prevent chlorine, saltwater, or algae damage.

5. Routine Maintenance

Regular cleaning removes organic debris that traps moisture. Power washing should be done carefully to avoid forcing water deeper into the stone.

Regional Factors That Affect Moisture Management

Coastal Regions: Saltwater can penetrate and crystallize inside the stone, causing spalling; select stones with very low porosity.

Cold Climates: Freeze-thaw resistance is critical; granite or dense limestone is often preferred.

Tropical Climates: High rainfall and humidity demand aggressive algae control and frequent sealing.

Long-Term Benefits of Proper Moisture Control

By prioritizing moisture management, you improve safety by minimizing slippery surfaces, extend the life of your pavers, maintain their color and surface finish, and reduce the need for costly repairs.

A polished stone walkway reflects light beautifully, showcasing smooth surface with modern design. natural stone tiles create elegant and inviting atmosphere

Final Word

Natural stone pavers are an investment in both beauty and durability. With the right approach to moisture management — from thoughtful installation to ongoing care — you can ensure your patio, walkway, or driveway remains as stunning and functional as the day it was built.

Follow the link below for more industry insights from across the building products world.

The Return of Linear Brick: Bridging Modern Design with Italian Old World Charm

The Return of Linear Brick: Bridging Modern Design with Italian Old World Charm

In modern architecture and design, few materials manage to blend timeless appeal with sleek innovation quite like linear brick. Also known as long-format brick, this elongated brick style is reshaping how we approach both interior and exterior design. Surprisingly, its roots trace back to the Old World architecture of Italy, where brick has long been celebrated for its warmth, strength, and charm.

What Is Linear Brick?

Linear brick (or long brick) is a slender, horizontally-stretched variation of the traditional brick. Often measuring 18–24 inches in length and only 2 inches in height, this format introduces sleek lines and a minimalistic rhythm to walls, both inside and out.

Toro Stone ® Bianco / Linear Brick

Linear Brick in Modern Building Design

Exterior Applications

Used in facades, entryways, and garden walls, linear brick exteriors provide a visually expansive effect. The long horizontal lines subtly guide the eye across the structure, reinforcing a clean, modern aesthetic.

Interior Design Uses

From fireplace surrounds to feature walls and kitchen backsplashes, long bricks bring warmth and texture indoors while maintaining simplicity. Their slender profile is ideal for modern, minimalist interiors.

Linear Brick vs. Old World Italian Brickwork

In Italy, brick construction dates back centuries, particularly in regions like Tuscany and Umbria. These bricks were typically handmade and baked in small batches, resulting in charming imperfections and regional color variation.

Key Characteristics of Old World Italian Brick:

  • Smaller, irregular dimensions
  • Laid in decorative patterns such as herringbone or running bond
  • Combined with stone or terracotta in arches and facades
  • Used extensively in load-bearing walls, churches, and rural homes

Bridging the Old and the New

Today’s architects are blending the historic charm of Italian masonry with the precision of modern linear brick. By combining traditional textures with long-format layouts, designers are achieving an aesthetic that feels both rooted and refined.

Popular Combinations:

  • Linear brick + natural stone
  • Linear brick + wood paneling
  • Long brick + industrial steel elements

Why Linear Brick Is Gaining Popularity

Architects and designers are embracing linear brick for its:

  • Modern look with timeless appeal
  • Durability and low maintenance
  • Versatile use indoors and outdoors
  • Sustainability and energy efficiency

Whether you’re creating a high-end commercial facade or a warm, modern home interior, linear brick offers a perfect union of old and new—bridging centuries of design innovation.

Conclusion

From the rustic villas of Tuscany to the clean lines of modern architecture, brick continues to inspire. With the rising popularity of linear brick, we see a beautiful evolution that honors tradition while embracing innovation. For builders, designers, and homeowners alike, long-format brick is a smart, stylish, and enduring choice.

Follow the link below for more industry insights from across the building products world.