From both an aesthetic and performance standpoint, manufactured stone offers a range of opportunity for both residential and commercial architects. Manufactured stone veneer’s versatility ensures flexibility and freedom in design alongside long-term durability for the client.
How Manufactured Stone Veneer Benefits Architects
Among manufactured stone’s advantages are a handful that ensure architectural freedom.
• Authenticity without limitations: Manufactured stone veneer offers the look of natural stone but without some of the drawbacks that might hinder design freedom. MSV masters are made using natural stone, and new technologies allow for replication of fine details. At the same time, MSV is lighter in weight, isn’t limited by locality, and typically costs less than natural stone.
• Diversity of styles and colors: Because it’s manmade, the options for profiles, textures, and colors of manufactured stone are vast. Exotic or unique looks are not limited to far-flung locales, so nearly any aesthetic vision is possible. At the same time, MSV doesn’t have to be purely natural in feel—it is also available in many modern, contemporary profiles and monochromatic color schemes.
• Consistency: The look and availability of natural stone cannot be controlled, which means there can be no promise of consistency or availability. With manufactured stone, on the other hand, repairs, replacements, or additions can typically be made possible because the materials do not rely on nature’s availability. This also means less culling and sorting to find flaw-free looks that coordinate on the wall.
• Application versatility: Because manufactured stone veneer is lighter in weight than natural stone, it can be used in a broader array of applications that stone or brick may be too heavy for. It’s also suitable for horizontal and vertical applications as well as for interior and exterior projects.
What Should Architects Keep in Mind When Specifying Manufactured Stone Veneer?
Manufactured stone veneer’s makeup and application mean there are a few factors that architects should consider in plans and specifications.
• Weatherization: As outlined in CMHA’s Manufactured Stone Veneer Installation Guide, rainscreens that create a capillary break/air space between the cladding and the water resistive barrier can be effectively incorporated into adhered manufactured stone veneer applications. Some local codes require the use of a rainscreen. Refer to the manufacturer’s recommendation for rainscreen/drainage system applications, and drainage space size requirements may vary from jurisdiction to jurisdiction.
• Wall ties and footings: Because it’s lighter in weight than natural stone, MSV typically doesn’t require wall ties and footings. Manufactured stone also requires fewer structural modifications for remodeling applications.
• Height considerations: Depending on the structural material, installation heights may be limited for some manufactured stone. ‘Check with the manufacturer and local building code requirements for more information.
• Fireplace applications: Most manufactured stone veneer can be used for fireplace surrounds, but consideration should be given for avoiding exposure to direct flame. For instance, MSV should not be used as returns into a firebox of a fireplace.
More Resources for Architects
Ready to learn more about designing with manufactured stone veneer? Check out CMHA’s full library of resources, continuing education courses, and online learning opportunities.
How to Match Natural Stone Veneer Profiles to Your Project
When it comes to designing a building or outdoor space, natural stone veneer is a stunning and durable material choice. Its ability to add texture, color, and timeless elegance makes it a favorite among designers, architects, and homeowners. However, selecting the right stone veneer can be a bit overwhelming. Each profile has unique characteristics that lend themselves to different architectural styles and applications.
Castlestone: Classic Elegance with a Modern Touch
Castlestone offers a classic, refined aesthetic. It features stones that are typically rectangular or square with slightly rough edges, creating a uniform yet rustic look. This profile is commonly used in traditional and contemporary designs alike, offering both rustic appeal and modern clean lines.
Best for:
Traditional homes or commercial buildings: The elegant yet natural feel of Castlestone complements a variety of traditional and colonial-style structures, as well as modern homes that want to evoke a sense of old-world charm.
Fireplaces and accent walls: Its well-defined, uniform shape makes Castlestone an ideal choice for accent walls, interior facades, and fireplace surrounds.
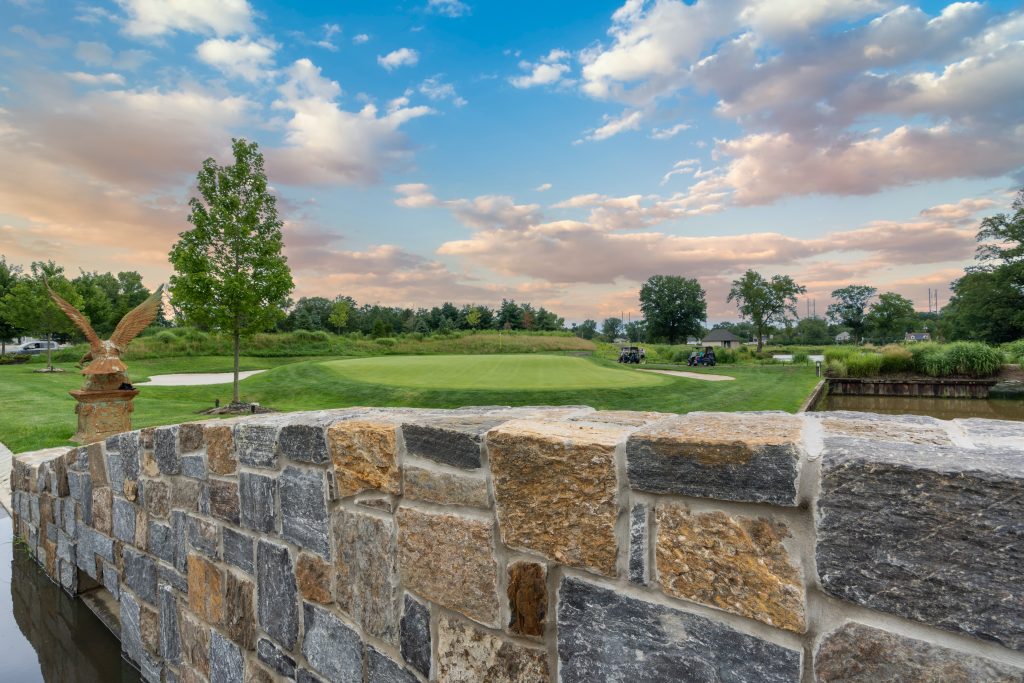
Outdoor living spaces: For patios, outdoor kitchens, and retaining walls, Castlestone can provide a solid, structured feel while blending seamlessly into natural landscapes.
Matching Tips:
The strong, geometric shapes in Castlestone can work well with minimalist or modern designs, adding warmth and texture without overwhelming the space. Castlestone works well with neutral color schemes. For example, pair it with lighter tones like white, beige, or gray for a soft, sophisticated vibe.
Pangaea® Natural Stone: Black Rundle / Castlestone
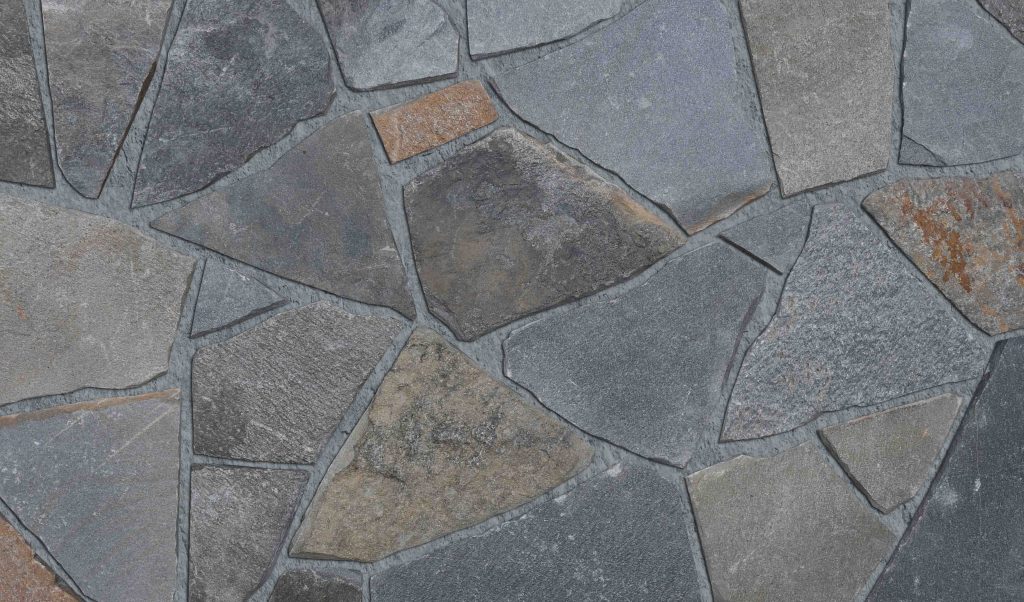
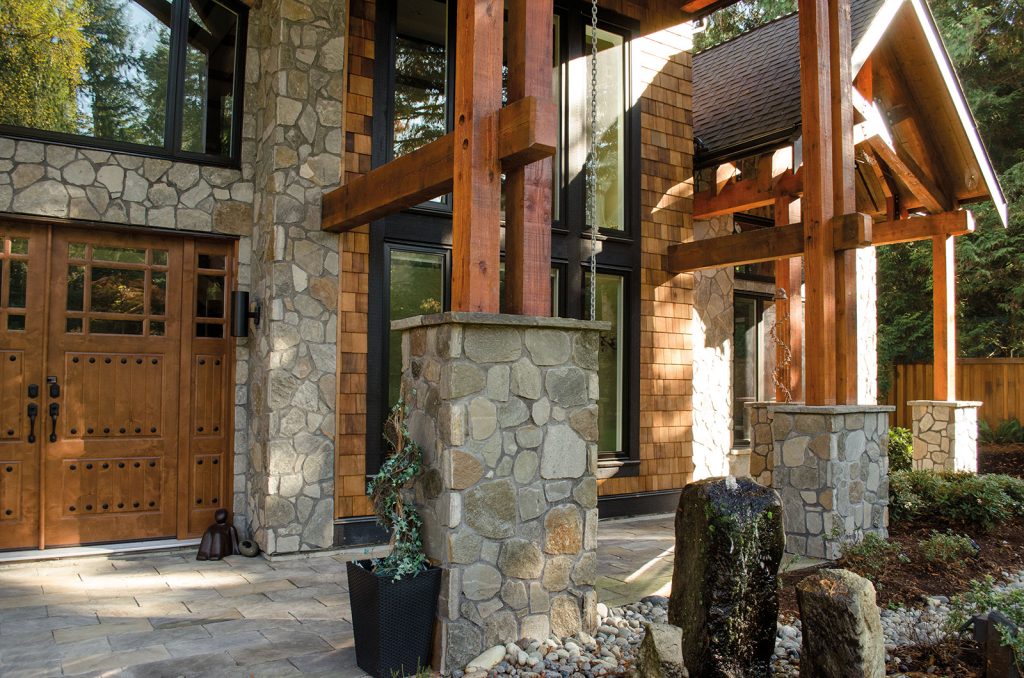
Fieldstone: A Rustic, Organic Charm
Fieldstone is known for its irregular shapes and sizes, creating a more natural and rugged look. This stone profile often features stones with natural edges, giving the impression of being hand-picked from the fields or the earth itself. The result is a weathered, earthy aesthetic that feels both timeless and authentic.
Best for:
Rustic and country-style homes: If you’re aiming for a cottage, farmhouse, or rustic cabin aesthetic, Fieldstone’s irregular, earthy appearance brings a lot of charm and character.
Garden walls, walkways, and landscapes: Due to its random sizes and shapes, Fieldstone is great for creating natural-looking outdoor elements, such as garden walls, borders, or even low retaining walls.
Fireplaces and chimneys: This profile adds a touch of ruggedness to indoor features like fireplaces and chimneys, particularly in rustic, lodge-inspired spaces.
Matching Tips:
Since it’s more irregular and textured than other profiles, Fieldstone is best suited for spaces where a natural, hand-crafted look is desired. Pair Fieldstone with warm, earthy tones like browns, tans, and dark greens to complement its organic feel.
Pangaea® Natural Stone: Sierra Ridge / Fieldstone
Ledgestone: Sleek, Vertical Appeal
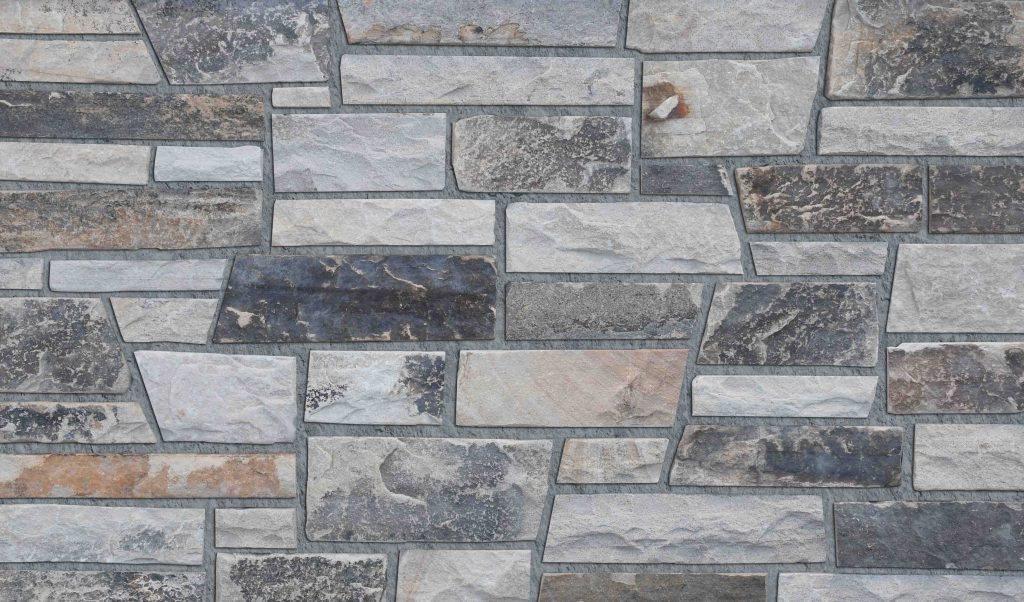
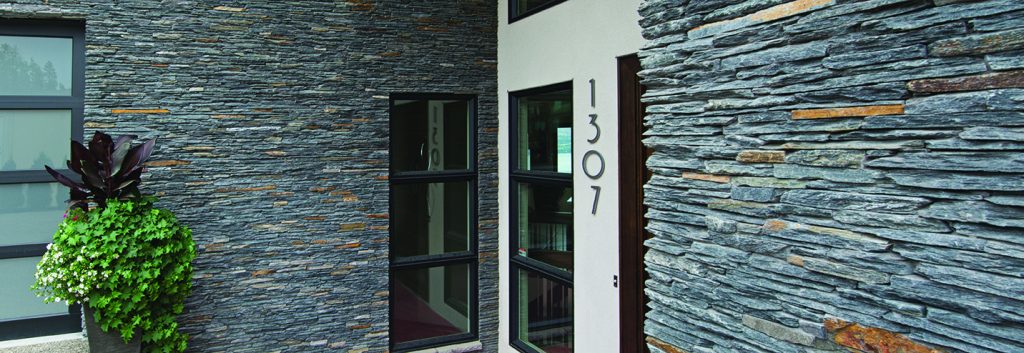
Ledgestone features long, rectangular stones stacked in a horizontal, layered fashion. These stones tend to have sharp, clean edges, which makes them visually striking. Ledgestone offers a more refined, vertical appearance and tends to be more linear than other profiles, which makes it a great choice for sleek and modern designs.
Best for:
Modern and contemporary architecture: Ledgestone’s sleek, vertical stacking is a perfect fit for modern homes and commercial buildings that emphasize clean lines and contemporary aesthetics.
Feature walls and accent walls: Ledgestone is often used for interior feature walls or exteriors where vertical height is emphasized. It can also work well in tall, vertical spaces like chimneys and columns.
Landscaping and outdoor spaces: When creating modern outdoor spaces, Ledgestone is an excellent choice for retaining walls, privacy screens, or outdoor living areas that require a high-end, structured look.
Matching Tips:
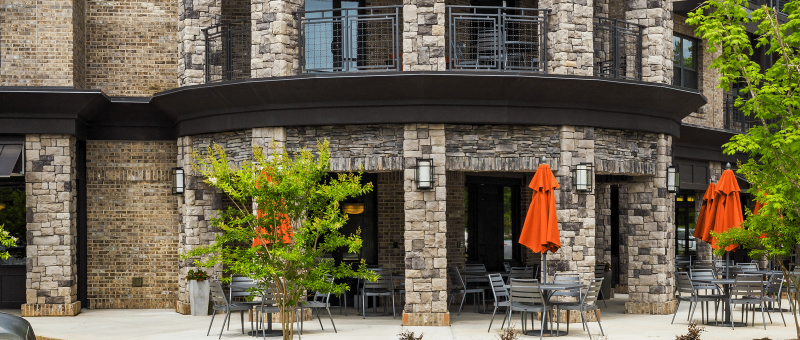
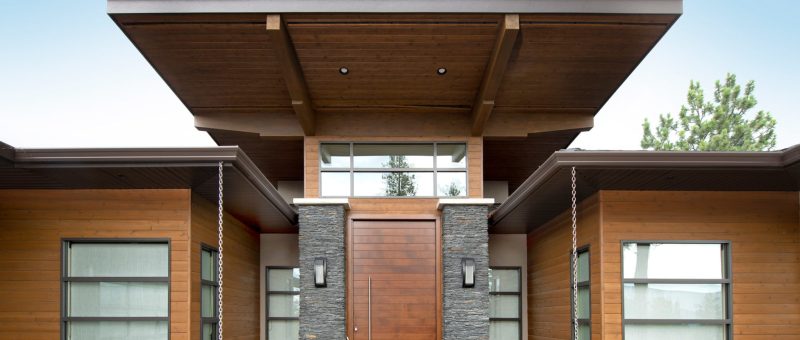
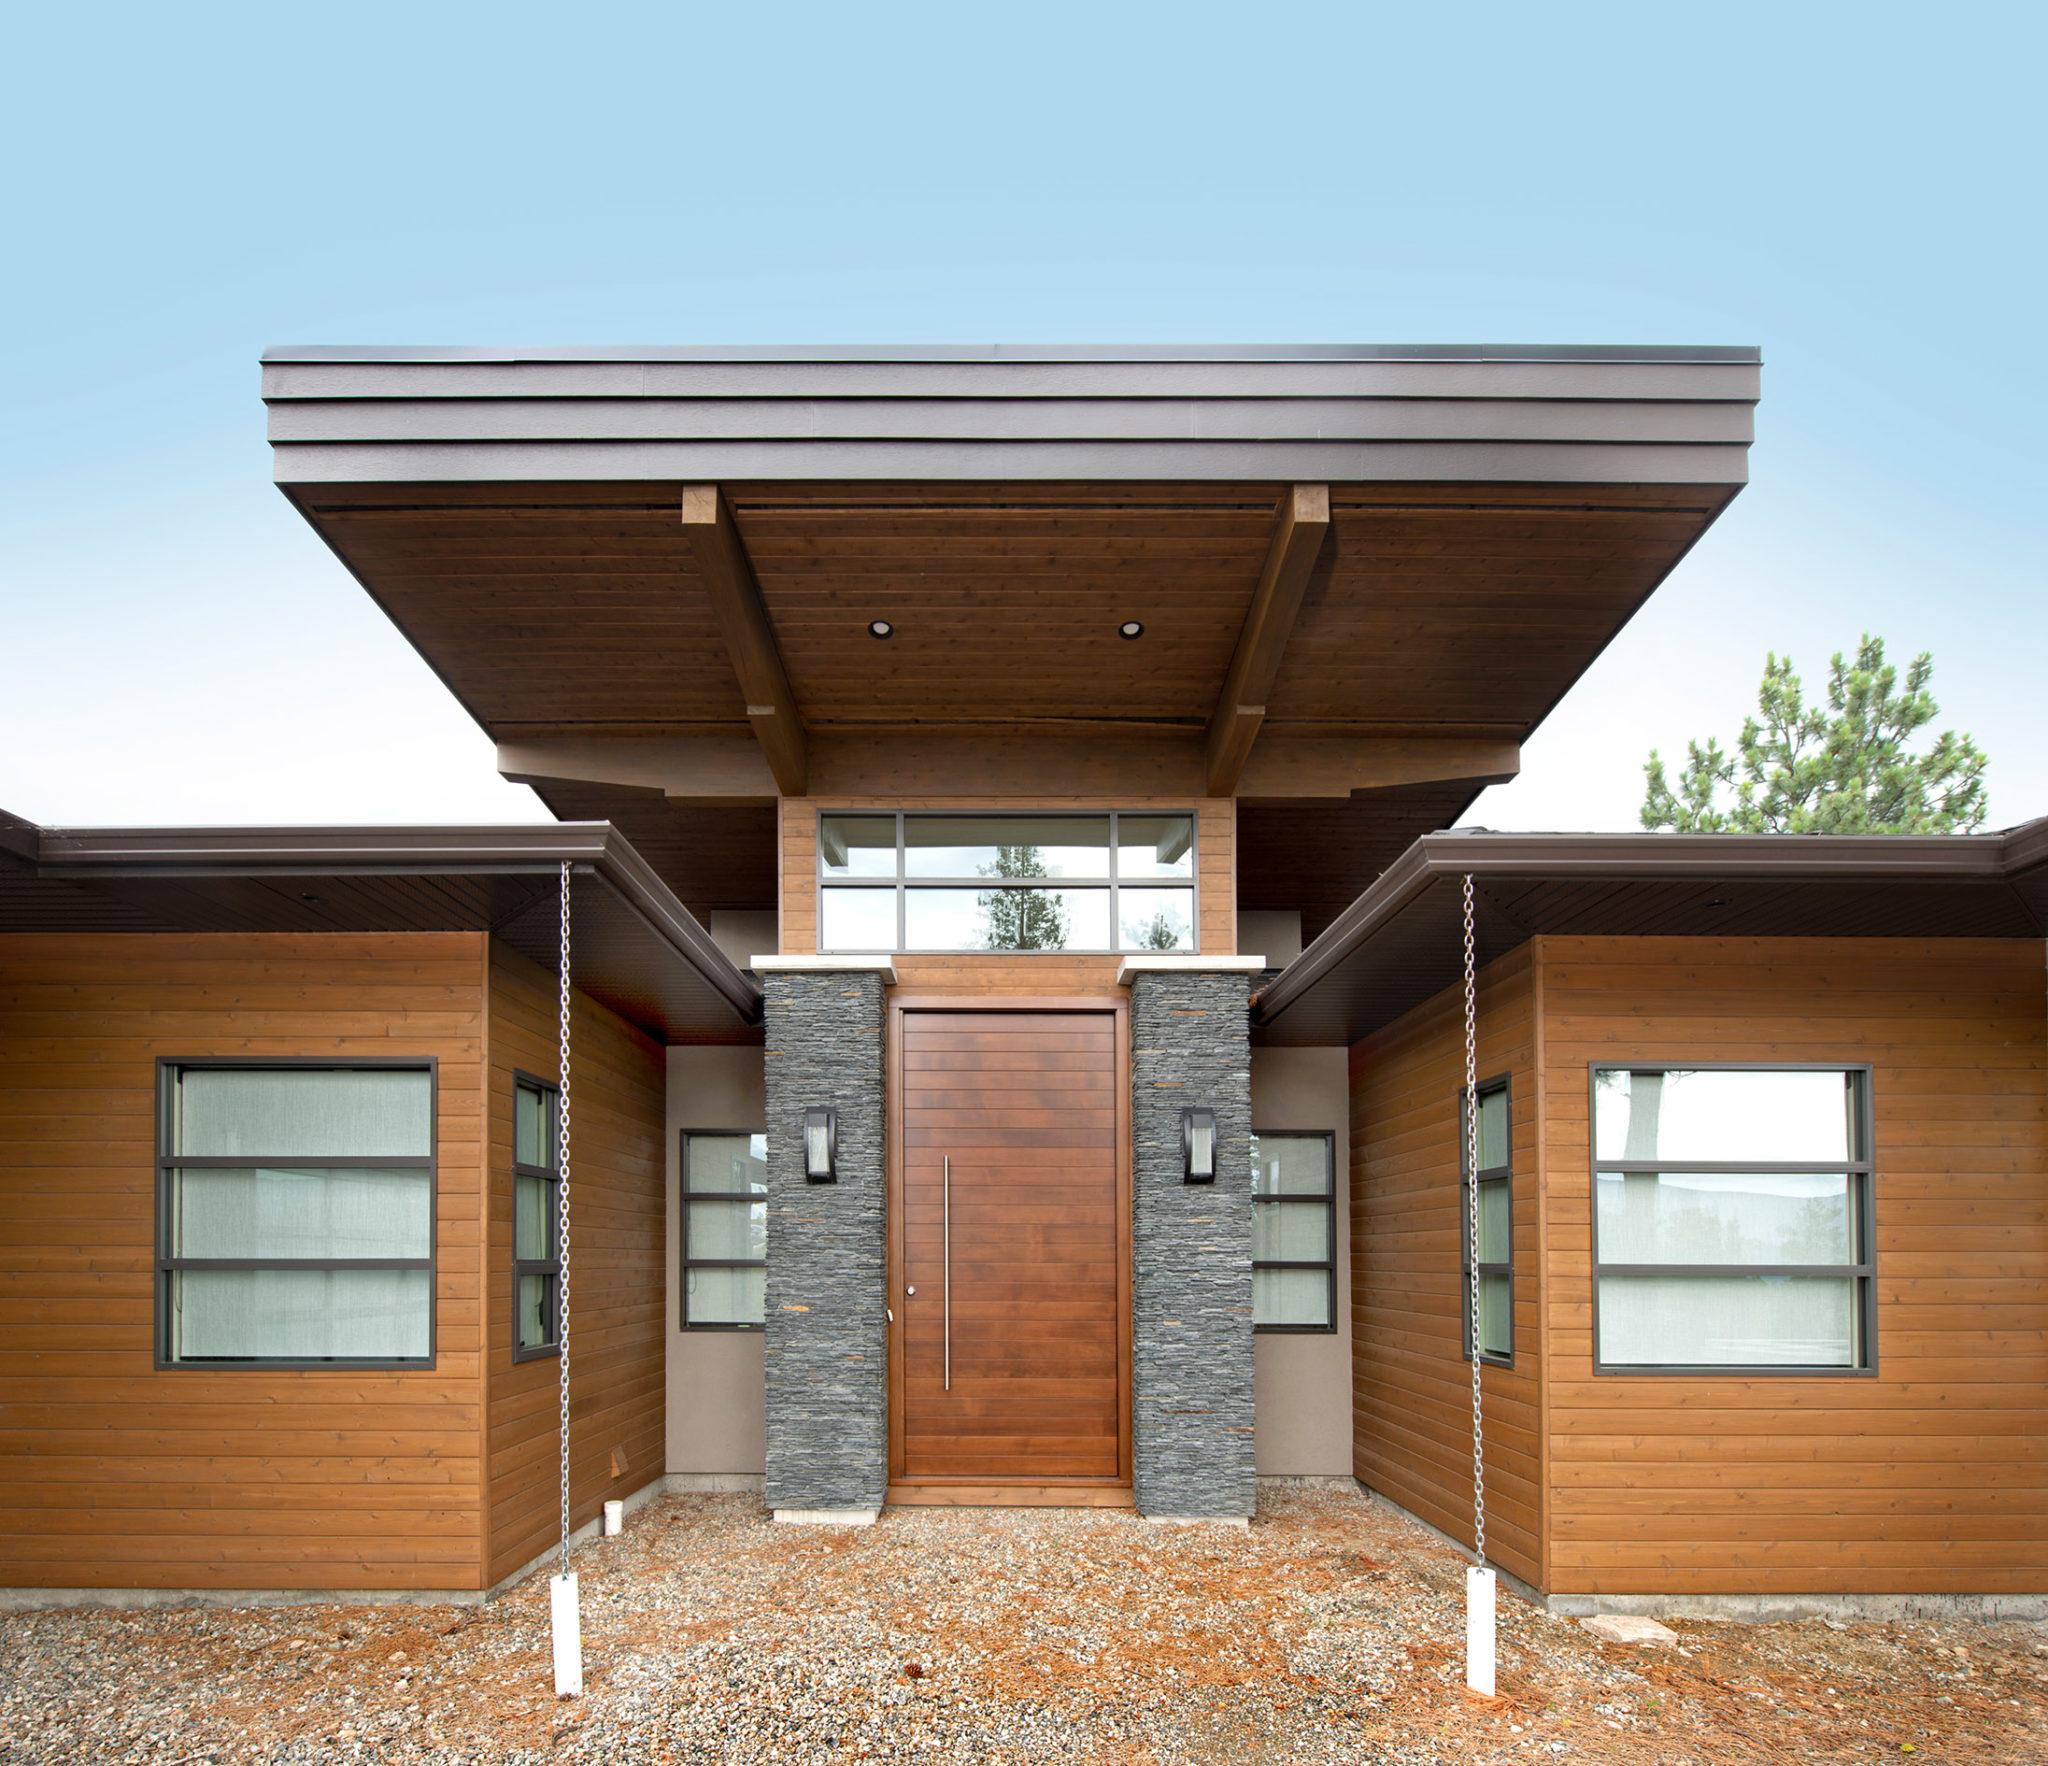
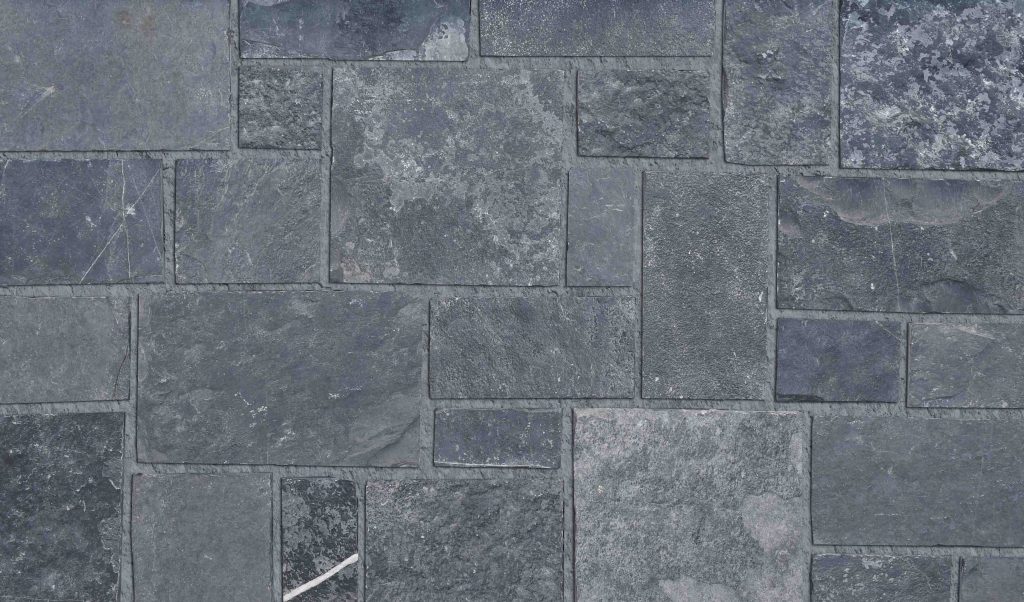
If you’re looking to create an urban or industrial feel, Ledgestone’s sharp edges and verticality will complement the aesthetic beautifully. Pair Ledgestone with neutral and monochromatic color palettes (grays, whites, blacks) to enhance its modern vibe.
Pangaea® Natural Stone: Grigio / Ledgestone
Quarry Ledgestone: A Nod to Industrial Elegance
Quarry Ledgestone has a more rugged, industrial look than regular Ledgestone. The stones often feature more pronounced textures and rougher edges, giving the veneer a sense of being quarried directly from the earth. Its irregular shapes and more pronounced vertical stacking offer a distinctive, high-contrast look.
Best for:
Industrial and modern urban spaces: Quarry Ledgestone’s rougher texture and irregularity make it perfect for loft-style homes, commercial buildings, and modern spaces that feature an industrial design.
High-impact feature walls and facades: Whether indoors or outdoors, Quarry Ledgestone creates stunning focal points that demand attention.
Retail and office spaces: It’s a great option for businesses looking to add a touch of raw elegance to their storefronts or office facades.
Matching Tips:
If you want to soften the appearance, balance the texture with light-colored paint or natural wood elements to create contrast. Pair Quarry Ledgestone with darker tones and metallic elements, such as steel or polished concrete, to enhance the industrial vibe.
Roman Castlestone: Old-World Charm with a Classical Twist
Roman Castlestone offers a sophisticated, classical look with a nod to ancient architecture. The stones tend to be larger and more square, often with weathered, distressed edges to create an antique, yet timeless feel. The combination of scale and texture gives Roman Castlestone a noble and grand appearance.
Best for:
Classical, Mediterranean, or European-inspired designs: Roman Castlestone works beautifully in spaces that draw inspiration from Old World architecture, such as Mediterranean villas, rustic Italian homes, or grand estates.
Grand entryways, courtyards, and columns: The larger stone format makes Roman Castlestone ideal for dramatic entrances, feature walls, or even outdoor garden features.
Luxury interiors and exteriors: If you’re aiming for high-end, classic elegance, Roman Castlestone adds a sense of grandeur without feeling overly ornate.
Matching Tips:
Its large scale makes it suitable for grand applications—use it to create bold focal points in both interior and exterior spaces. Pair Roman Castlestone with rich, luxurious color schemes like deep reds, terracottas, or golds to enhance its classical appeal.
Pangaea® Natural Stone: Lancaster / Roman Castlestone
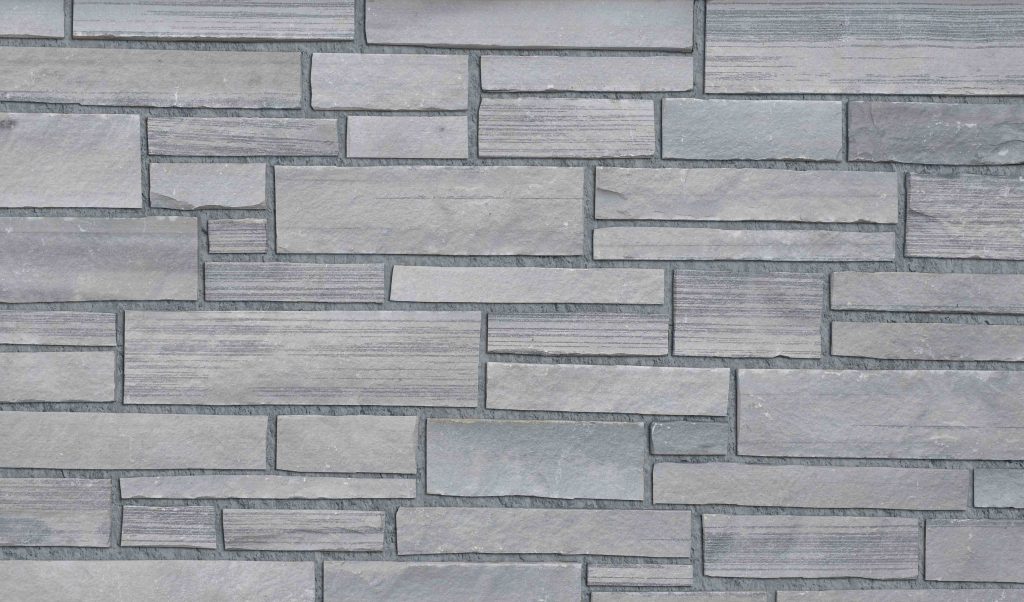
Microledge: Subtle and Modern with Clean Lines
Overview: Microledge stone veneer is a smaller, more refined version of Ledgestone. The stones are thinner and more consistently sized, often stacked in a slightly staggered fashion to create a sleek, modern profile. Microledge offers a clean, linear look with minimal texture, making it one of the most contemporary stone veneer options.
Best for:
Modern homes and minimalist designs: If you’re going for a clean, contemporary look with a focus on simplicity, Microledge is a perfect choice.
Small-scale projects or subtle accents: Due to its smaller, more delicate appearance, Microledge is ideal for adding subtle accents to smaller spaces or creating a minimalistic backdrop for other architectural elements.
Interior accent walls and backsplashes: In kitchens or living areas, Microledge works wonderfully as a backsplash or feature wall to provide texture and depth without overwhelming the space.
Matching Tips:
If you want to add a touch of luxury, combine it with metal accents (e.g., stainless steel) or modern furniture. Pair Microledge with light, neutral colors like whites, grays, and soft blues to enhance its clean, minimalist aesthetic.
Pangaea® Natural Stone: Westcoast / Microledge
Conclusion
Selecting the right stone veneer profile for your project comes down to your design goals, style preferences, and the desired mood of the space. Whether you choose the refined elegance of Castlestone or the rugged charm of Fieldstone, the key is to consider how the texture, color, and profile of the stone will interact with the rest of the design elements in your space. By matching the right profile to your project’s needs, you can create a stunning, timeless look that will stand the test of time.
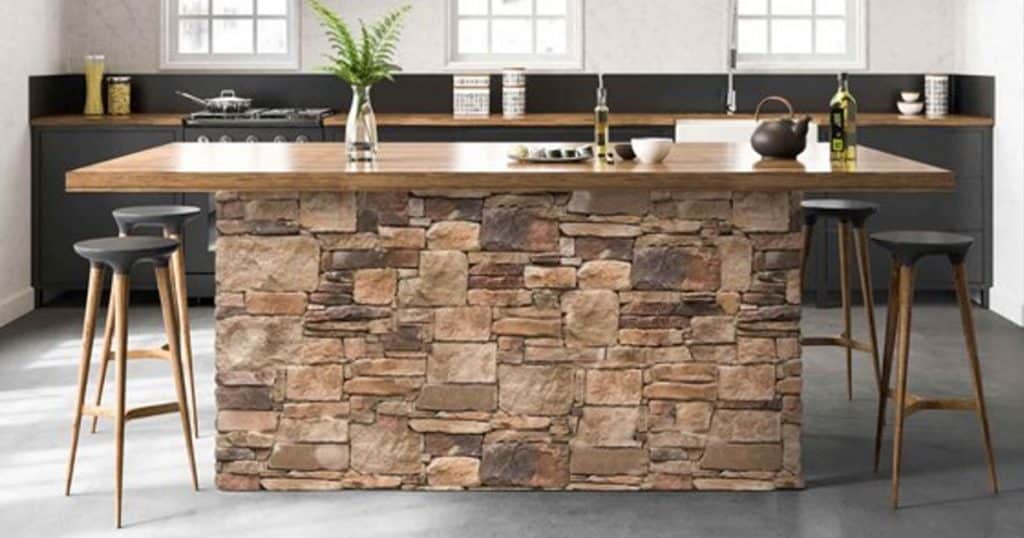
With its unbeatable allure, combined with rich textures and unique colors, manufactured stone adds instant sophistication to any space. While it’s been a go-to for outdoor facades for decades, thin stone veneer takes things indoors, offering a versatile solution for bringing that natural beauty right into your home. From cozy fireplaces to stylish kitchen backsplashes and even mudroom makeovers, the creative possibilities with stone veneer are seemingly endless.
Here are four of the inventive ways stone veneer is being incorporated into interior design, showcasing its versatility and charm in unexpected ways.
Rustic Stone Kitchen Island
Photo courtesy: Horizon Stone.
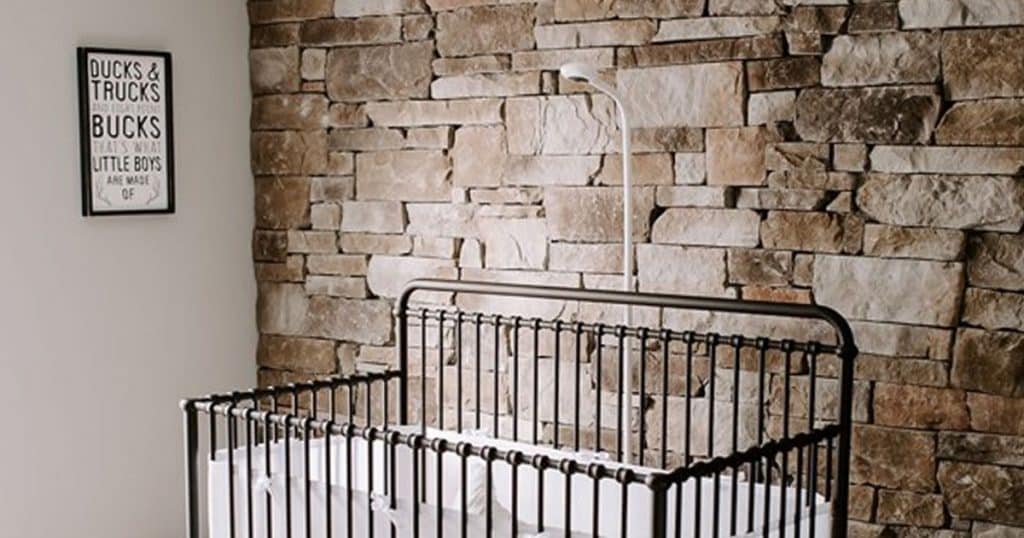
Stone Nursery Accent Wall
For parents-to-be who appreciate the timeless appeal of neutral tones, a neutral scheme exudes quiet luxury and brings a sense of tranquility to the space. This stone veneer accent wall adds depth and texture to the serene environment. The natural tones and subtle textures of the stone complement the neutral palette beautifully, creating a warm atmosphere while adding visual interest to the pace. This stone accent wall is also a durable, low-maintenance backdrop that can easily adapt to changing styles and trends as the child grows up. It’s a versatile canvas for decorating and personalizing the space, which allows parents to create a soothing and serene environment for their little ones to thrive in.
Photo courtesy: Horizon Stone.
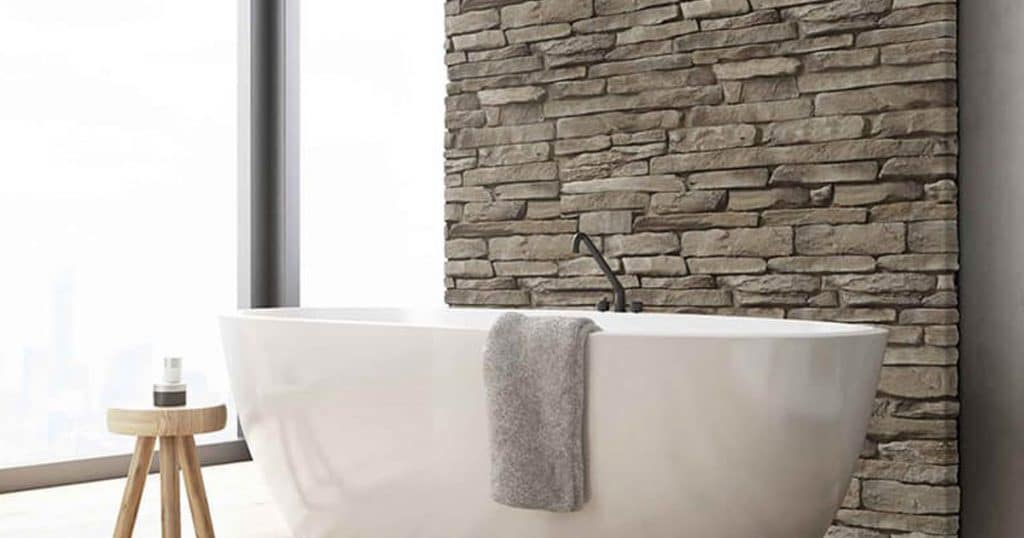
Stone Veneer Vanity Wall
A stone veneer accent wall behind a freestanding modern bathtub or vanity elevates the space with aesthetic appeal and long-lasting durability. The natural, “stacked” look adds rustic charm, bringing the beauty of the outdoors inside. This accent wall adds timeless elegance to the bathroom, creating a captivating focal point that enhances the overall ambiance. The stone veneer’s organic textures and earthy tones also complement this serene, spa-like atmosphere. And unlike conventional wall coverings like paint or wallpaper, the stone veneer is also highly resilient, withstanding moisture, wear, and tear, preserving its striking appearance for years to come.
Photo courtesy: Horizon Stone.
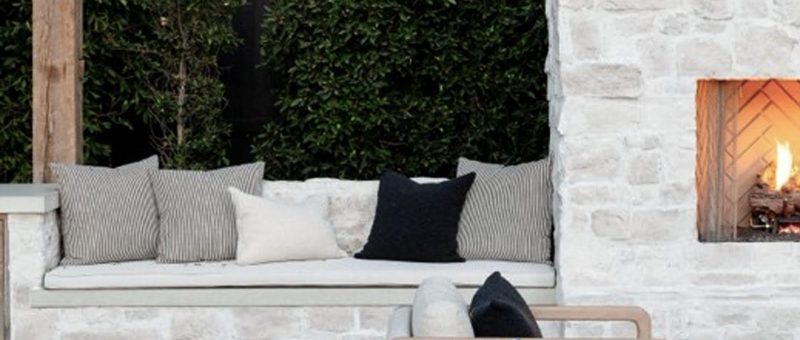
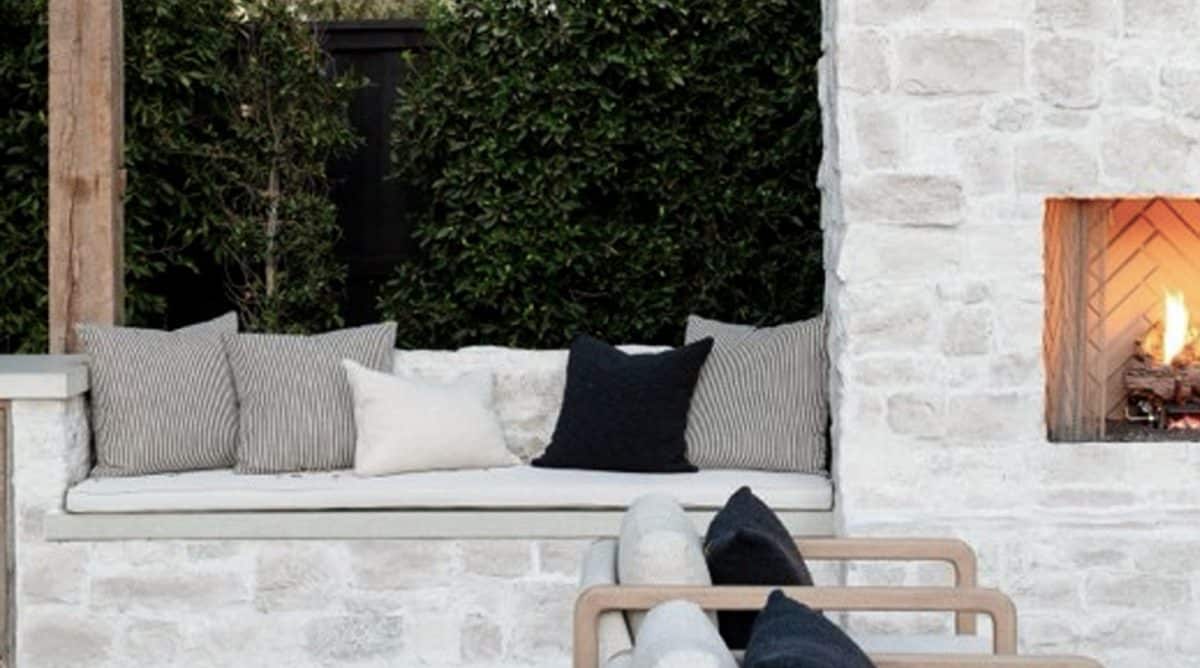
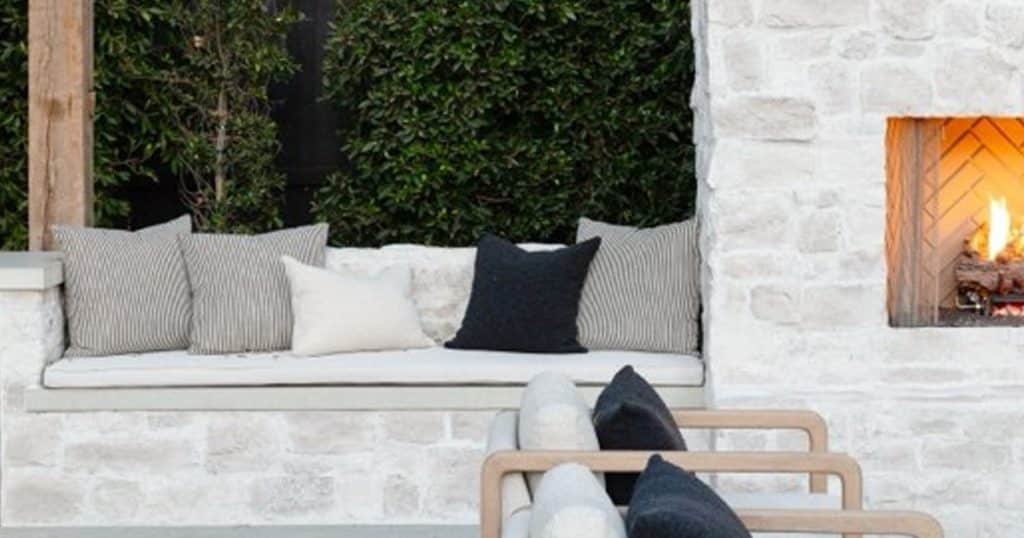
Outdoor Stone Fireplace and Lounge Area
Amber Lewis of Amber Interiors, celebrated for her cozy interior design aesthetic from her home’s exterior to the outdoor fireplace and lounge area in her California renovation. Inspired by a blend of old European architecture and the rugged beauty of the California coast, Amber’s design ethos infuses the outdoor space with timeless elegance and modern comfort. The stone-clad fireplace and lounge area create a focal point for year-round enjoyment. The cohesive use of stone ties the outdoor elements together while harmonizing with the natural surroundings, including the majestic oak trees framing the property, fostering an earthy, serene ambience perfect for relaxation and entertainment.
Photo courtesy: Horizon Stone.
With countless creative possibilities, incorporating stone veneer into your design aesthetic adds depth and character to any space.
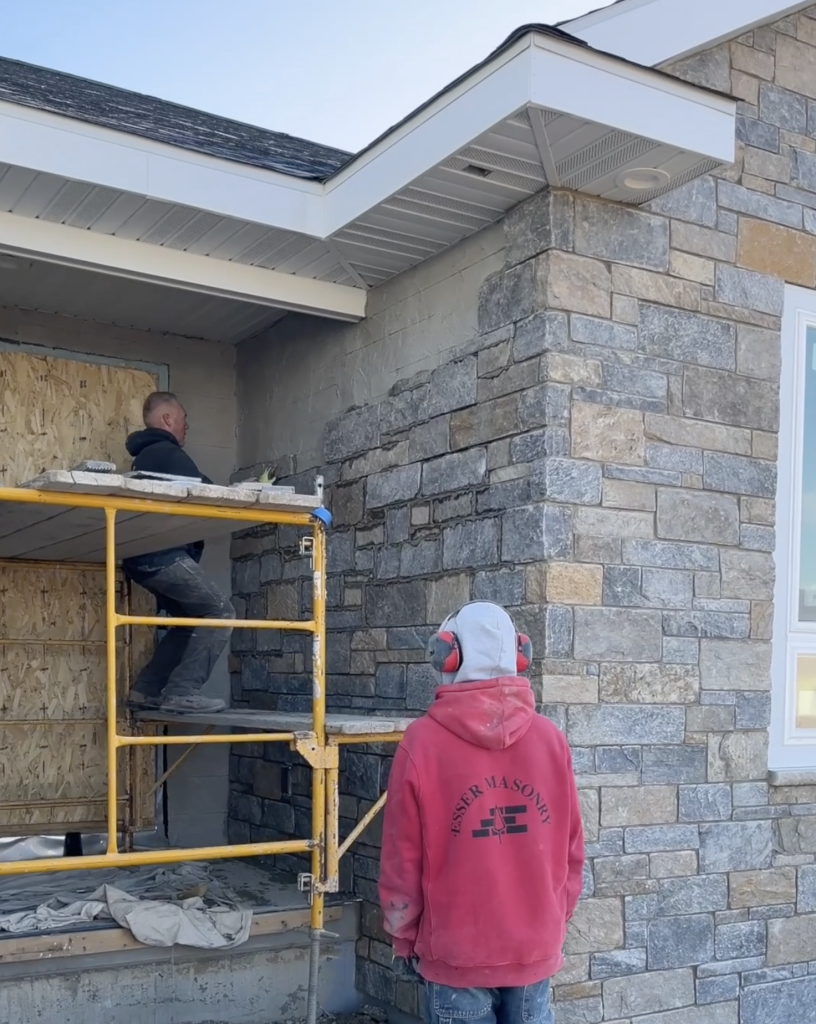
How to Build a Healthy Wall: A Step-by-Step Guide for Masons Preparing Stone Veneer Applications
Building a stone veneer wall—whether for exterior or interior surfaces—requires careful preparation to ensure longevity and durability. A properly prepared substrate wall will not only enhance the aesthetic appeal of the stone veneer but also protect it from elemental damage like moisture, temperature fluctuations, and general wear and tear. This guide will walk you through the essential steps masons should take when preparing the wall before applying stone veneer, as well as the reasons these steps help prevent long-term damage.
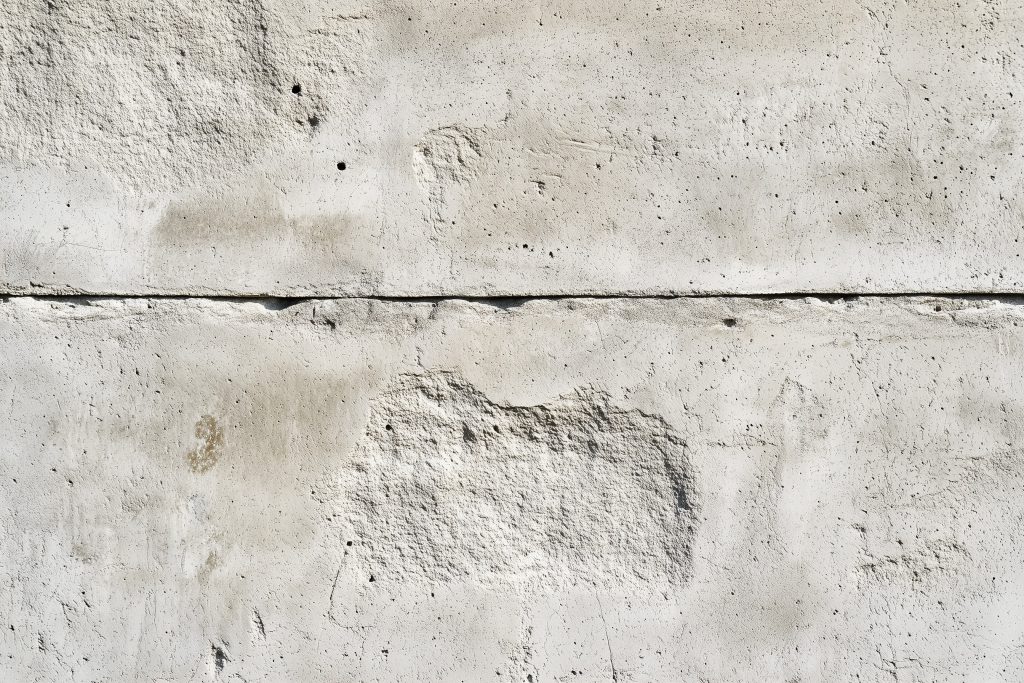
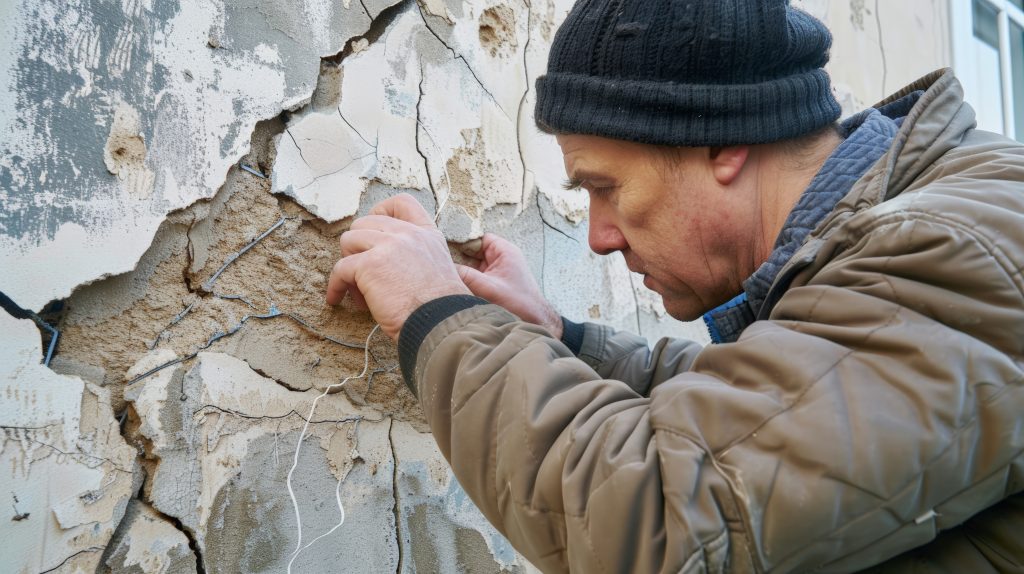
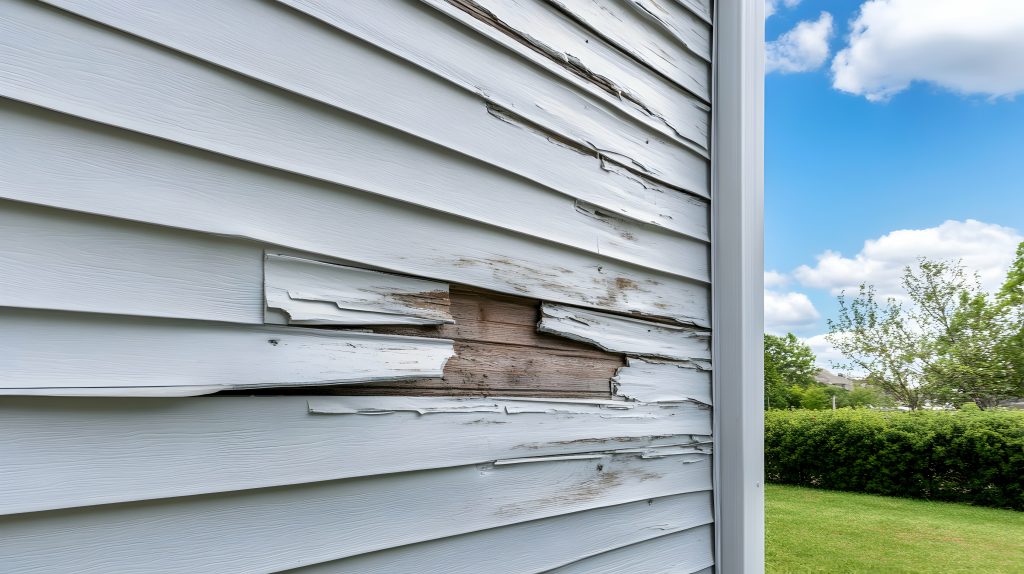
Step 1: Inspect the Existing Wall Structure
Castlestone offers a classic, refined aesthetic. It features stones that are typically rectangular or square with Before starting any work, always inspect the condition of the existing wall. Check for signs of cracks, water damage, or other structural issues that could compromise the surface integrity.
Why It’s Important: Ensuring the wall is structurally sound forms the foundation of a healthy stone veneer application. A weak or damaged substrate can compromise the veneer’s stability, leading to issues like loosening stones or moisture infiltration. Fixing any issues upfront ensures that the veneer will adhere securely and remain durable over time.
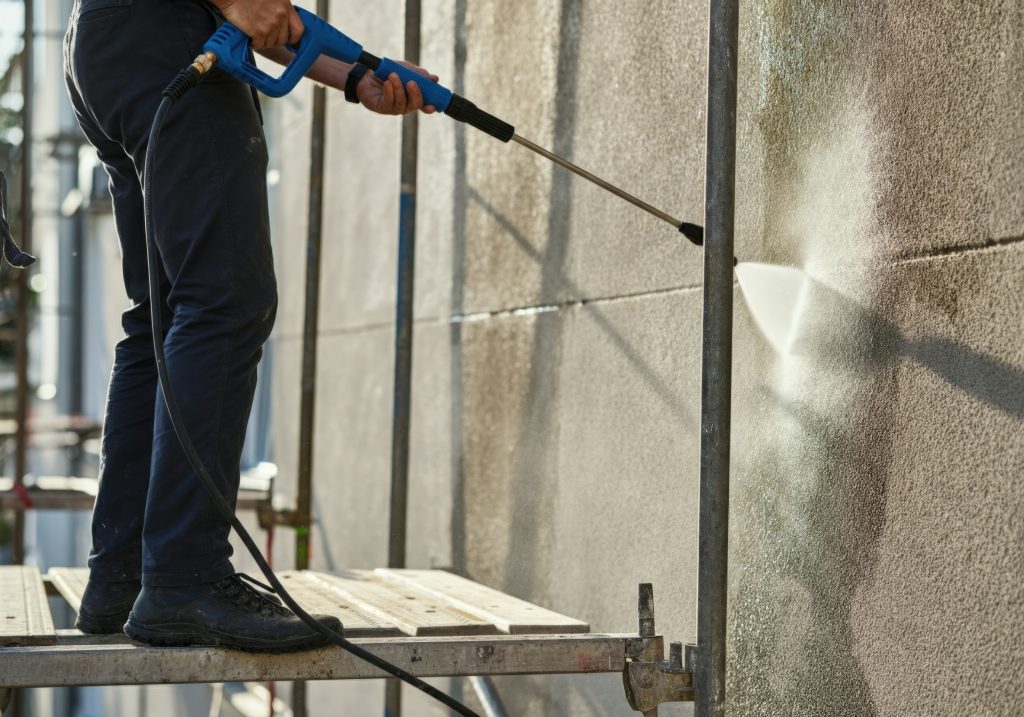
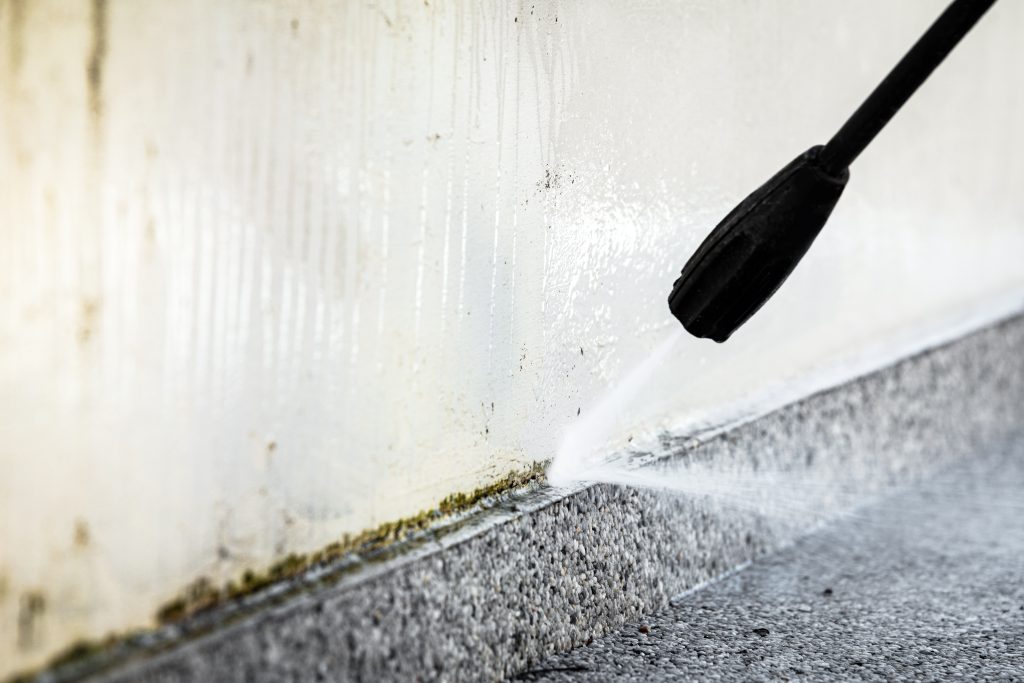
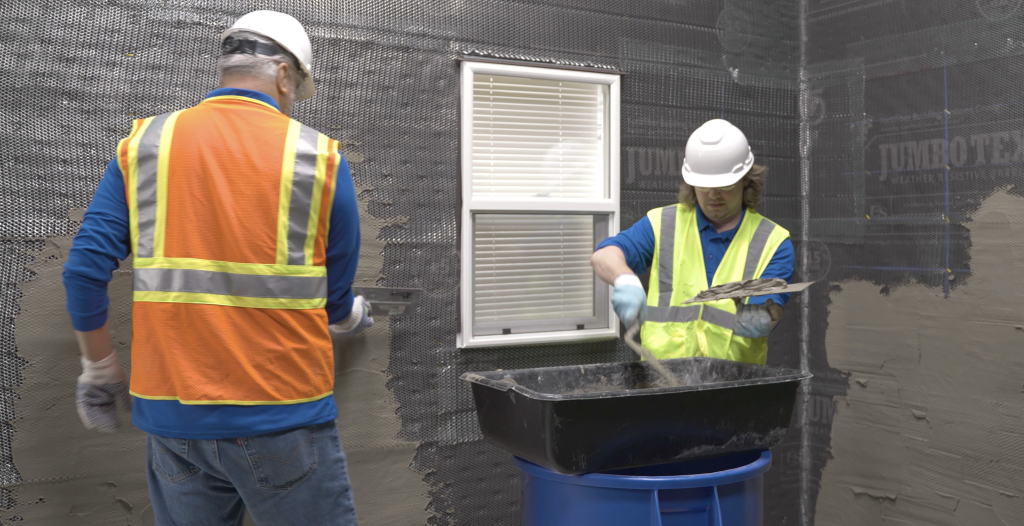
Step 2: Clean the Wall Surface
Next, clean the wall thoroughly by removing dirt, dust, grease, and oils using tools like a wire brush, pressure washer, or specific cleaning agents designed for masonry surfaces.
Why It’s Important: A clean surface is vital for proper adhesion. Any dirt or grease can interfere with the bonding agents, making the stone veneer less secure. This step is key in ensuring that the adhesive or mortar holds the veneer in place, preventing future loosening or damage.
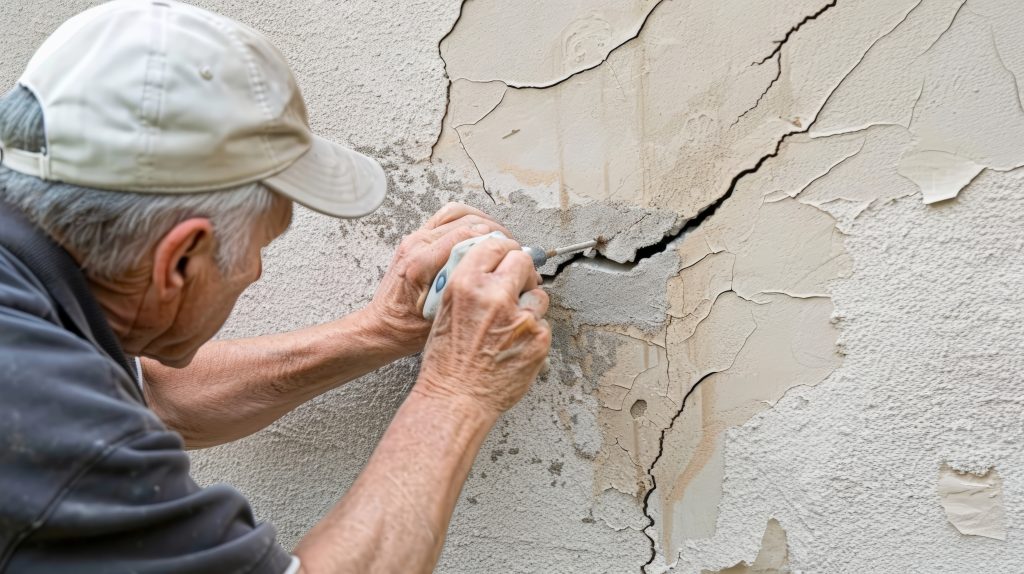
Step 3: Repair Any Damage
Ledgestone features long, rectangular stones stacked in a horizontal, layered fashion. These stones tend to If you notice cracks, gaps, or deteriorated sections of the wall, these must be repaired before moving forward. This may involve filling cracks with a suitable mortar or replacing damaged materials like rotting wood or compromised masonry.
Why It’s Important: Unaddressed cracks or damage allow moisture to infiltrate the wall, leading to further deterioration. By repairing these areas, you create a solid base for the veneer, minimizing the risk of mold, mildew, and rot. Repairing the wall also enhances the wall’s overall strength, preventing the veneer from becoming dislodged or compromised over time.
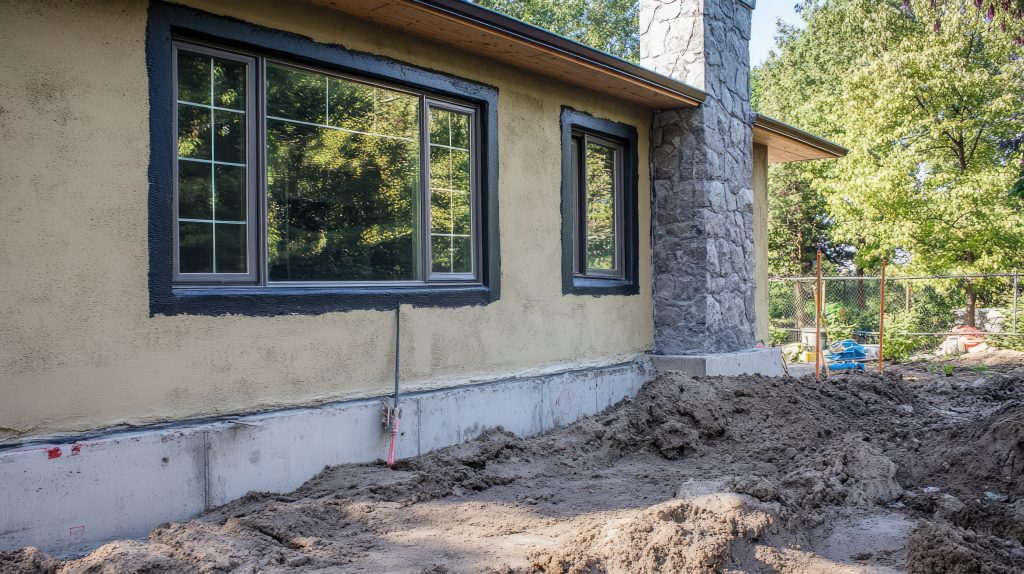
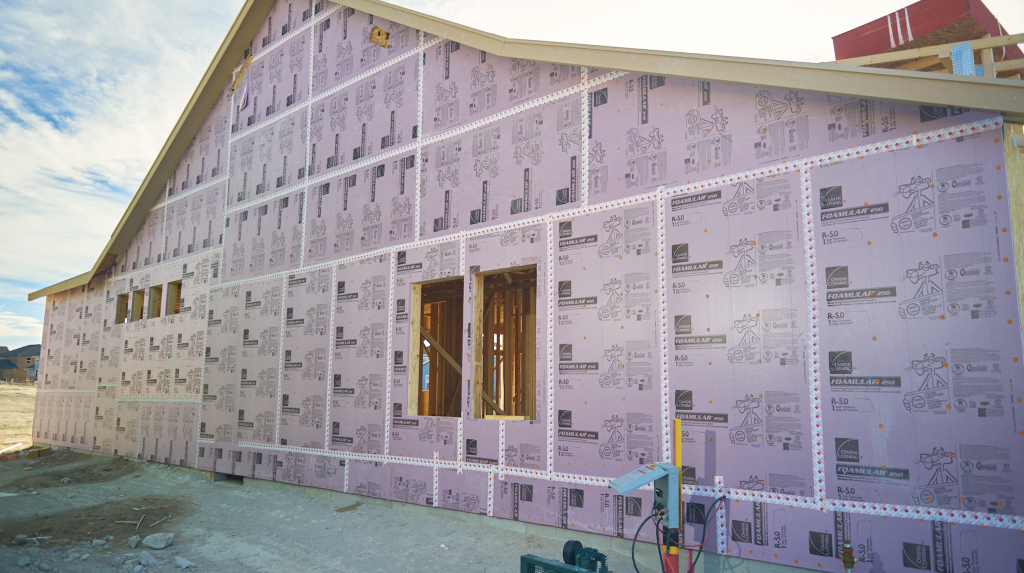
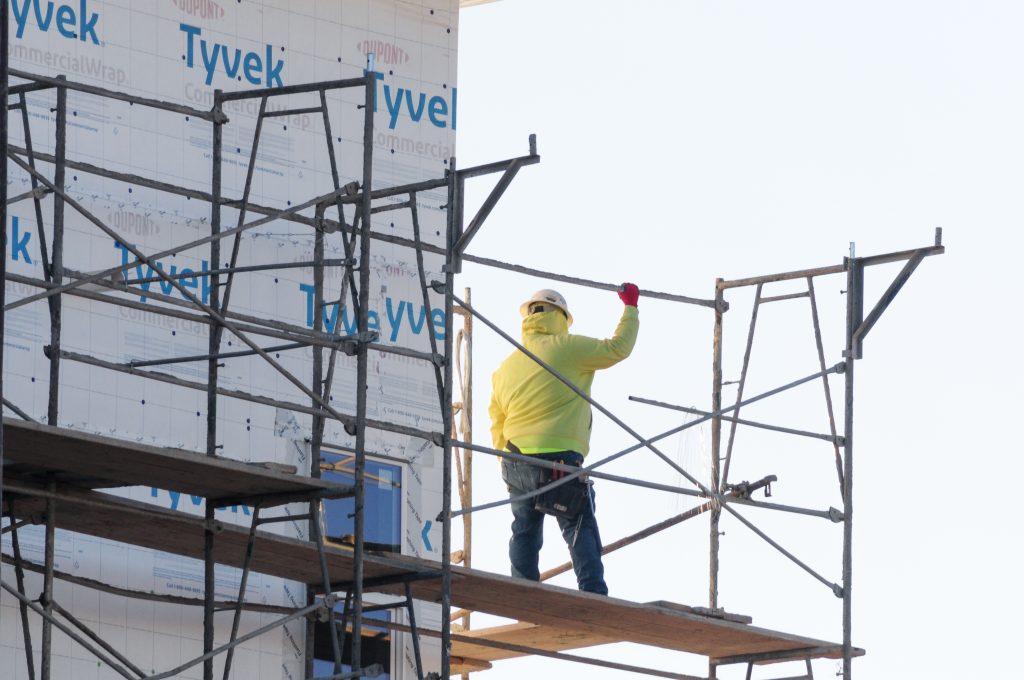
Step 4: Apply a Moisture Barrier (for Exterior Walls)
For exterior walls, it’s essential to install a moisture barrier before applying stone veneer. Moisture barriers can be vapor barriers or breathable membranes that help keep water out while allowing the wall to “breathe.”
Why It’s Important: A moisture barrier is crucial for preventing water from seeping behind the stone veneer. Without it, moisture can lead to mold, mildew, or corrosion on the wall behind the veneer. By adding a moisture barrier, you help protect the substrate and the veneer from water damage, which can be costly to repair.
Examples of Moisture Barrier Products:
Tyvek HomeWrap: This is a popular moisture barrier that resists air and water infiltration, while still allowing moisture vapor to escape, preventing the growth of mold or mildew.
Henry Blueskin VP100: A self-adhering waterproofing membrane that protects against water infiltration while maintaining breathability.
Grace Ice & Water Shield: Often used in roofing, this product is an excellent choice for protecting exterior walls from water intrusion.
These products form a protective layer that keeps water from seeping into the wall structure, preserving the longevity of both the substrate and the stone veneer.
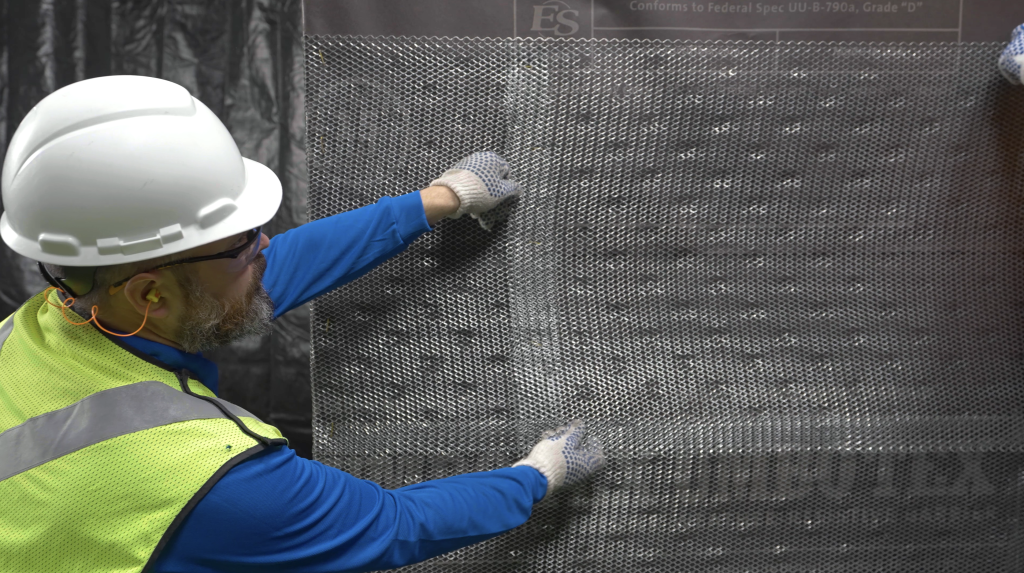
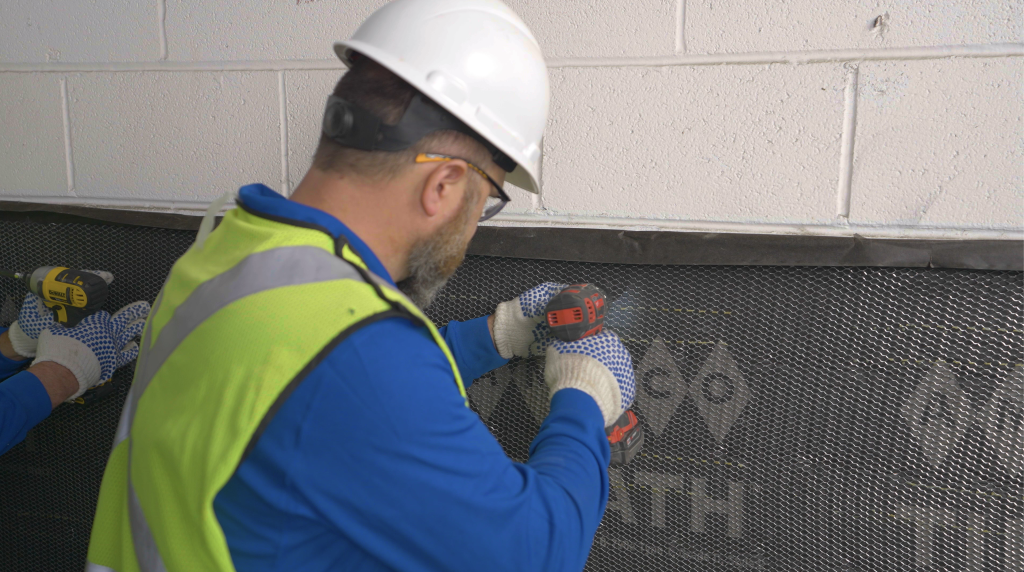
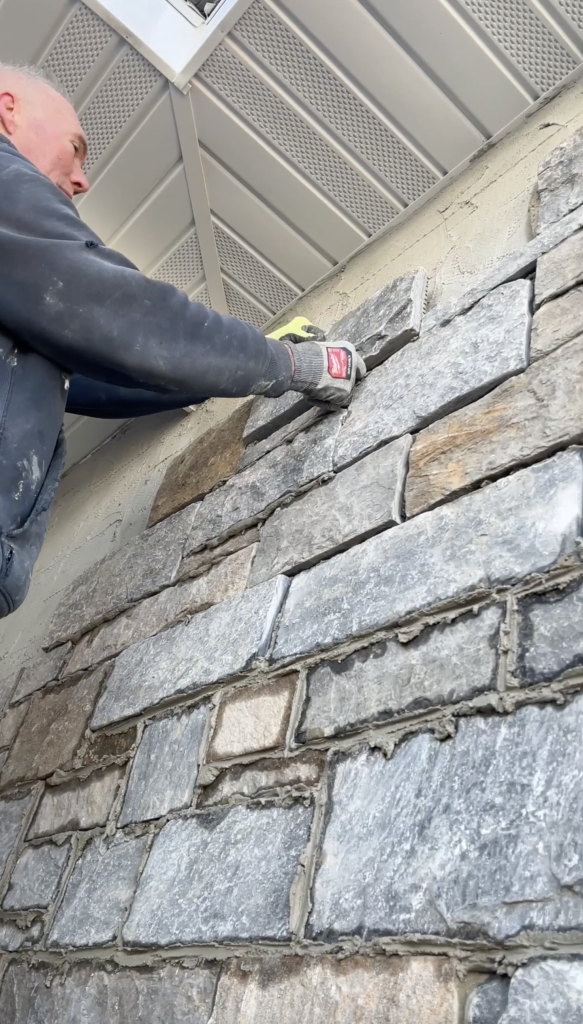
Step 5: Install a Layer of Wire Lath (for Masonry or Concrete Walls)
Roman Castlestone offers a sophisticated, classical look with a nod to ancient architecture. The stones tend For masonry or concrete surfaces, install a metal lath, also known as wire lath, over the wall. This is typically secured with masonry nails or screws to provide a stable, textured surface for the mortar to bond.
Why It’s Important: The wire lath ensures that the mortar adheres firmly to the wall. Without it, there would be insufficient bonding between the stone veneer and the substrate. The lath acts as a foundation for the mortar, helping distribute pressure evenly across the wall and preventing the veneer from cracking or falling off over time.
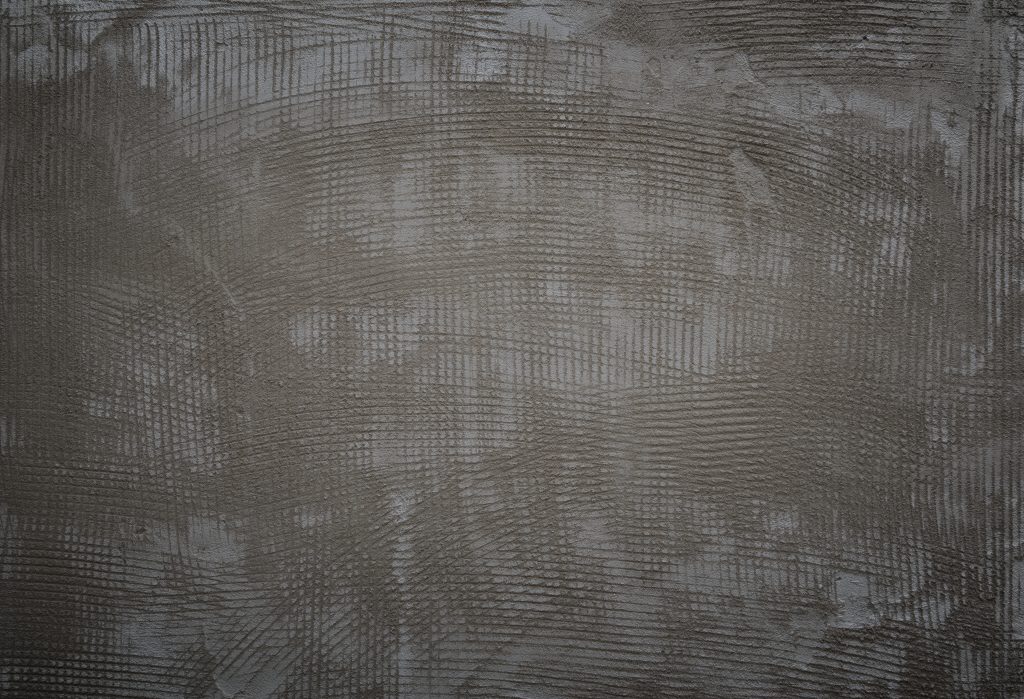
Step 6: Apply a Scratch Coat (for Masonry or Concrete Walls)
Overview: Microledge stone veneer is a smaller, more refined version of Ledgestone. The stones are thinner Once the wire lath is installed, apply a scratch coat—this is a thin layer of mortar that is smoothed and then roughened with a notched trowel to create grooves.
Why It’s Important: The scratch coat improves the mechanical bond between the mortar and the stone veneer. The grooves provide added surface area for better adhesion, ensuring the veneer stays secure. This coat also acts as a moisture barrier, reducing water penetration to the substrate wall.
Step 7: Apply the Bonding Agent (For Wood or Drywall Substrates)
For wood or drywall surfaces, it’s necessary to apply a bonding agent or adhesive before the stone veneer is installed. A high-quality latex-based adhesive is typically used for these types of substrates.
Why It’s Important: Wood and drywall are more vulnerable to moisture than masonry, making it essential to use a bonding agent to create a secure connection. The bonding agent will ensure that the stone veneer sticks properly to the wall, preventing any shifting or loosening over time. It also adds a layer of moisture resistance, protecting the wall from rotting or warping.
Step 8: Begin Installing the Stone Veneer
With all the preparations complete, you can now begin applying the stone veneer. Press each stone firmly into place using a mortar that’s appropriate for the type of stone being used. Make sure there are no gaps or loose stones.
Why It’s Important: Proper installation is the final step in creating a durable and aesthetically pleasing stone veneer wall. Correctly placing each stone and ensuring it’s securely adhered will prevent issues like gaps, shifting, or stones falling off. These issues could expose the substrate to moisture, leading to long-term damage.
Building a healthy wall for stone veneer involves careful attention to preparation, from inspecting and cleaning the surface to applying moisture barriers and bonding agents. Each step is crucial to ensuring that the stone veneer adheres properly, stays intact, and protects the underlying wall from moisture, temperature fluctuations, and other elements. By following these steps and using high-quality materials like moisture barriers, wire lath, and bonding agents, masons can create a durable, long-lasting stone veneer installation that will stand the test of time.
For exterior walls, always use moisture barriers like Tyvek HomeWrap or Grace Ice & Water Shield to protect against water intrusion. With proper preparation, your stone veneer wall will not only look great but also remain resilient and functional for years to come.
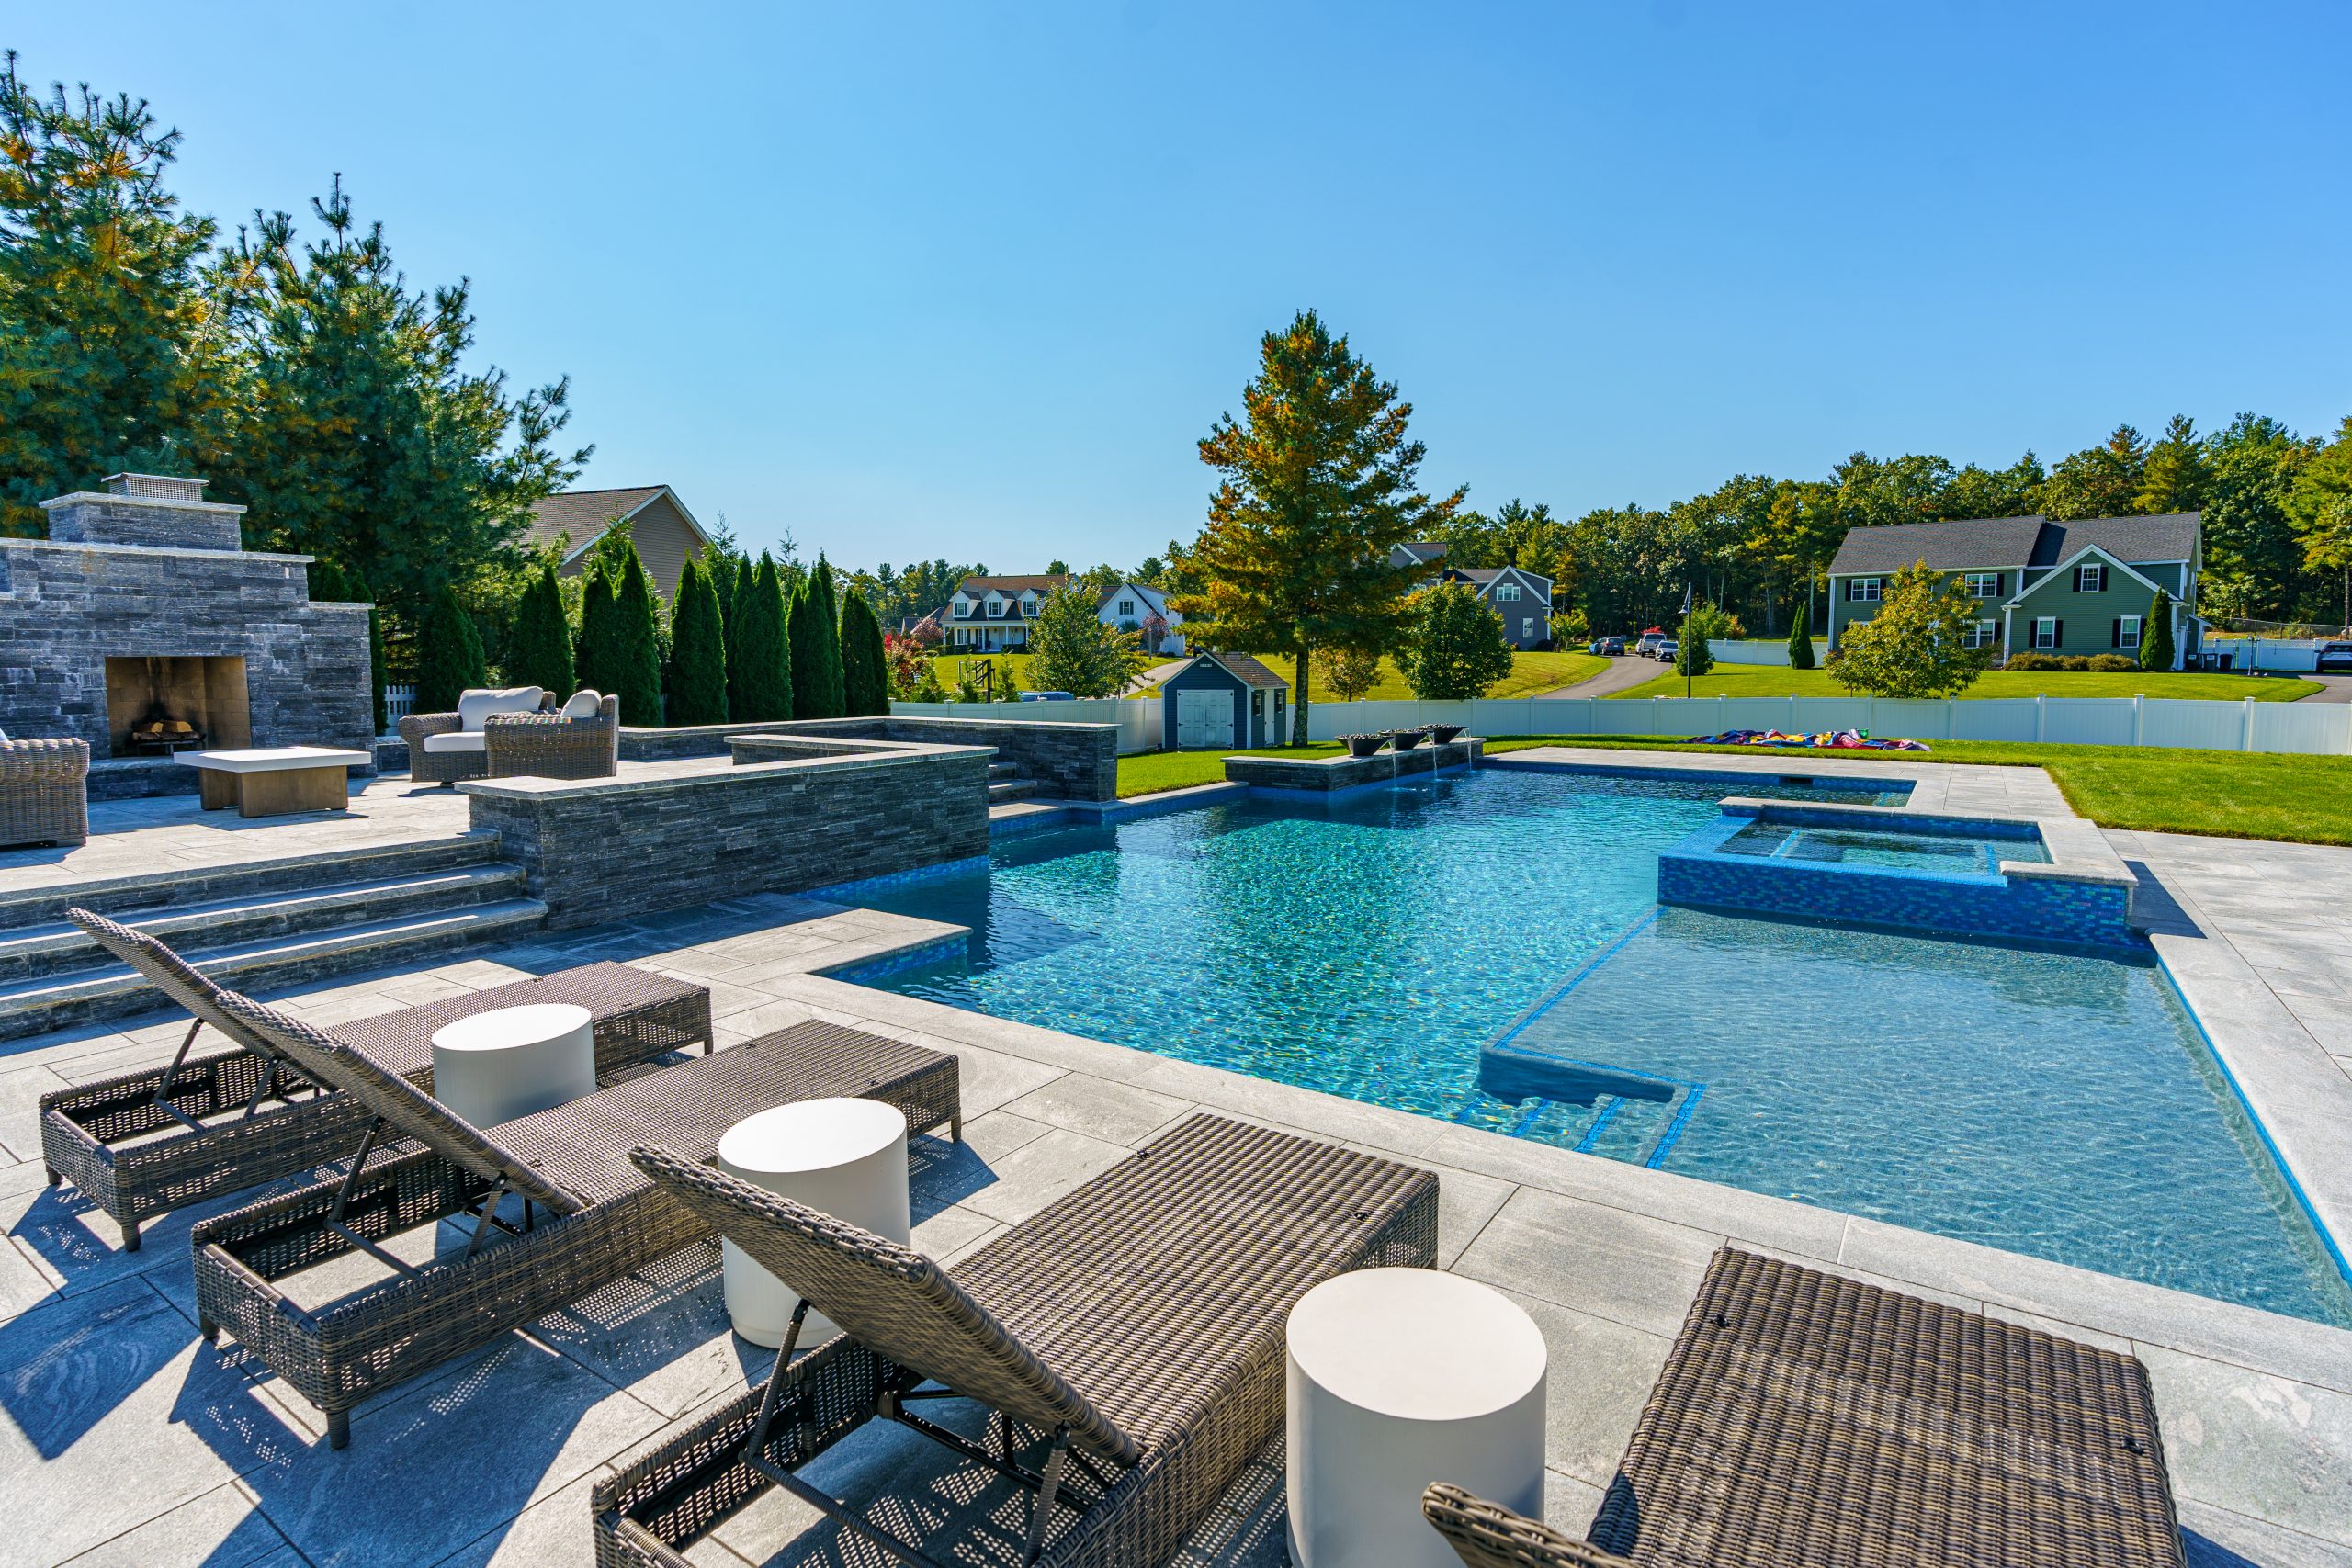
Enhance Your Backyard Design with Custom Fabricated Natural Stone
When designing a dream backyard, natural stone elements are a game changer. Custom-cut and fabricated stone pieces offer endless possibilities, bringing beauty, durability, and sophistication to your outdoor space. Whether you’re updating your patio, adding a pool, or enhancing your landscaping, natural stone is an ideal choice. Below are some of the best ways to use custom-cut natural stone in your backyard design, along with the many benefits they offer.
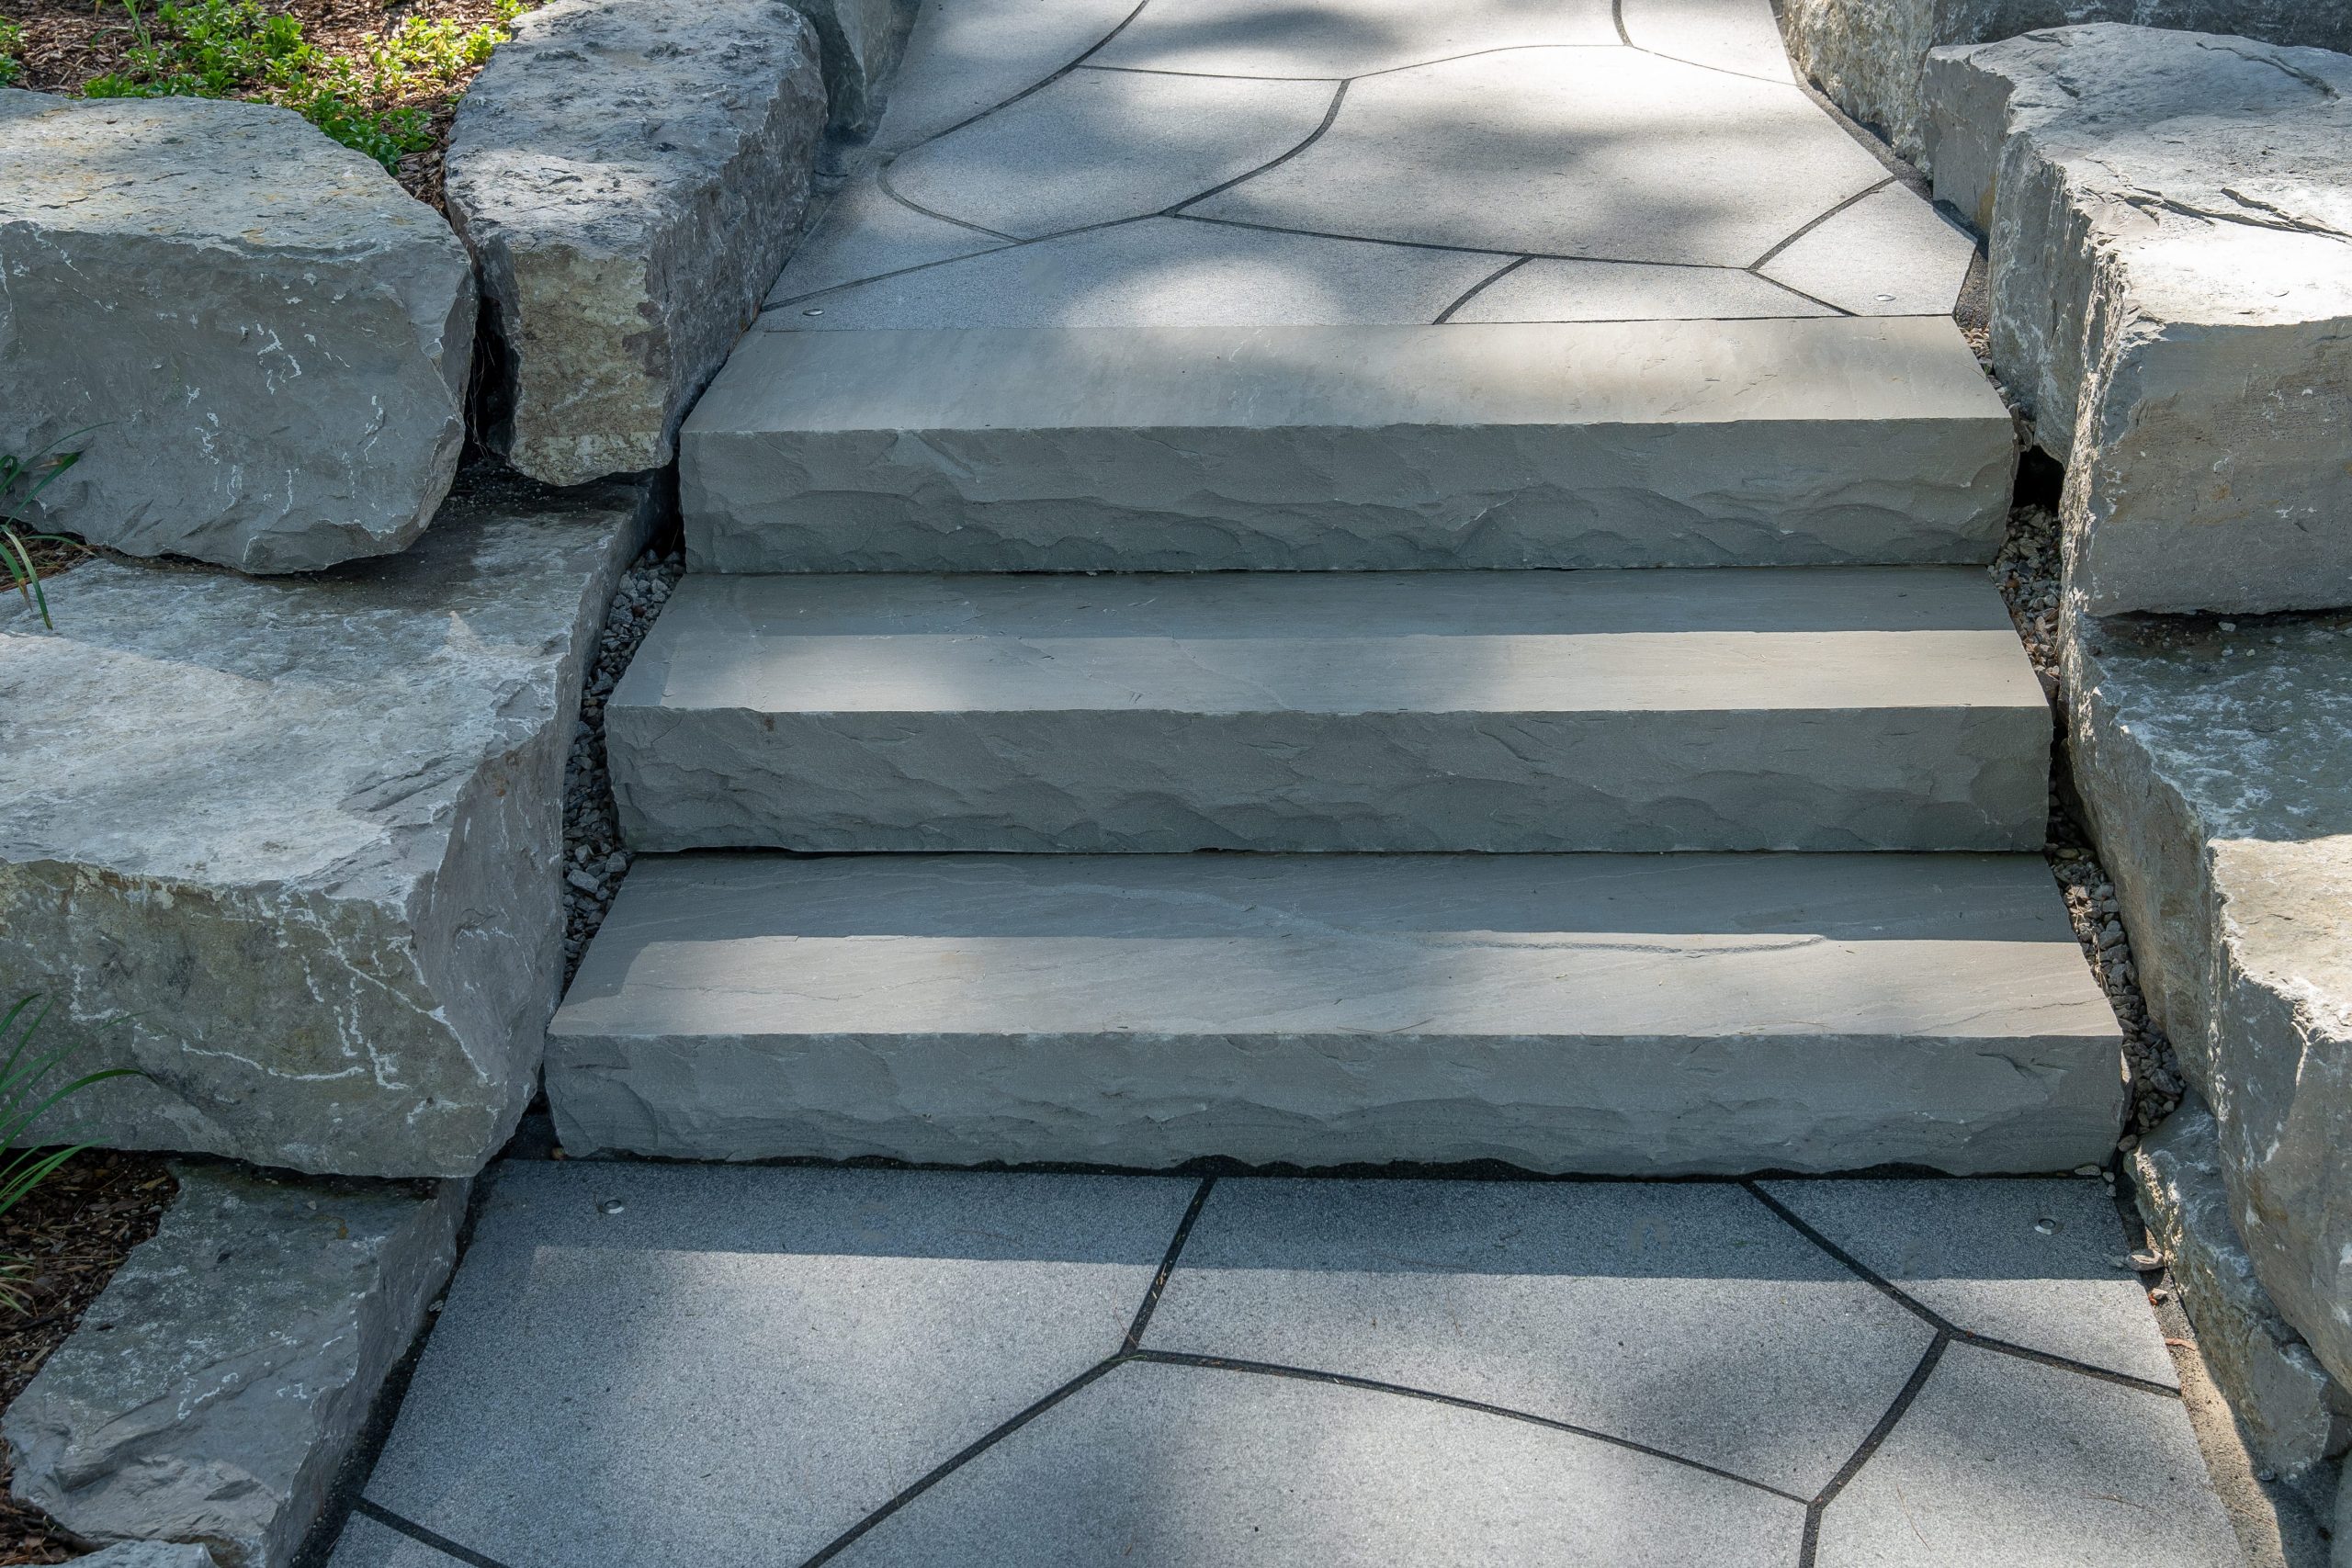
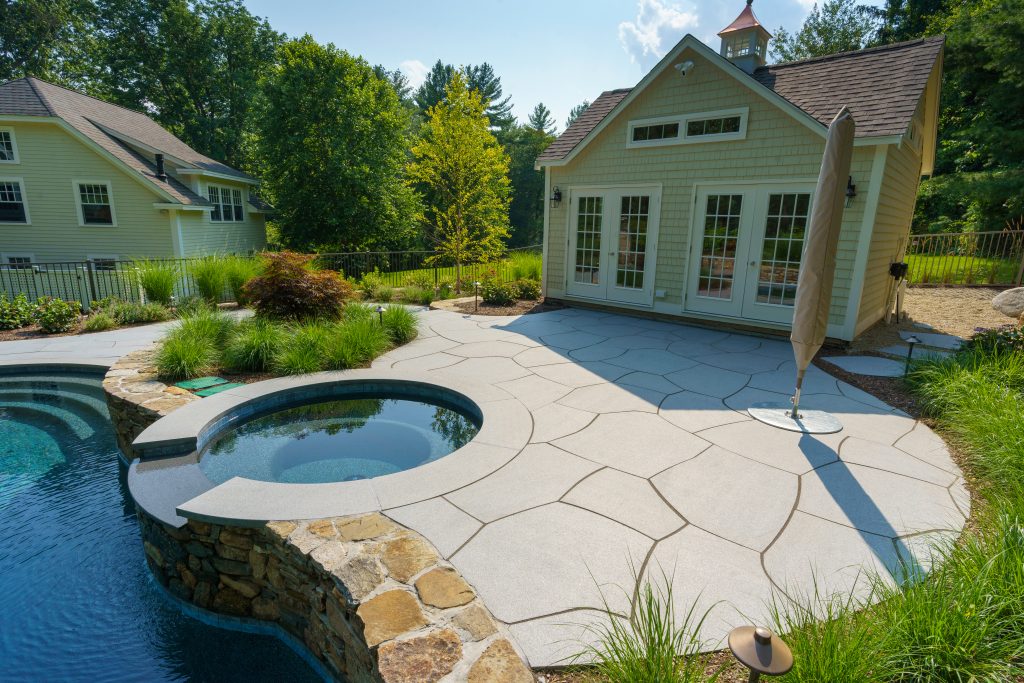
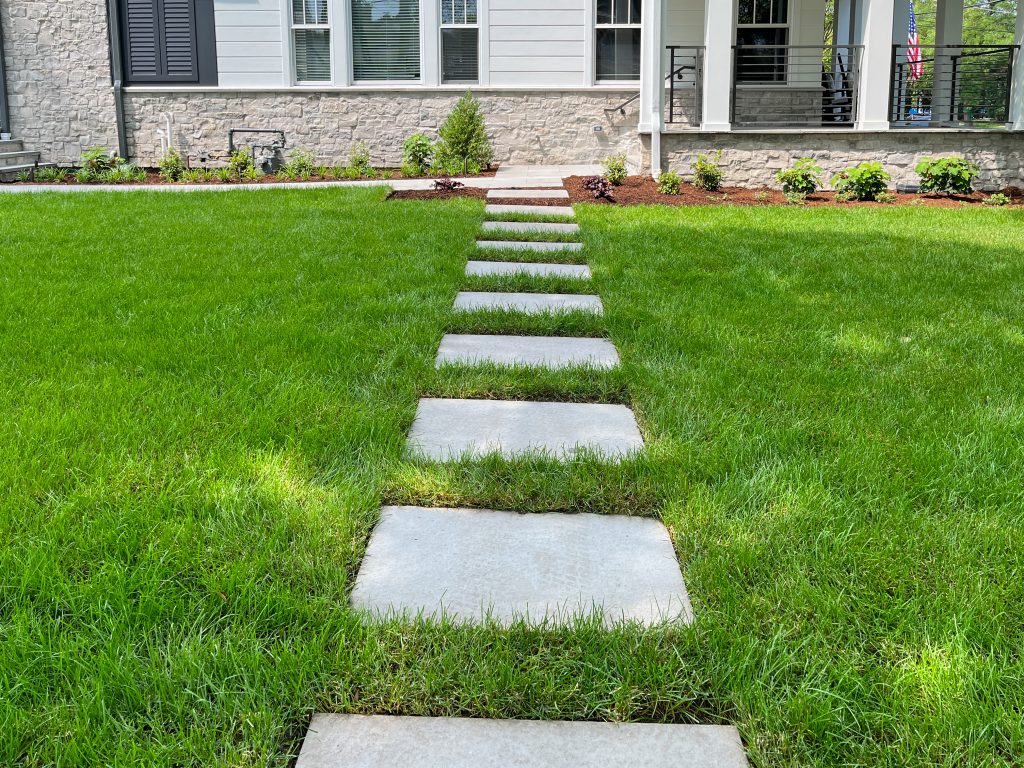
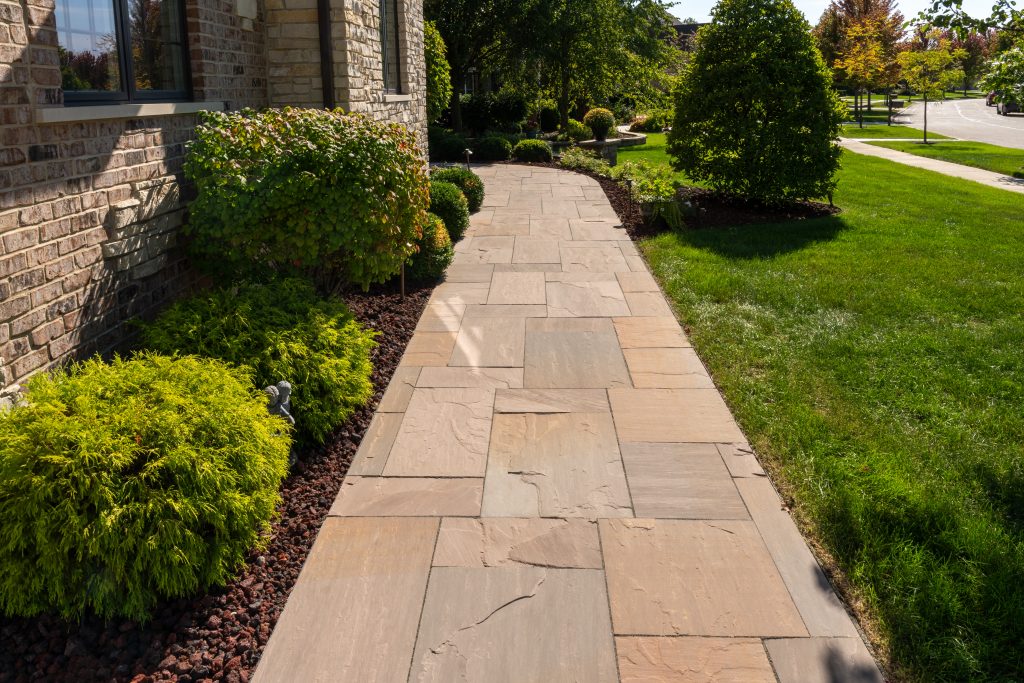
Custom Pathways & Walkways
One of the most popular ways to incorporate custom-cut stone into your backyard is through unique pathways and walkways. Whether you use flagstone, granite, or sandstone, custom stone allows you to create one-of-a-kind shapes and patterns that follow the natural flow of your landscape. These tailored paths guide guests through your yard while adding visual interest and sophistication.
Benefit: Customized pathways provide durability, resist wear, and add curb appeal. Tailored designs ensure your paths blend seamlessly with your landscape, making them a standout feature of your backyard.
Aura™ Natural Landscapes – Blue Mist Granite / Irregular Flagging
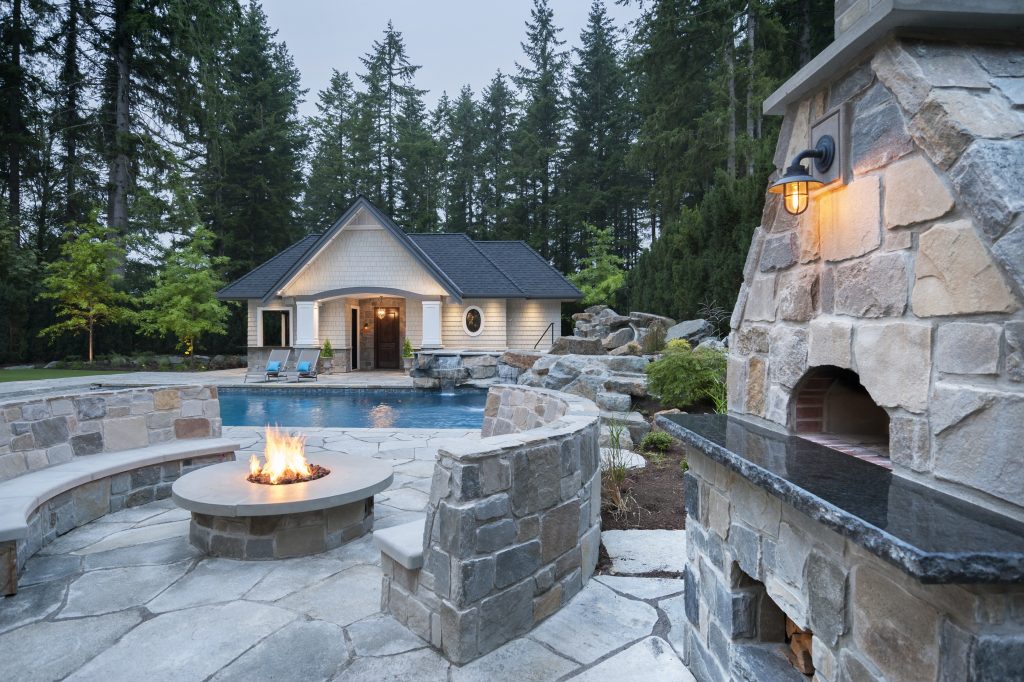
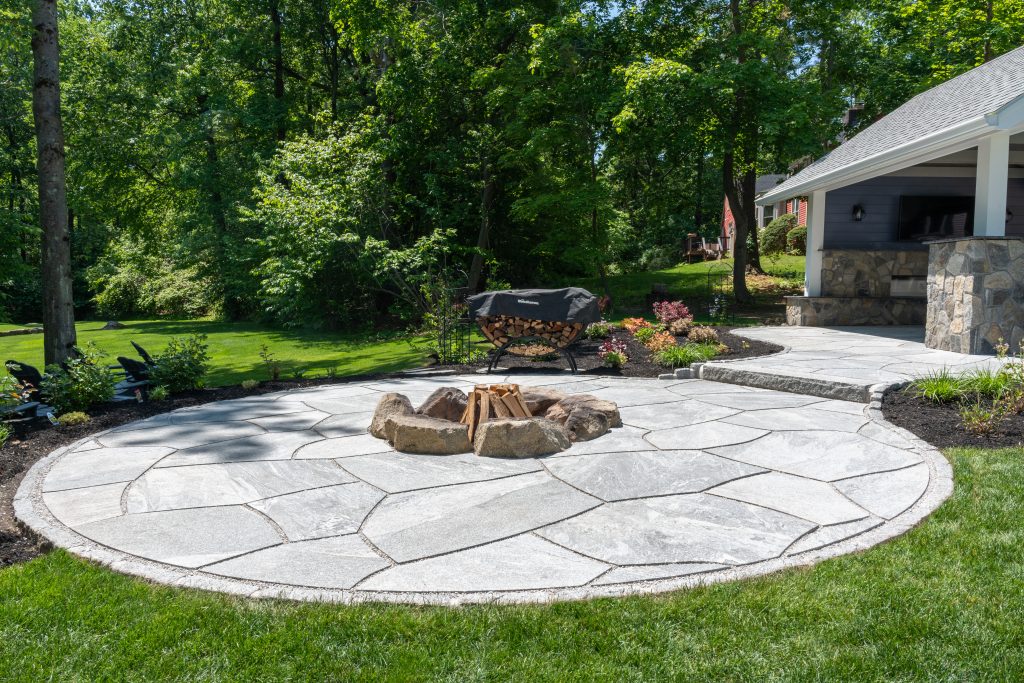
Outdoor Fire Pits & Kitchens
Natural stone is perfect for building stunning outdoor fire pits and kitchens. Custom fabrication ensures the stonework complements your overall backyard design. Popular choices include granite, travertine, and slate for their aesthetic appeal and heat resistance. A custom fire pit or outdoor kitchen creates an inviting atmosphere for family gatherings and outdoor entertaining.
Benefit: Custom stone features, like fire pits and kitchens, increase outdoor living space, are heat-resistant, and provide a luxurious and functional focal point for your yard.
Pangaea® Natural Stone – Sierra Ridge / Roman Castlestone
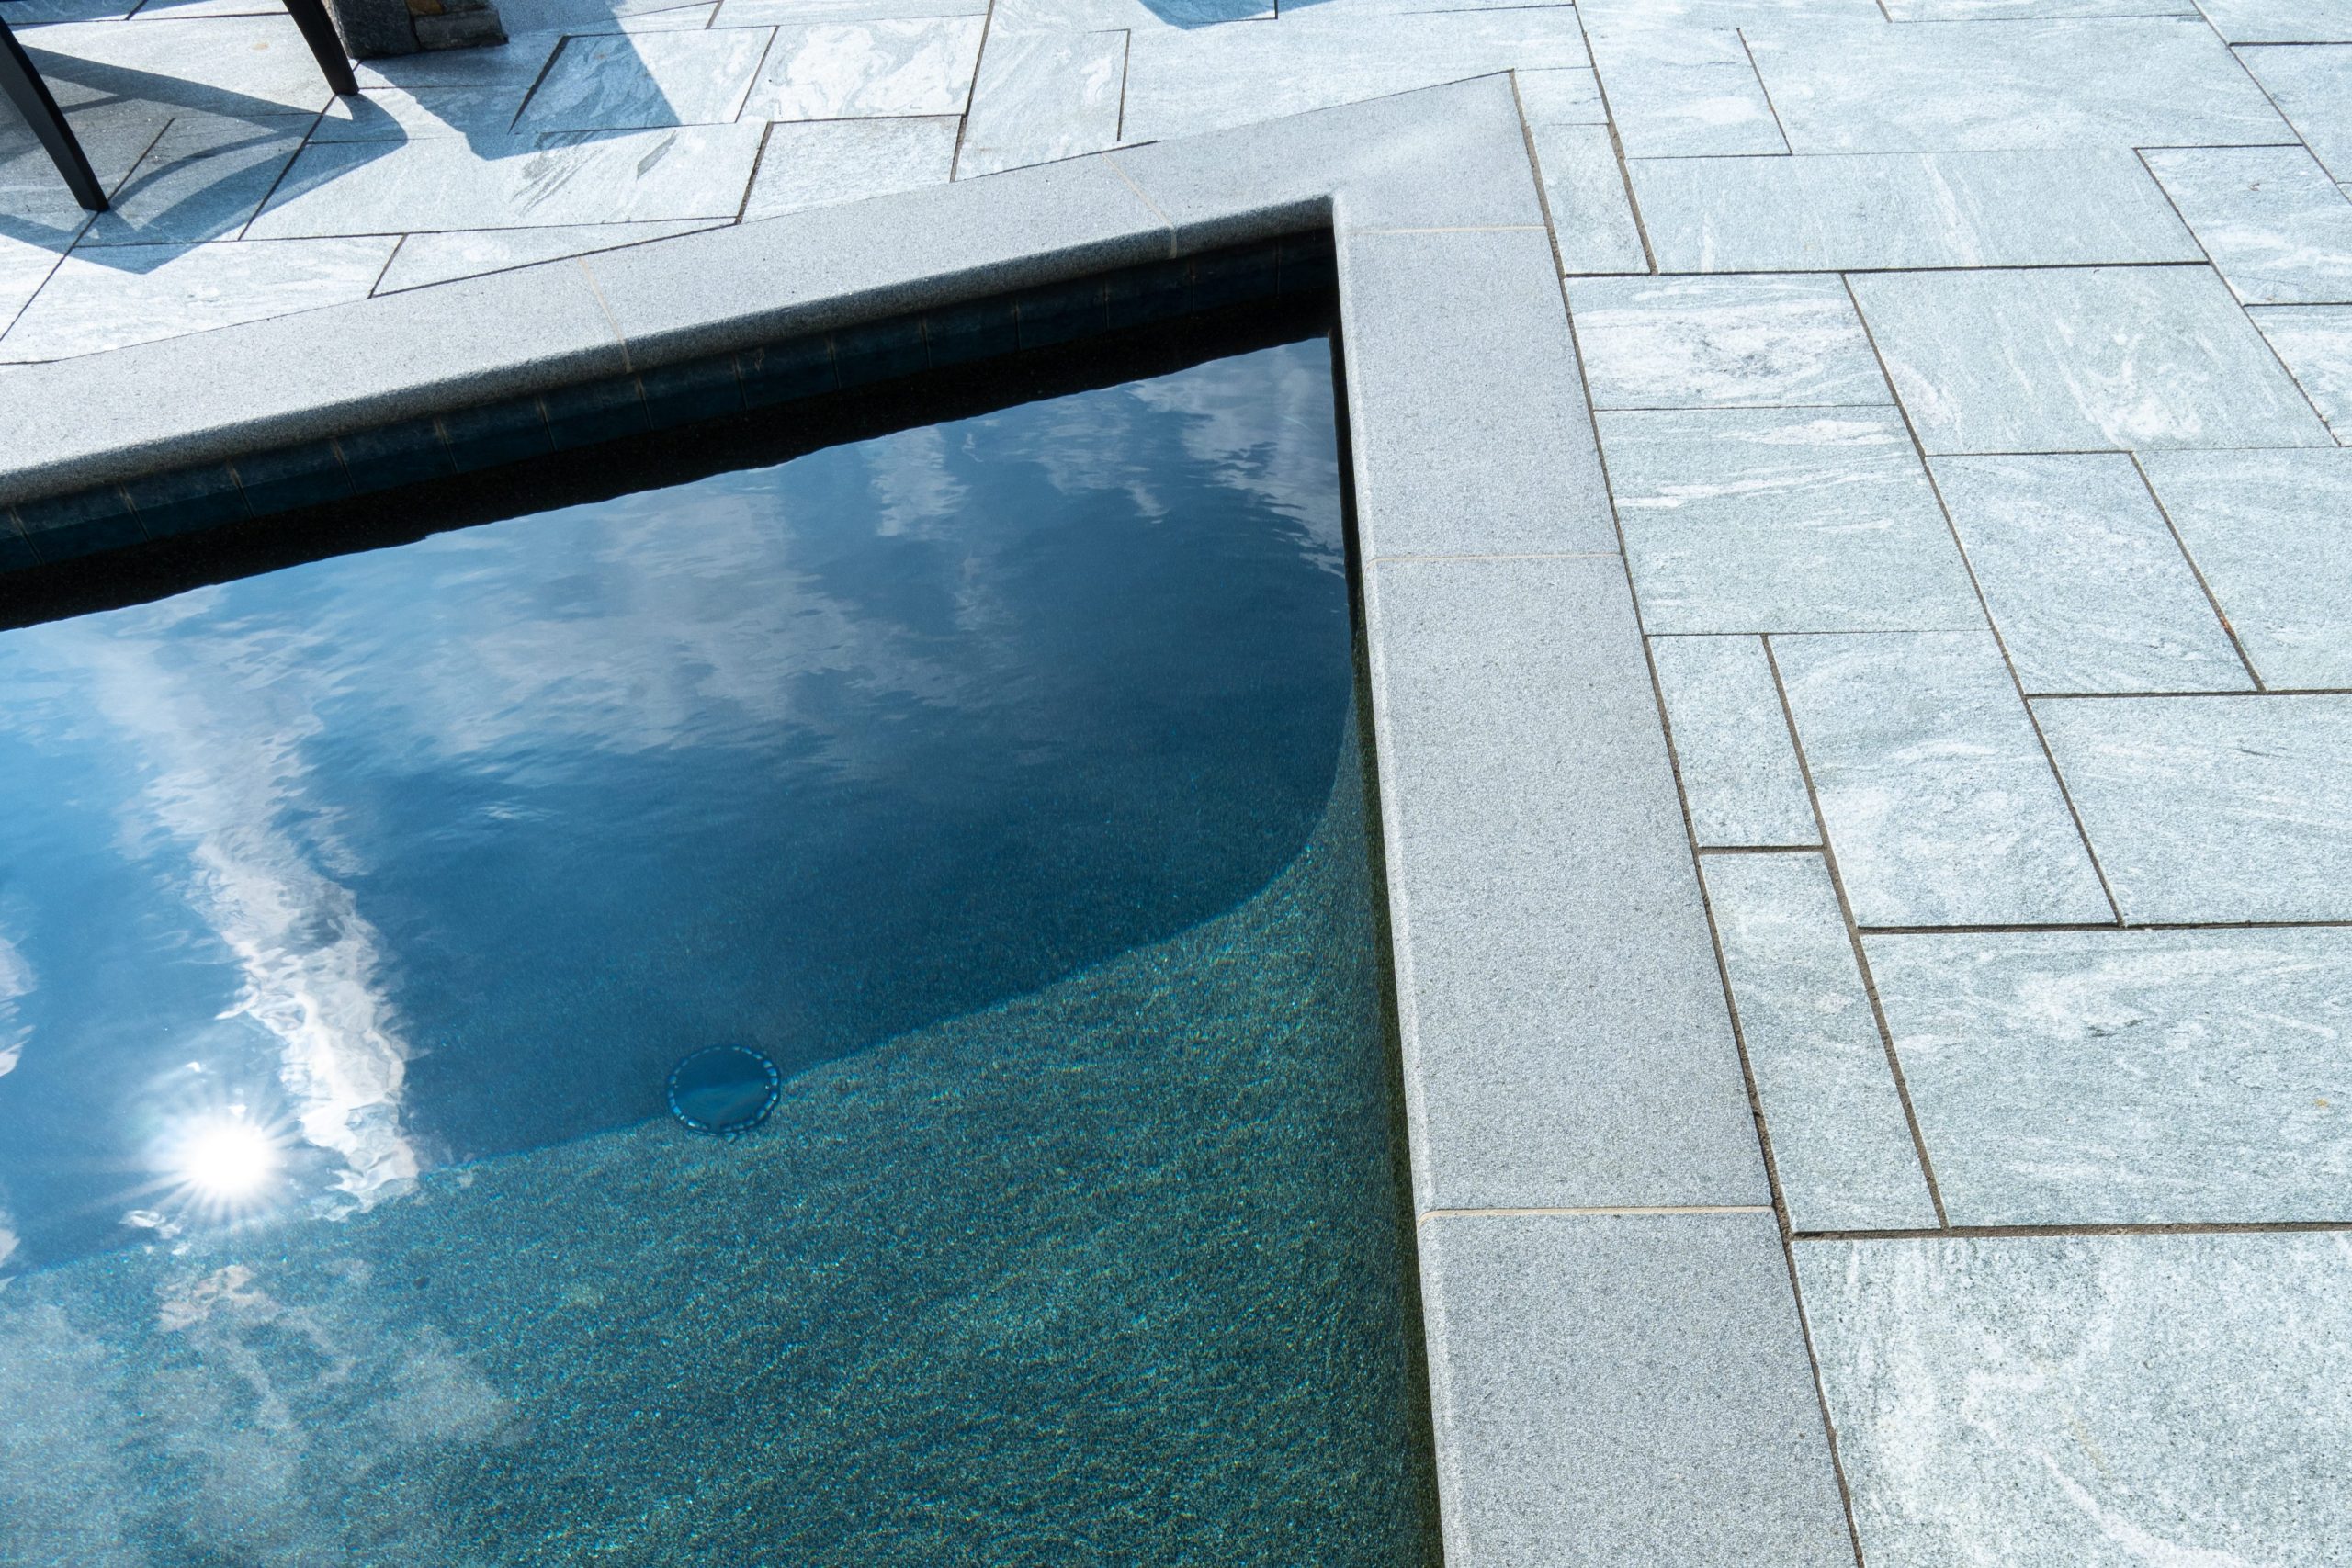
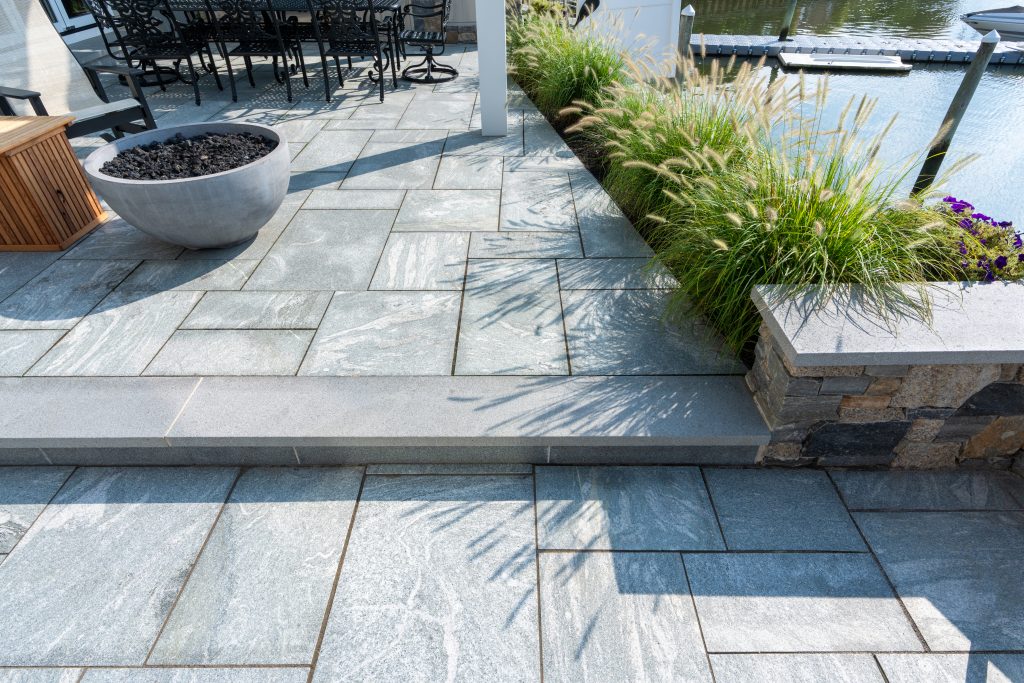
Custom Pool CopingStones
If you have a pool or are planning to add one, custom pool coping stones are a must-have. Pool coping stones are the edge stones that surround your pool, offering both functional and aesthetic value. Custom-cut stone, such as limestone, travertine, or bluestone, is a great choice because it provides a smooth, durable finish that complements the water. Custom pool coping stones can be designed to suit any style, from sleek and modern to rustic and natural.
Benefit: Custom pool coping stones ensure a seamless transition between your pool and the surrounding deck. They’re durable, non-slip, and designed to withstand harsh outdoor conditions, all while adding a touch of elegance to your pool area.
Aura™ Natural Landscapes – Blue Mist / Granite Coping
Stone Walls & Retaining Structures
Custom-cut stone walls are ideal for creating privacy, building retaining walls, or adding a decorative touch to your backyard. Whether it’s a dry-laid stone wall or a more intricate, mortar-set design, natural stone offers exceptional strength and beauty. A custom stone wall can be built to fit any size or shape, providing functional and aesthetic benefits to your landscape.
Benefit: Retaining walls made from custom-cut natural stone offer structural support, prevent soil erosion, and create beautiful focal points. These walls are low-maintenance and provide timeless beauty to your outdoor space.
Aura™ Natural Landscapes – Blue Mist / Granite
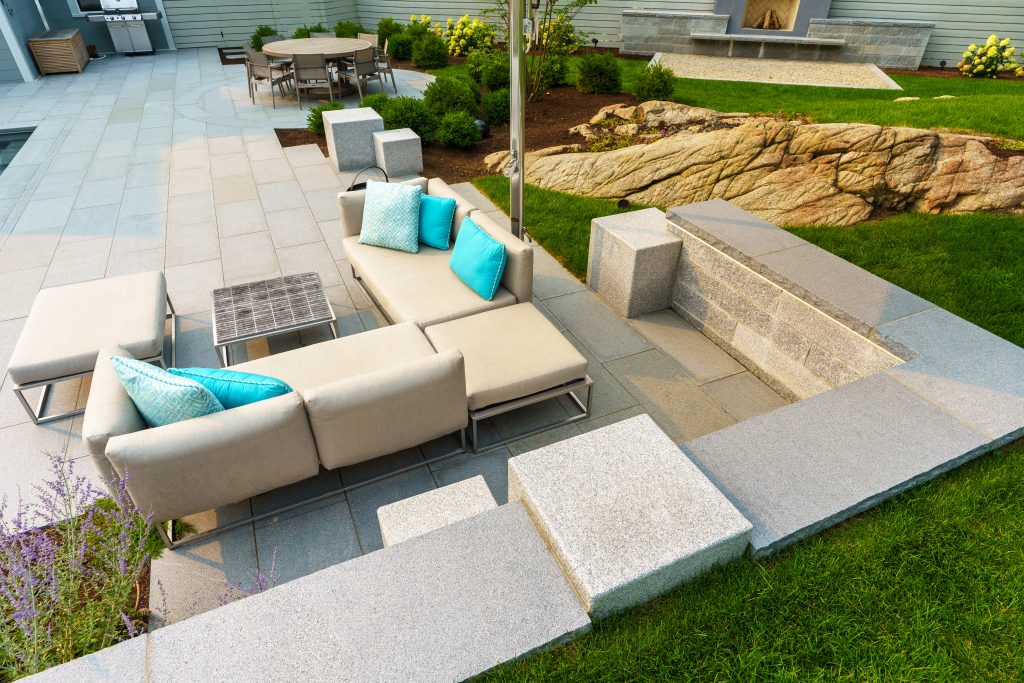
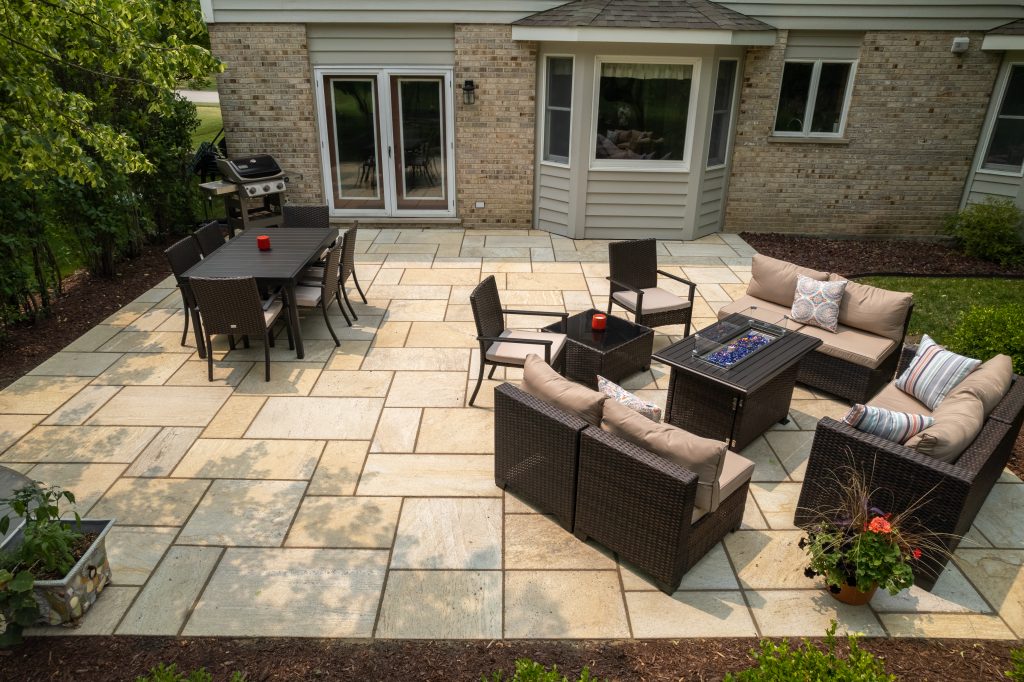
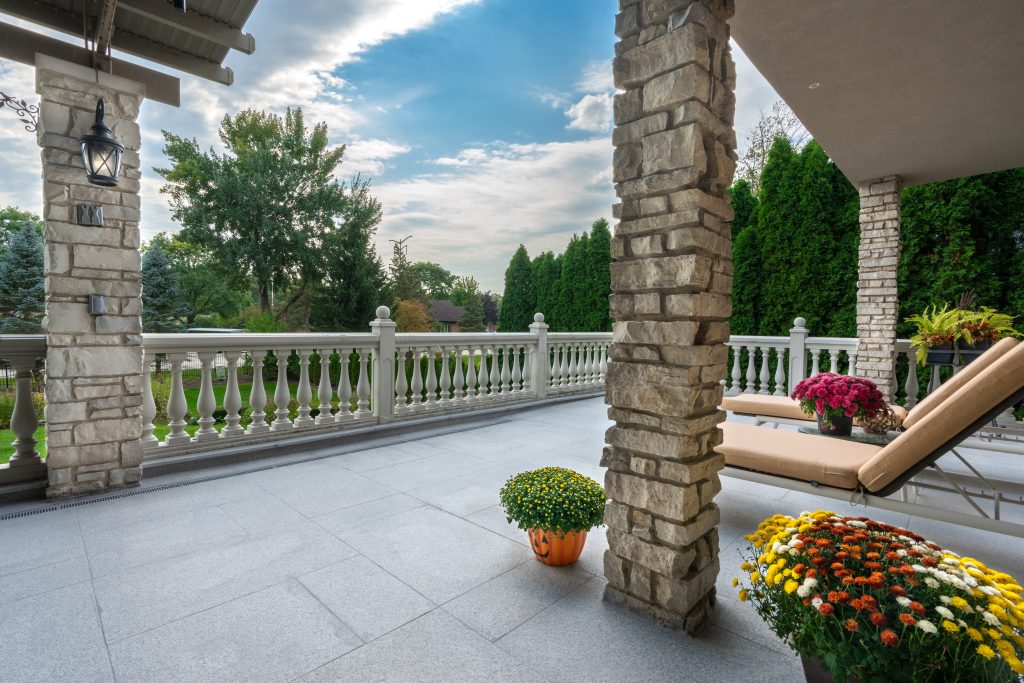
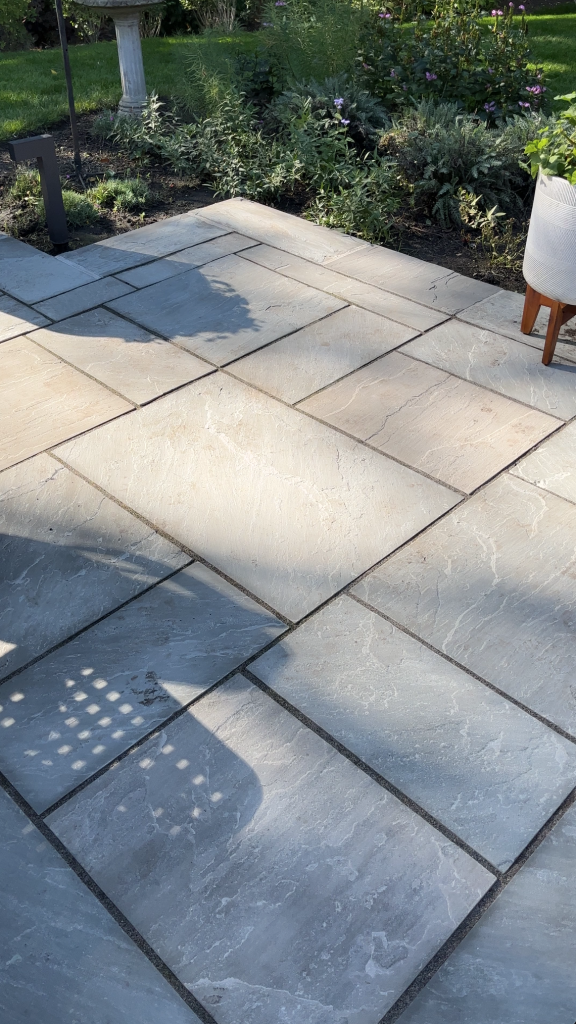
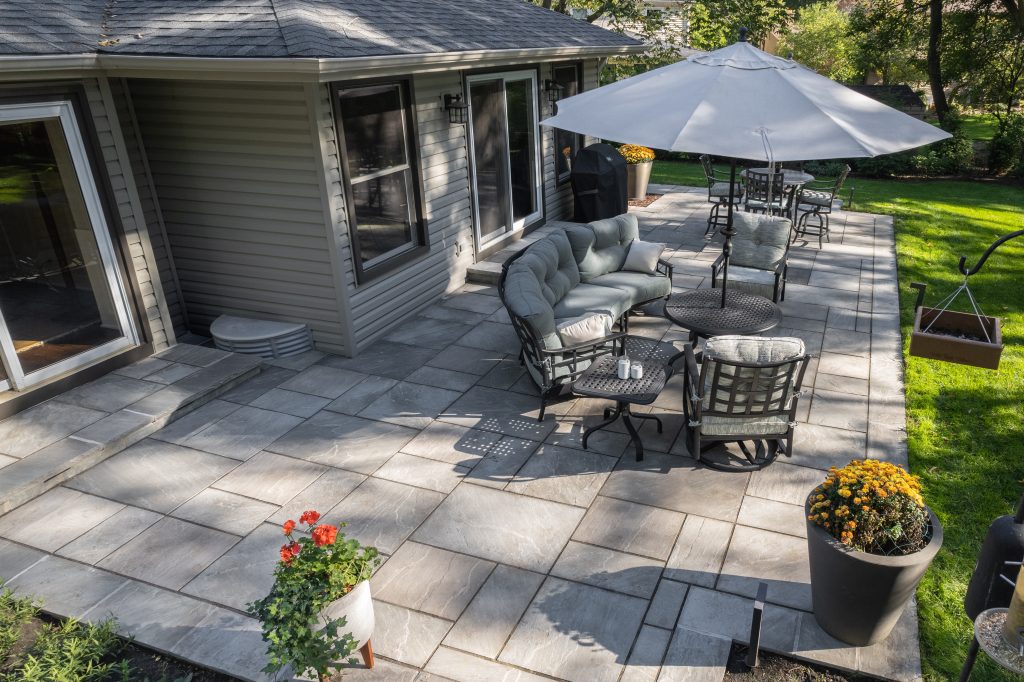
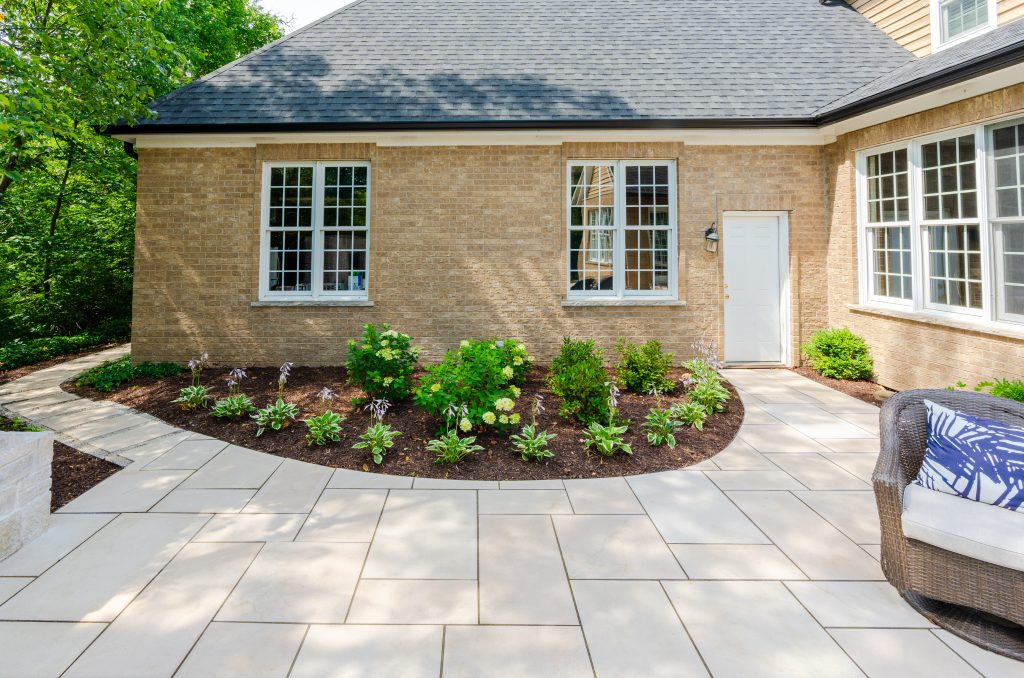
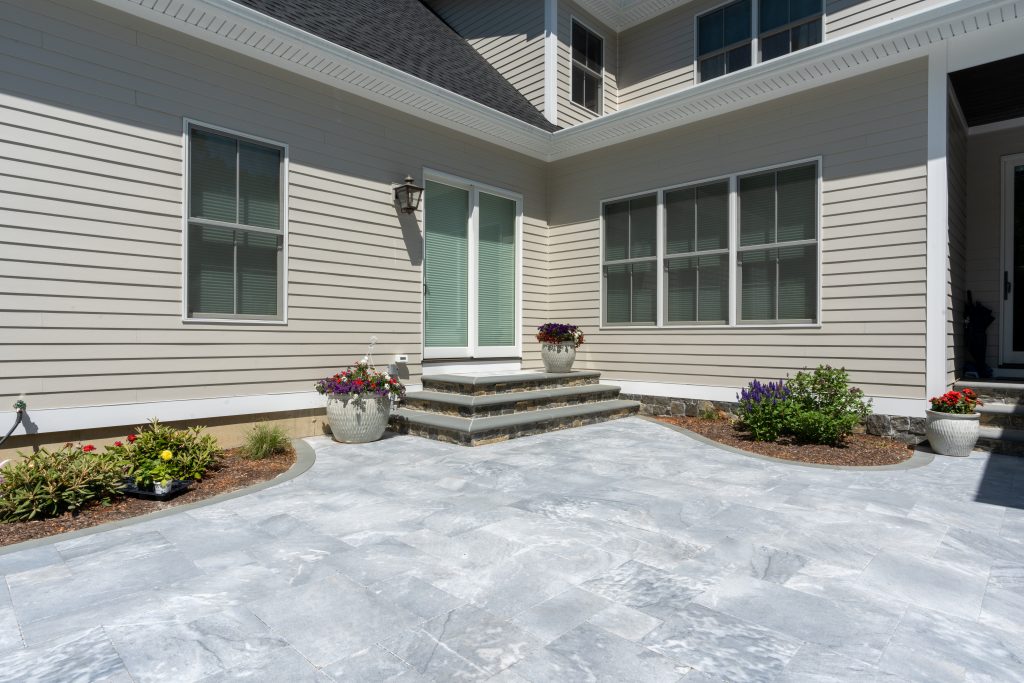
Patios & Outdoor Seating Area
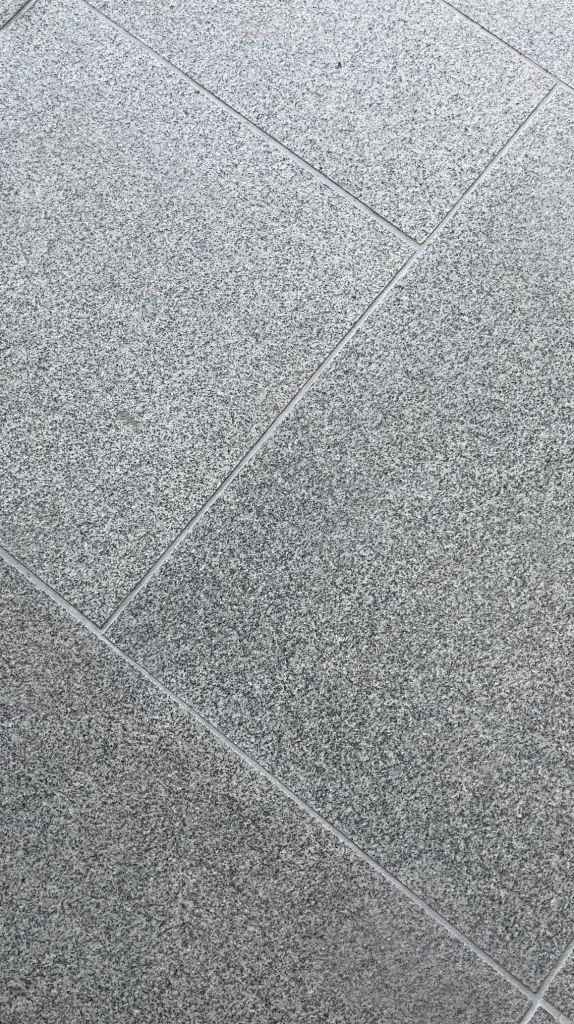
Natural stone is a top choice for patios and outdoor seating areas, offering both durability and elegance. Custom-cut stone slabs can be used to design a personalized patio that fits your specific style and dimensions. Stones like bluestone, travertine, and sandstone are popular for their versatility, and they provide a low-maintenance, long-lasting surface for dining, lounging, and entertaining.
Benefit: Custom stone patios add value to your home, extend your living space, and require little upkeep. They are a long-lasting investment that transforms your backyard into a beautiful and functional outdoor oasis.
Aura™ Natural Landscapes: Blue Mist Granite
Conclusion
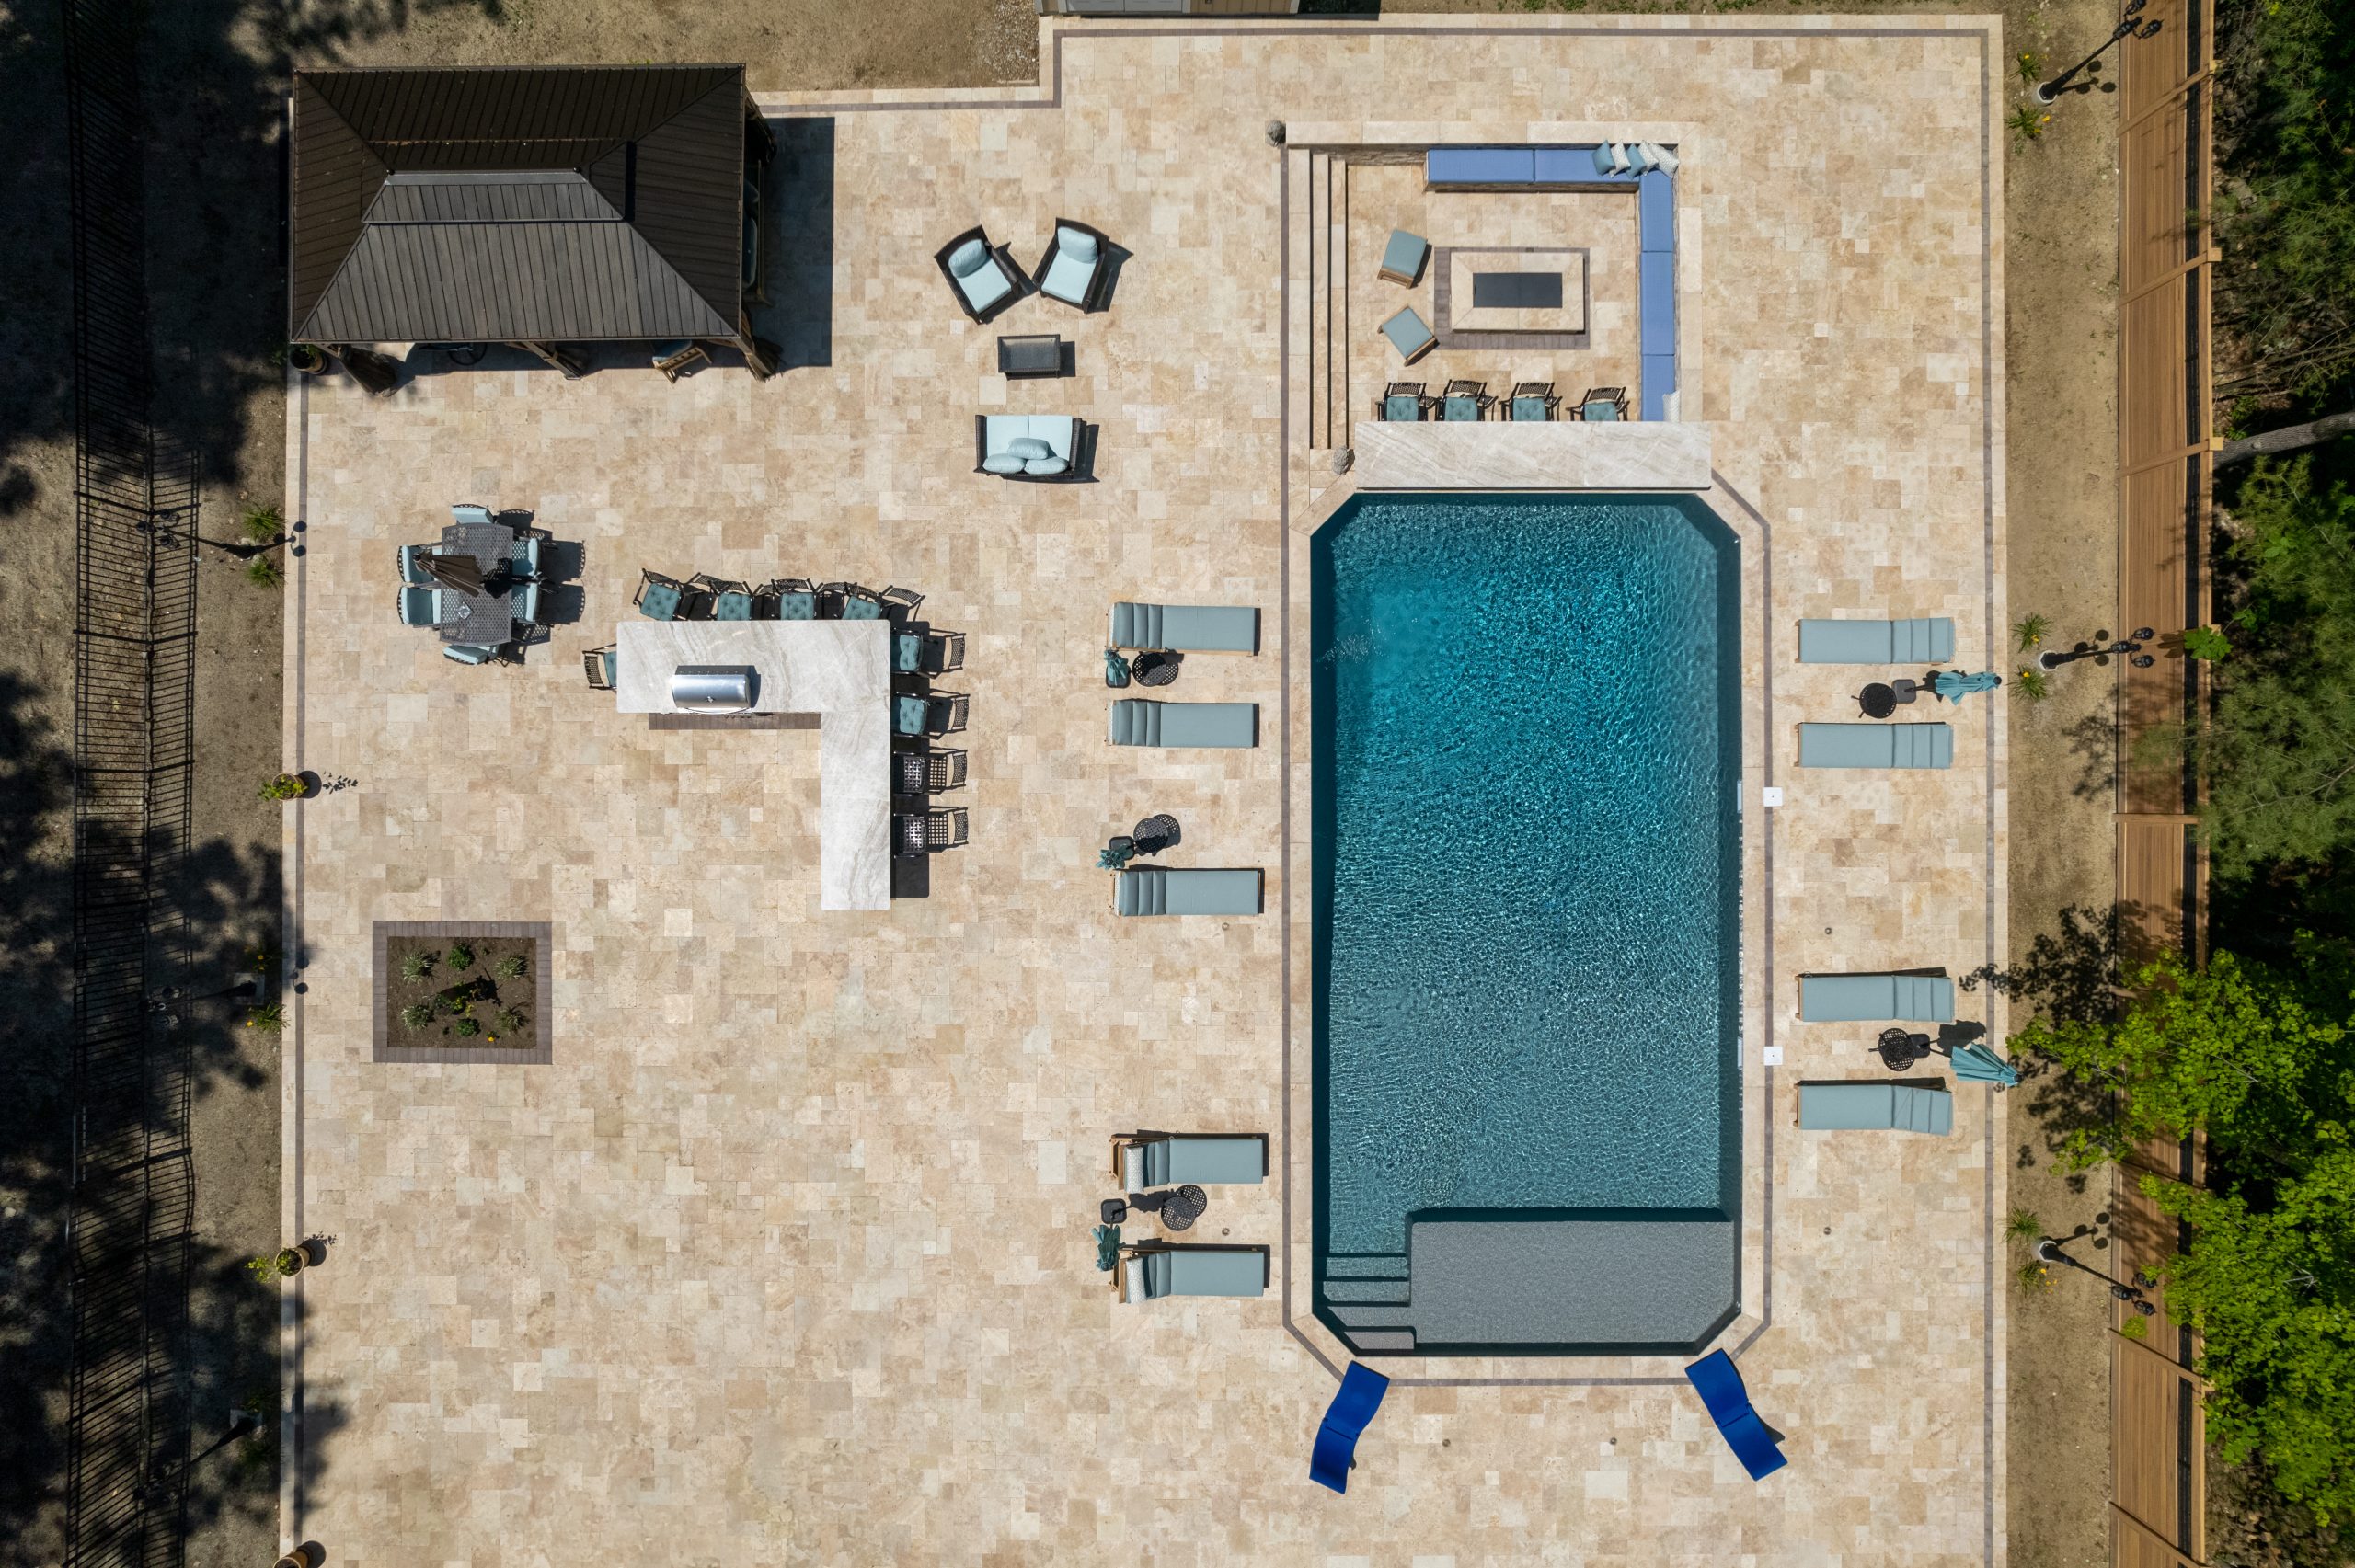
Incorporating custom-cut and fabricated natural stone elements into your backyard design is a fantastic way to enhance its beauty, functionality, and value. Whether it’s custom pathways, a fire pit, pool coping stones, or retaining walls, the possibilities are endless with natural stone. Custom fabrication allows for a personalized touch, ensuring your backyard design is as unique as you are. Choose natural stone to create an outdoor space that stands the test of time and becomes the perfect spot for relaxation and entertaining.
Aura™ Natural Landscapes – Blue Mist / Granite – Irregular flagging and pool coping
The Ultimate Guide to Choosing and Installing Natural Stone Pavers for Your Hardscape Project (part two)
Once you’ve selected the perfect natural stone pavers for your hardscape, the next step is choosing the best method to fill the joints between them. Joint fillers not only impact the aesthetics but also affect the stability and maintenance of the pavers. Here are some of the most popular options for filling joints in your natural stone pavers:
Polymeric Sand for Paver Joints
Polymeric sand is a popular choice for filling joints between pavers because of its durability and functionality.
Considerations: One downside is that polymeric sand can leave a fine residue on the surface of the pavers if not carefully cleaned off during installation. In addition, it may need to be reapplied after several years, particularly in high-traffic areas.
How It Works: Polymeric sand is a mixture of fine sand and special binding agents. When activated with water, it hardens and bonds the pavers together, providing a solid joint that resists shifting, erosion, and weed growth.
Benefits: Polymeric sand creates a long-lasting, low-maintenance solution for keeping your pavers securely in place. It also helps reduce the growth of weeds between the joints.
Application of Polymeric SandPolymeric Sand JointsAura™Natural Landscapes: Sandy Point/Granite
Crushed Gravel for Paver Joints
Crushed gravel is an effective, natural option for filling the joints between pavers, especially if you’re aiming for a rustic or informal look.
Considerations: Gravel can shift over time, especially in areas with heavy rainfall or high foot traffic. It may need to be replenished periodically.
How It Works: Crushed gravel, such as pea gravel, is placed into the joints and compacted to form a stable base. This method allows water to drain freely between the pavers while preventing weed growth.
Benefits: Gravel is cost-effective, easy to install, and adds a natural, organic aesthetic to your hardscape. It’s also great for creating a permeable surface that allows rainwater to pass through.
For areas with heavy traffic or specific structural needs, mortar or concrete can provide a permanent solution for filling the joints between pavers.
Considerations: Over time, mortar or concrete may crack if the pavers shift or settle. This method is more permanent, making repairs or replacements more difficult if necessary.ndscape, including plant life and other materials. This ensures a balanced and cohesive design.
How It Works: Mortar or concrete is applied between the pavers, providing a strong, solid bond. This method is ideal for driveways or areas that need to support heavy loads.
Benefits: Mortar and concrete create durable, long-lasting joints that help prevent shifting and weed growth. They also offer a solid surface for high-traffic areas.
For an eco-friendly, visually appealing option, you can fill the joints between pavers with groundcover plants, moss, or low-growing vegetation.
Considerations: Groundcover plants require more maintenance, such as watering, trimming, and occasional replanting. Depending on your climate, some plants may not thrive and could need additional care.
How It Works: Small plants are placed in the gaps between the pavers. As the plants grow, they fill the joints and provide a lush, green look that softens the hardscape.
Benefits: Groundcover plants add beauty and texture to your hardscape, improving its overall appearance. They also contribute to water absorption and help maintain a sustainable, eco-friendly design.
Aura™Natural Landscapes: Italian Bluestone/Sandstone
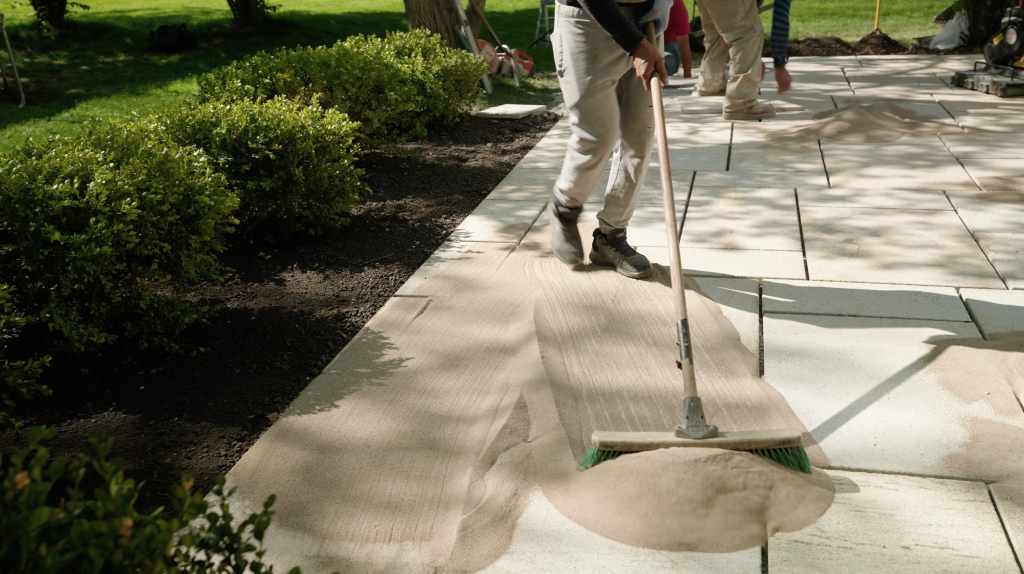
Gravel or Sand Sweeping for Paver Joints
For a simple, budget-friendly solution, gravel or sand can be swept into the joints between pavers.
How It Works: Fine gravel or sand is poured into the joints and swept into place, filling the gaps between the stones. This method is easy to install and works well for smaller-scale hardscapes.
Benefits: This option is low-cost and easy to maintain. Gravel or sand also provides good drainage and flexibility, allowing for simple replacement when needed.
Considerations: Over time, the gravel or sand can shift, particularly in areas with heavy rainfall or foot traffic. Periodic replenishing may be necessary.
Sand Swept JointsAura™Natural Landscapes: Blue Ice Natural/Sandstone
Conclusion
The best method for filling the joints between your natural stone pavers depends on your design vision, traffic load, and maintenance preferences. Whether you choose polymeric sand for its durability, crushed gravel for its rustic charm, or groundcover plants for their natural beauty, selecting the right joint filler ensures your hardscape will remain stable, attractive, and functional for years to come. Choose a joint filler that complements your chosen pattern and finish to complete your perfect outdoor space.
The Ultimate Guide to Choosing and Installing Natural Stone Pavers for Your Hardscape Project (part one)
When designing a beautiful and lasting hardscape, selecting the right natural stone pavers is essential to creating an outdoor space that not only looks amazing but also stands the test of time. From patios and walkways to driveways and garden paths, choosing the ideal profile, pattern, color, and finish for your natural stone pavers can transform your space. Here’s a guide to help you make the best choices for your hardscape project.
Choosing the Right Profile
The profile of your natural stone pavers refers to their shape, size, and edge details. Your choice of profile impacts the overall aesthetic of your hardscape project. Here are some of the most popular profile options:
Cobblestone Pavers: Small, round stones that evoke old-world charm and timeless elegance, cobblestones are often used for vintage-style walkways or to create a European-inspired outdoor space.
Rectangular and Square Pavers: These pavers offer clean, modern lines that are perfect for contemporary landscapes. They can be arranged in various patterns, ranging from sleek linear arrangements to more intricate interlocking designs.
Irregular or Flagstone Pavers: Flagstones are large, flat stones with irregular edges, giving them a natural, organic appearance. They are ideal for creating a rustic, freeform look, perfect for informal garden paths or naturalistic outdoor settings.
Aura™Natural Landscapes: Silver Ridge/GraniteAura™Natural Landscapes: Blue Mist/Irregular Flagstone
Selecting the Perfect Pattern
The pattern you choose for your pavers can completely change the visual effect of your hardscape. Here are some of the most popular paver patterns:
Irregular Pattern: The irregular pattern uses stones of various shapes and sizes to create a free-flowing, natural look. Each stone is carefully chosen for its unique shape, fitting together like a puzzle to form an organic, almost random arrangement. Unlike the structured randomness of the random pattern, the irregular pattern intentionally embraces the natural variations in stone, creating a more curated, yet still rustic, design. This pattern is perfect for rustic pathways, garden areas, and informal patios, where a natural, earthy aesthetic is desired.
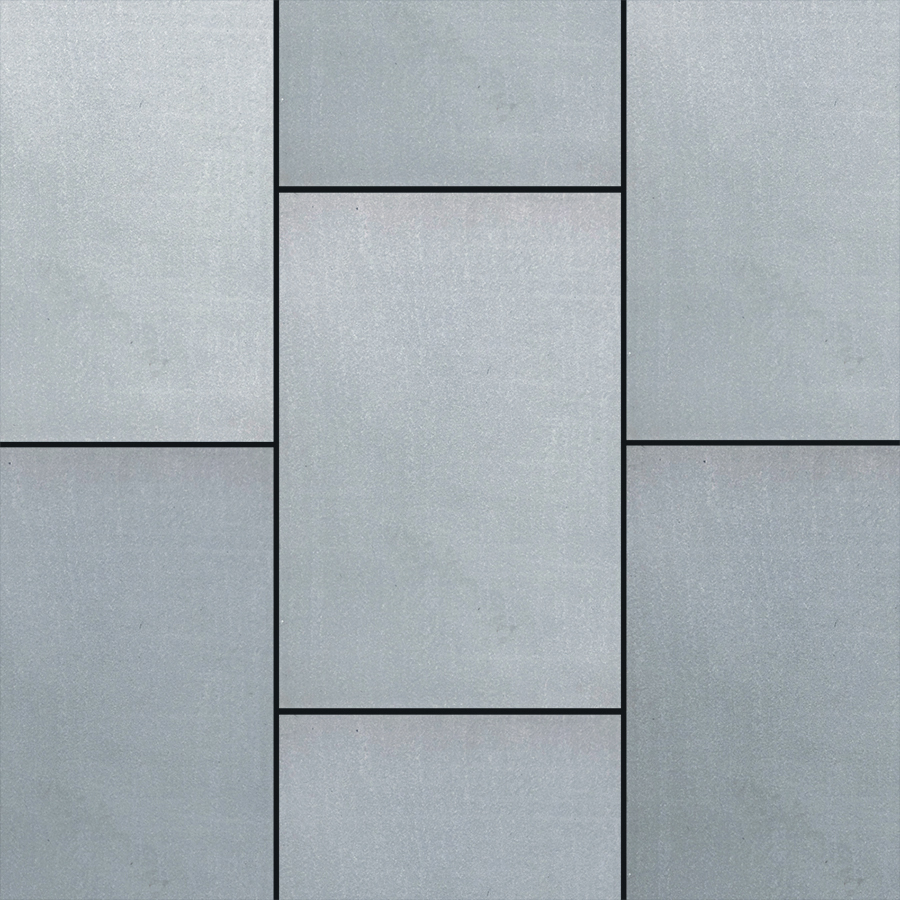
Running Bond: This traditional pattern features staggered rectangular pavers, providing a neat and uniform look. It’s ideal for creating a classic, structured design in your outdoor space.
Herringbone: Characterized by its distinctive zig-zag pattern, herringbone creates a bold, dynamic effect. It’s particularly suited for high-traffic areas like driveways and walkways.
French Pattern: Also known as the Versailles pattern, the French pattern uses four different sizes of pavers arranged in a repeating geometric design. This pattern offers a luxurious, old-world feel and is perfect for both formal and informal spaces, such as patios or garden paths.
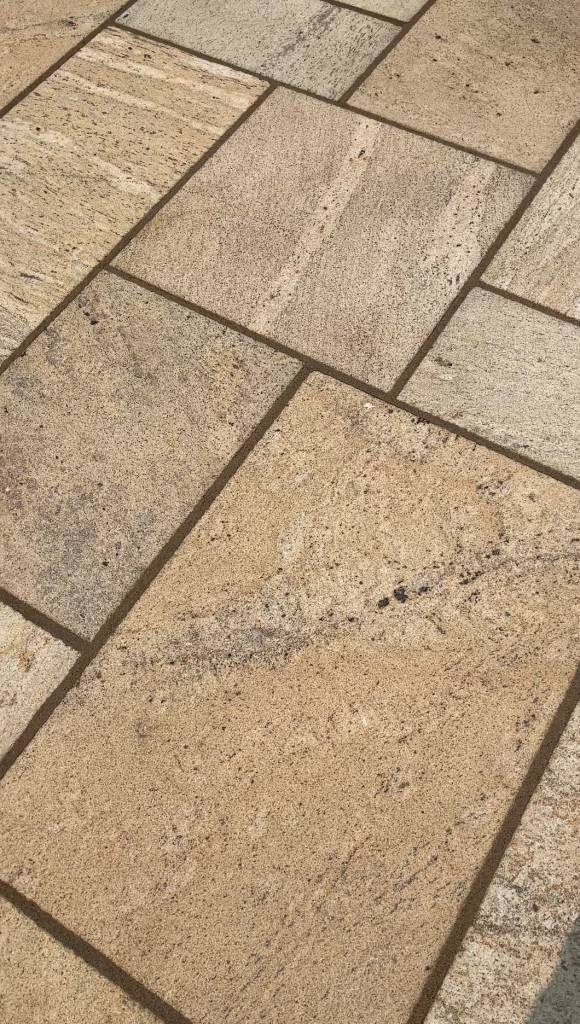
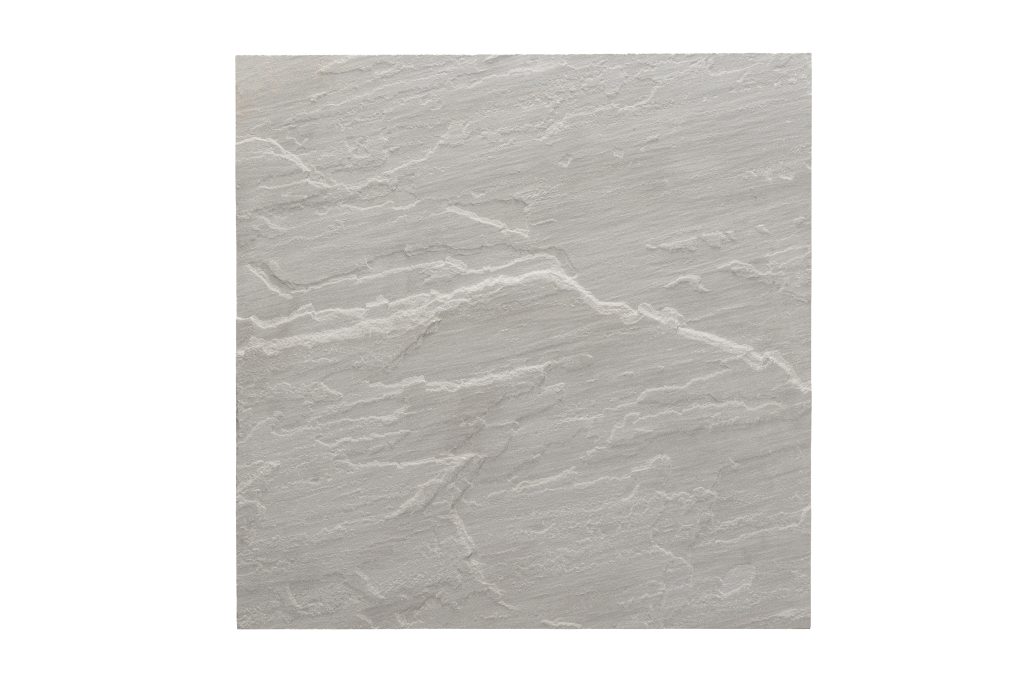
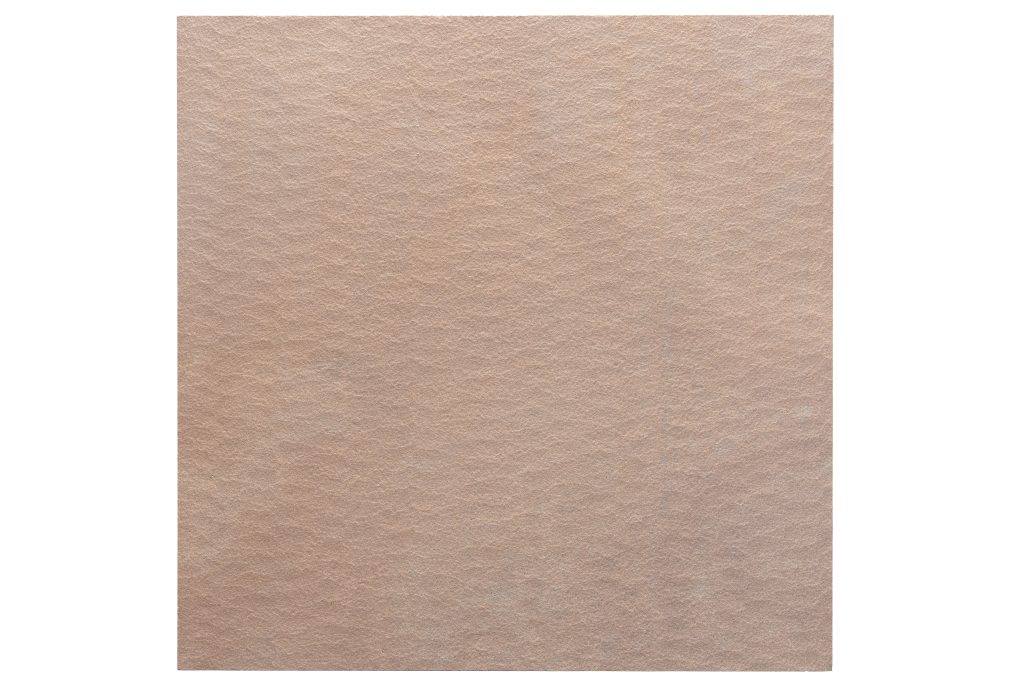
The color of your natural stone pavers plays a significant role in complementing the surroundings and enhancing the overall look of your hardscape. Natural stone comes in a variety of hues, from earthy neutrals to bolder tones. Here are some options to consider:
Neutral Tones: Shades like beige, gray, tan, and brown are versatile and work well in most outdoor settings. These colors create a soothing, harmonious environment and blend effortlessly with surrounding landscaping.
Warm Earthy Tones: Rich reds, oranges, and golds add warmth and vibrancy to your hardscape. These colors are ideal for Mediterranean, Southwestern, or rustic-style designs.
Cool Blues and Grays: Slate-gray and blue-toned stones create a sleek, modern look, making them ideal for contemporary outdoor spaces and coastal designs.
When choosing the color for your pavers, consider the surrounding landscape, including plant life and other materials. This ensures a balanced and cohesive design.
Oxford Buff/SandstoneAutumn Brown Natural/SandstoneMisty Blue/Marble
Choosing the Right Finish
The finish on your natural stone pavers affects both their appearance and their functionality. Depending on your aesthetic preferences and the intended use of the space, there are several finishes to choose from:
Natural Finish: A natural finish retains the stone’s inherent texture and rugged surface, which works well in informal landscapes. This finish gives your pavers an organic, earthy appearance, making it ideal for casual, nature-inspired designs.
Thermal Finish: Thermal finishing involves exposing the stone to high heat, which results in a slightly textured surface with a naturally rough appearance. This finish enhances grip, making it ideal for outdoor spaces that require a non-slip surface, such as pool decks or walkways. It also provides a rugged, natural look.
Tumbled Finish: Tumbled pavers have a worn, weathered appearance, giving them a rustic, old-world charm. They are also less slippery, making them ideal for high-traffic areas or poolside.
Blue Ice/Sandstone/Natural FinishAutumn Brown/Sandstone/Thermal Finish
Continue to part 2 to learn more about the best methods and options for filling the joint between your natural stone pavers.
Manufactured stone veneer is often top of mind for exterior facades—but the same benefits (and more) make it an ideal option for commercial interiors. From ease of installation to eye-catching aesthetics, manufactured stone can create a look designers love while infusing warmth, authenticity, and style into the space.
Why Is Manufactured Stone Suitable for Commercial Interiors?
Many of the traits that make manufactured stone veneer a go-to product for building exteriors carry over to the interior—and then some. Among the benefits for commercial spaces:
• Design versatility: Commercial interiors, particularly those used by the public, rely on beautiful aesthetics to portray an image and make customers feel welcome. Manufactured stone veneer’s sheer abundance of profiles, styles, and colors means specifiers can meet nearly any design need. Seeking a contemporary, linear look? You got it. Want something rustic and textured? It’s available. You can even find MSV that replicates the look of barn siding or other woods—splinters not included. Plus, there are looks and colors available that simply cannot be found in nature.
• Consistent appearance: Natural stone can vary greatly from piece to piece, over time and across locations; and it is not an unlimited resource. Because it is manmade, manufactured stones can replicate the varied look of natural stone, but with looks and colors can then be replicated over and over. This allows franchises to create consistency from location to location. It also allows individual stones to be replaced if they somehow get damaged.
• Biophilia: Biophilic design, which help building occupants connect with nature, is an ongoing trend. Manufactured stone veneer allows designers to marry indoors and out while creating calmer spaces—and do so without the higher cost of real stone.
Image courtesy Westlake Royal Building Products.
• Lighter weight: Manufactured stone veneer’s lighter weight typically doesn’t need special structural support, and it’s suitable for some areas where natural stone is too heavy, such as barrel ceilings.
• Ease of installation: The lighter weight also makes MSV easier to maneuver into interior spaces for installation. Plus, the manufacturing process creates shapes that fit together nicely, so there’s typically less cutting and repositioning required versus the unpredictability of natural stone.
What Commercial Interiors Applications Make Sense for MSV?
Manufactured stone veneer offers design versatility for a range of applications in commercial lobbies, waiting areas, and much more. Try it for accent walls, fireplaces, and columns, and even for wayfinding and signage.
A few examples include:
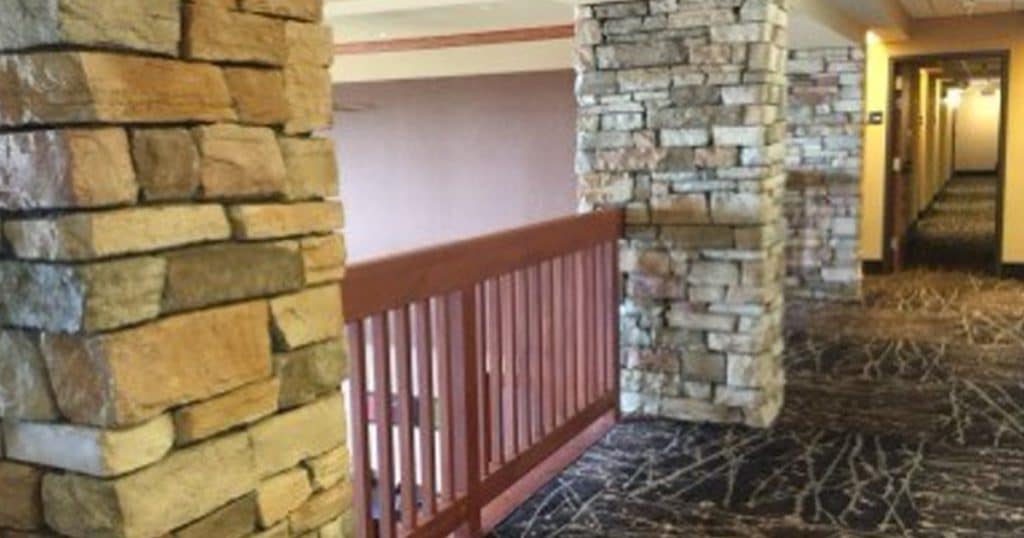
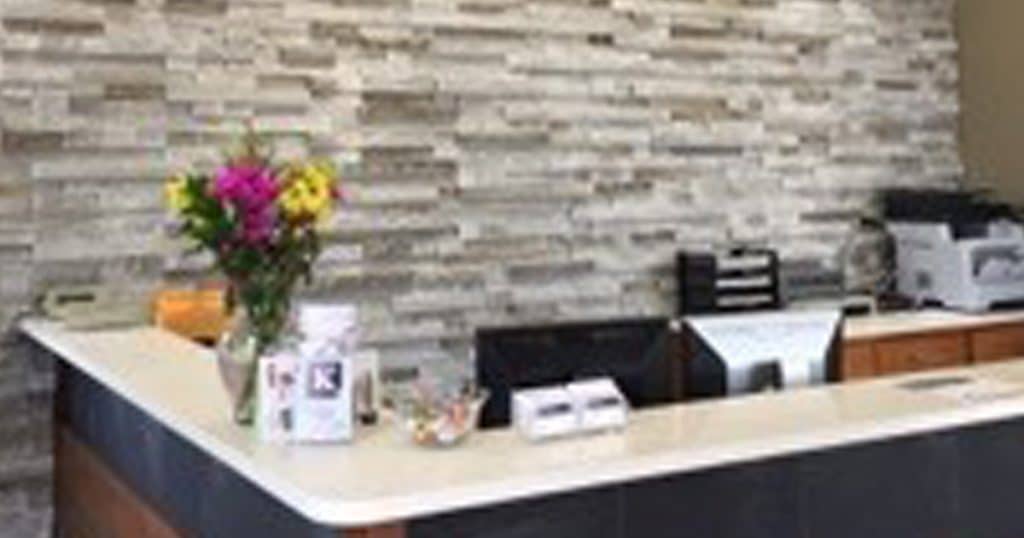
• Hospitality: Cozy lobbies are welcoming to guests. Use MSV for a feature wall behind the check-in desk or wrapping the front of it, add style to interior columns, or infuse warmth around the fireplace. Franchises can easily replicate looks for familiarity and consistency, helping to create a sense of belonging.
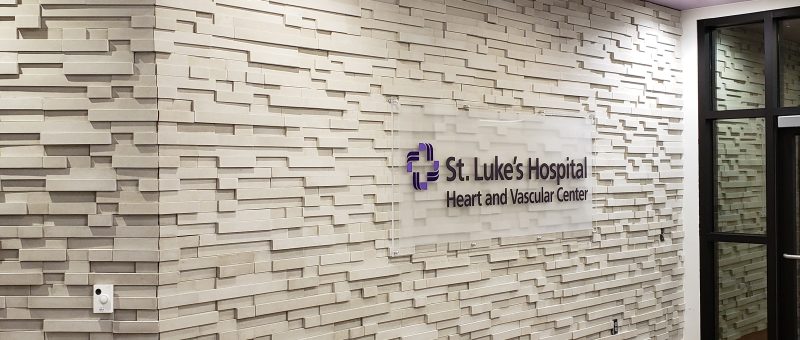
• Healthcare: More and more hospitals are recognizing how warm interiors, versus cold, blank walls, can help in patient healing and well-being. In areas of the building where a sterile environment isn’t needed, such as lobbies and waiting rooms, MSV can easily add a comforting feeling or be a bit reminiscent of home. Stone signage can help draw attention to adjacent wings.
• Schools and libraries: Similarly, the warmth of stone and the biophilia it provides can ease stress in schools and add a calm, quiet appeal to libraries.
• Office lobbies and waiting areas: Manufactured stone’s versatility can strike nearly any vibe—whether you’re outfitting an ultra-modern urban accounting firm or the rustic headquarters of an outdoor store. The possibilities are endless to meet each company’s unique aesthetic for the perfect first impression.
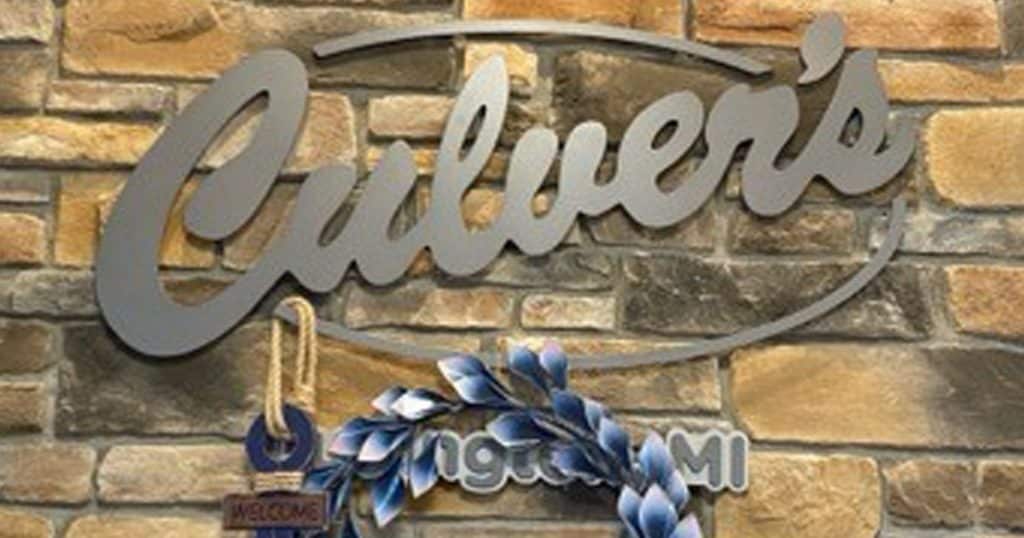
• Restaurants: Add MSV as durable, eye-catching décor behind the bar, in lobbies, and more. This is another application where franchises can benefits from manufactured stone’s consistency.
Image courtesy Westlake Royal Building Products.
No matter the location, application, or design vibe, manufactured stone veneer offers a host of benefits for commercial interiors. Browse our manufacturer members to get started creating the ideal design for your next project.ation of what you can expect to see with the finished project.
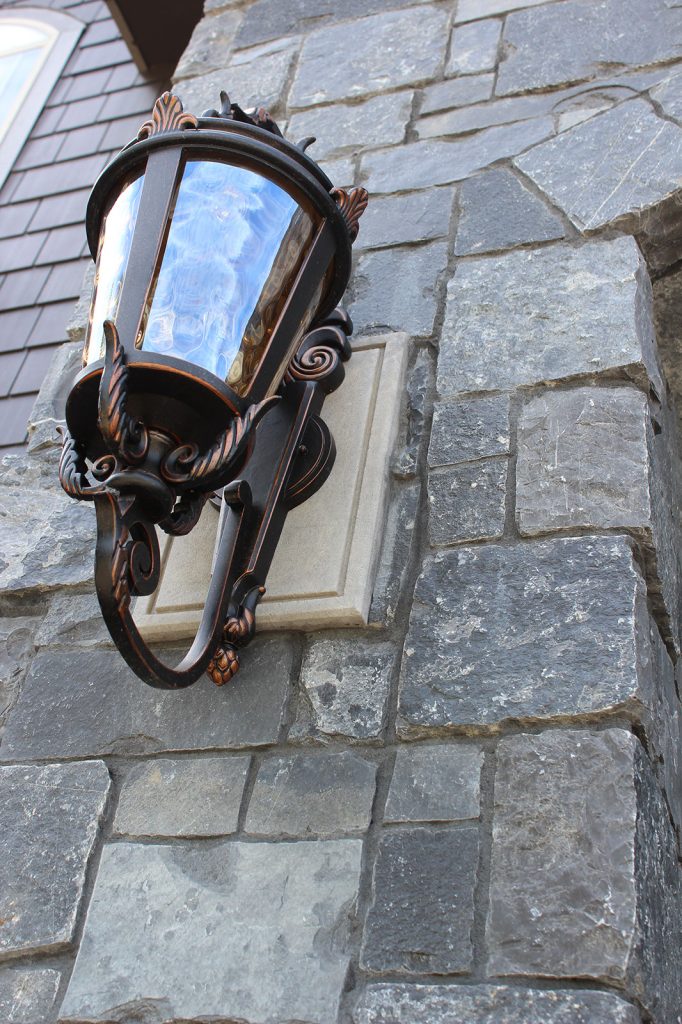
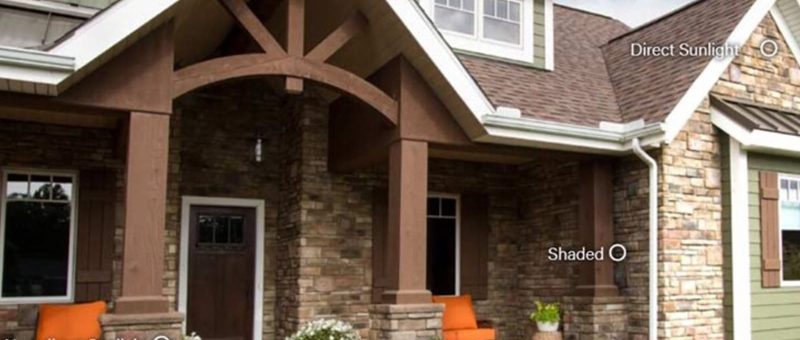
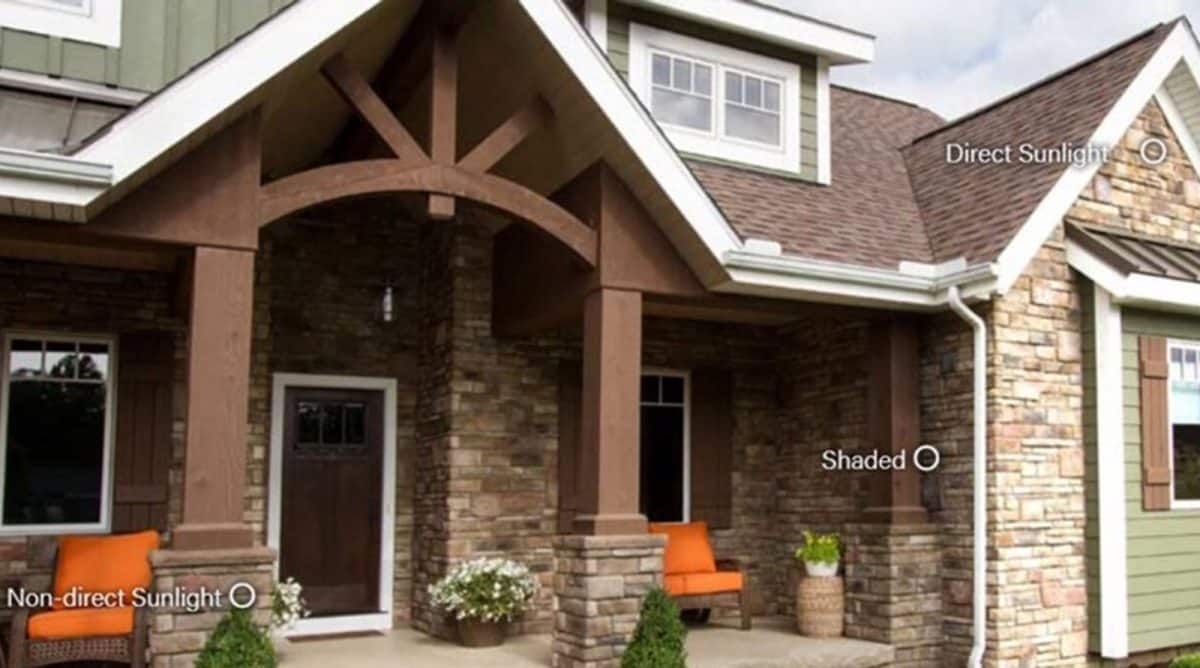
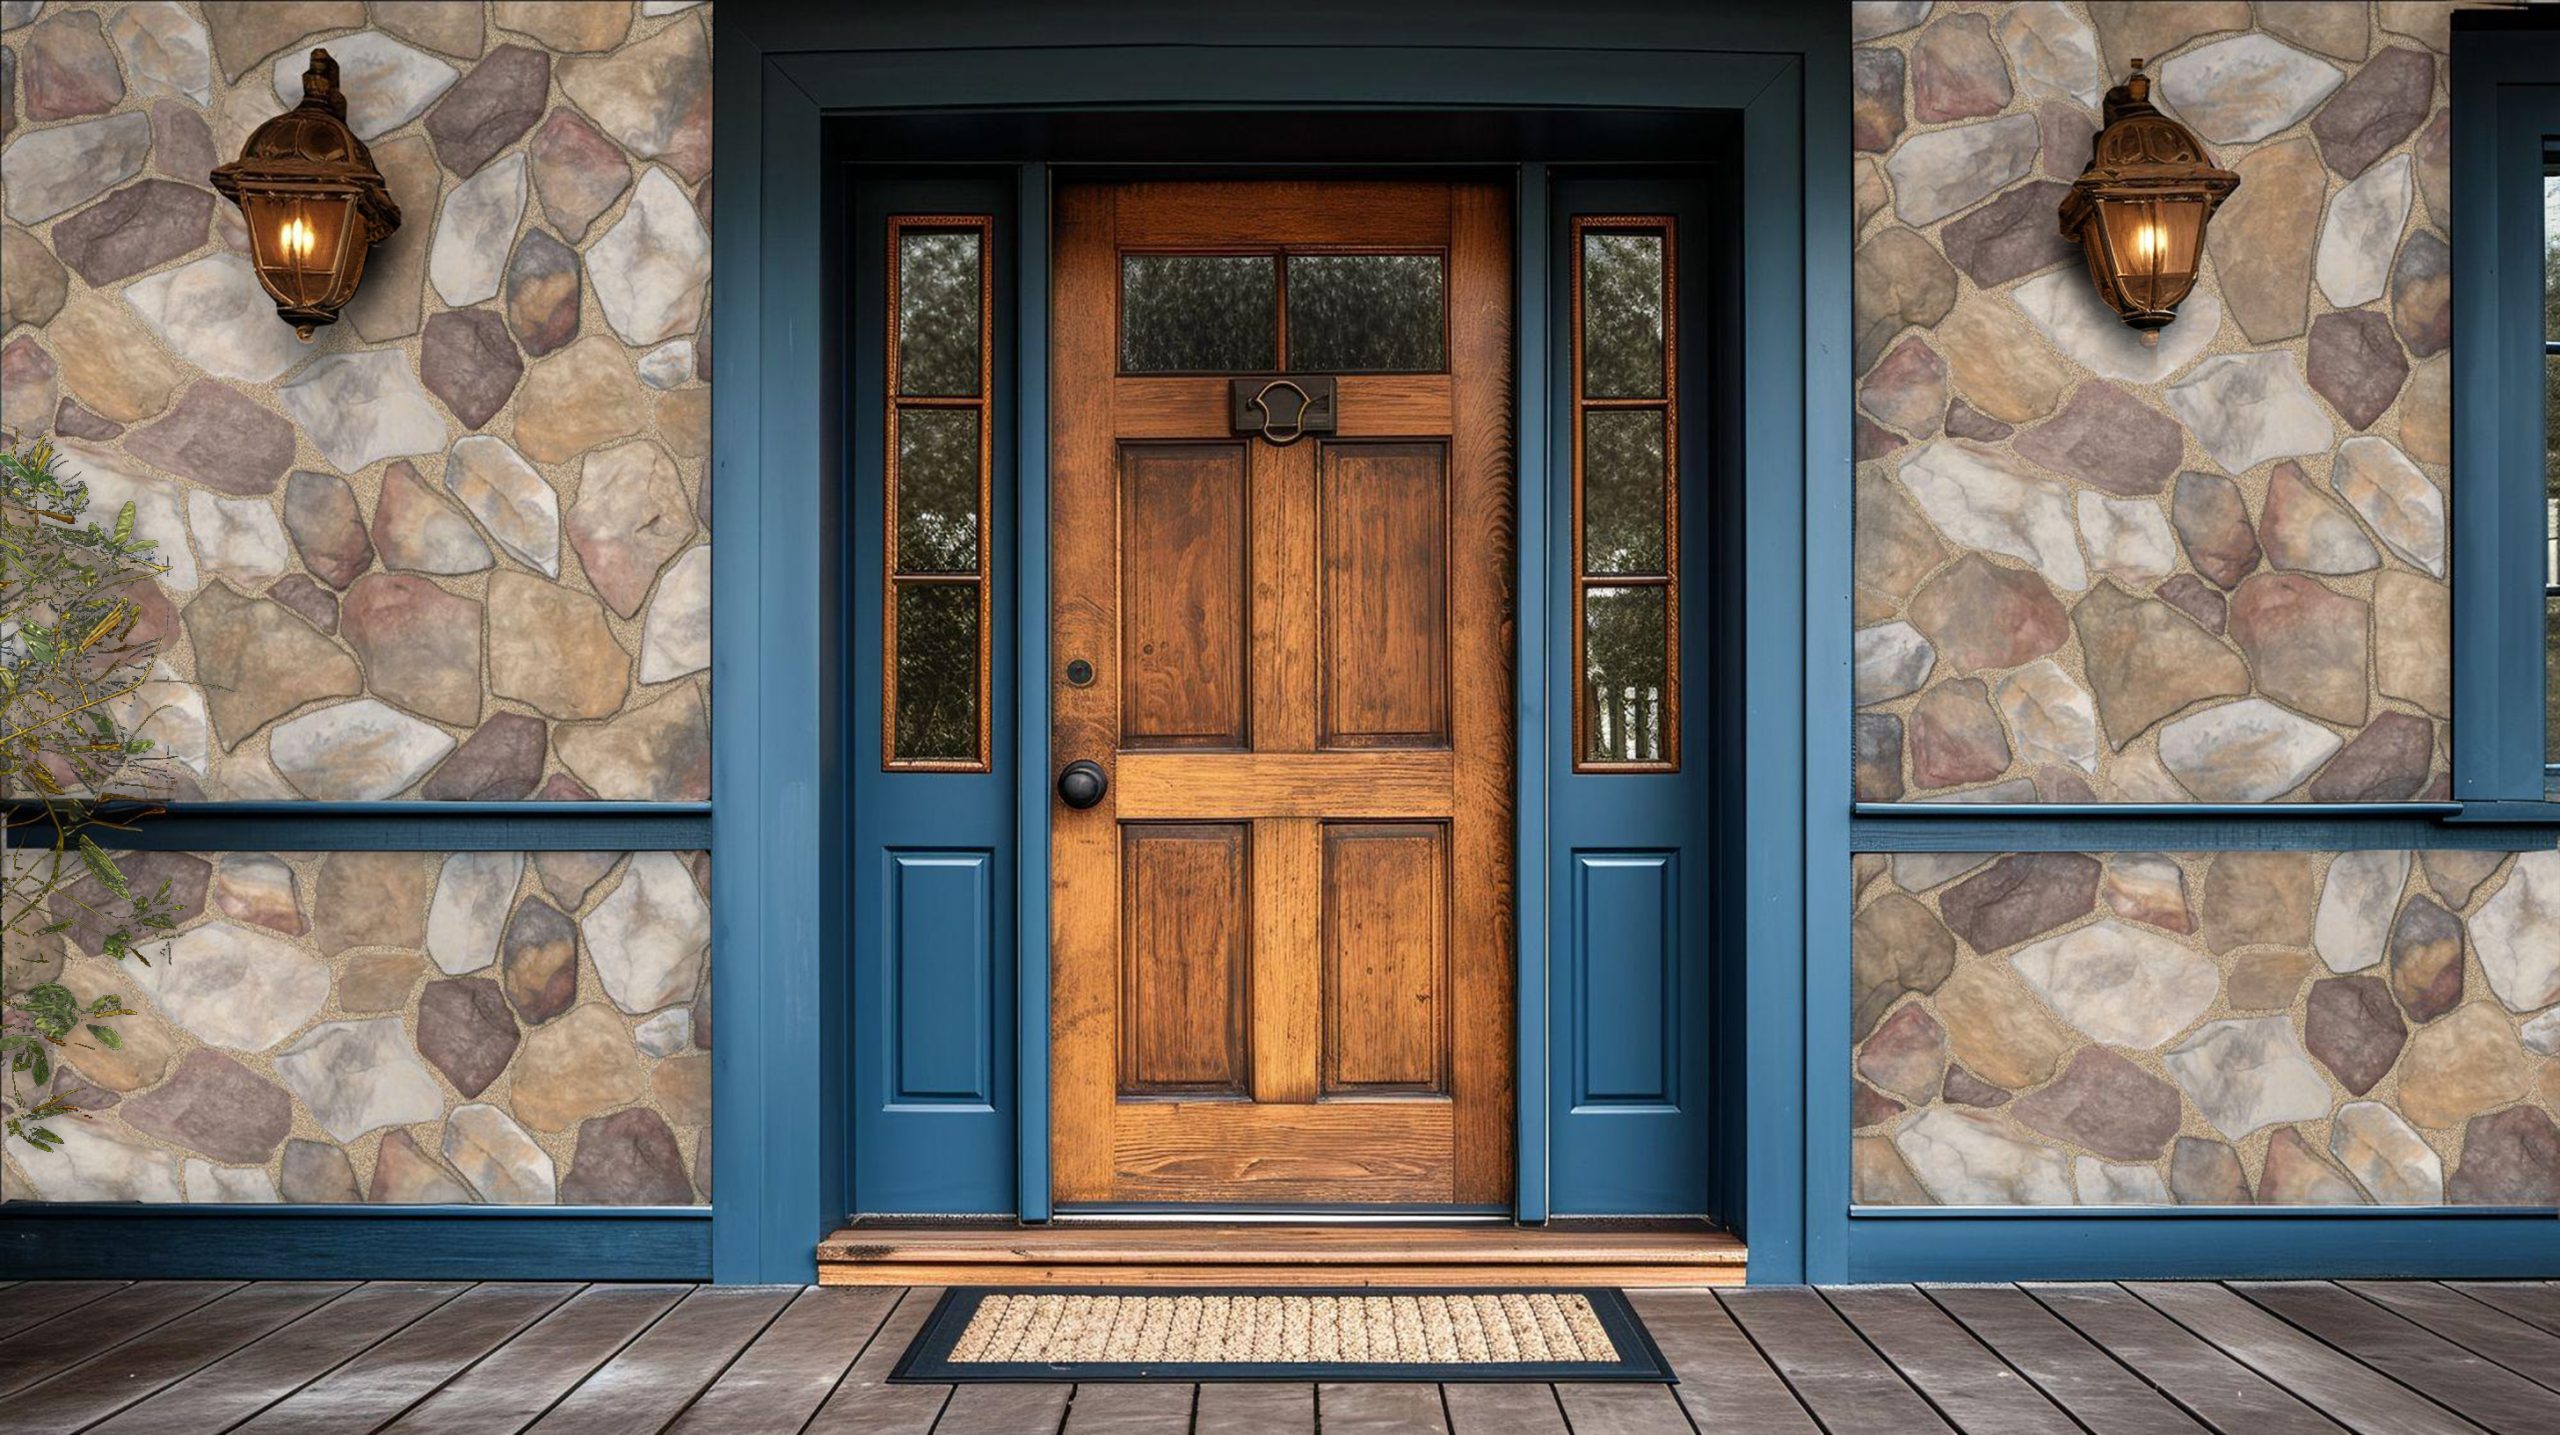
Along with considering the style, texture, and color of manufactured stone veneer as it pertains to personal tastes and the home’s décor, it’s also important to weigh how lighting will impact the way the stone will look on the completed project. Lighting can play a great role in how vivid stone colors appear, whether the stone application is on the outside or inside of the home.
Understanding the lighting conditions under which the stone will be viewed will help you identify the stone color that achieves the desired look of the home.
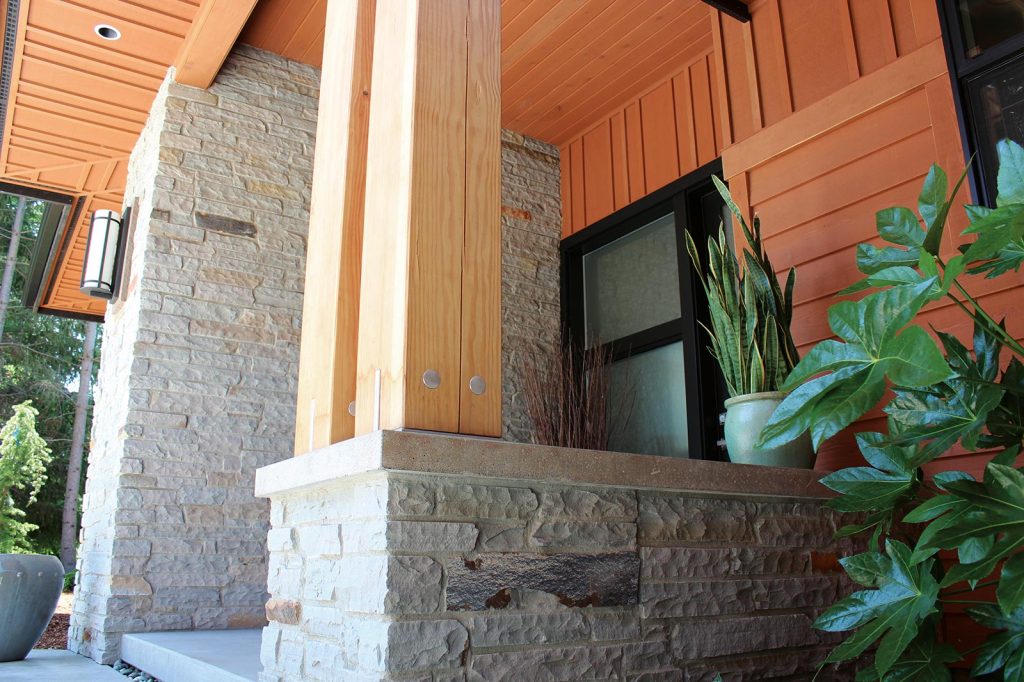
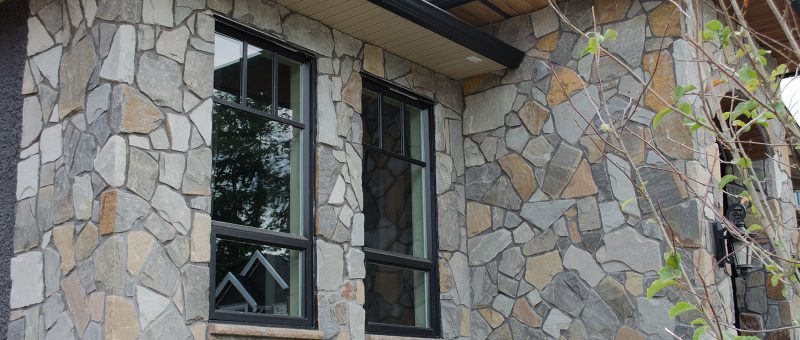
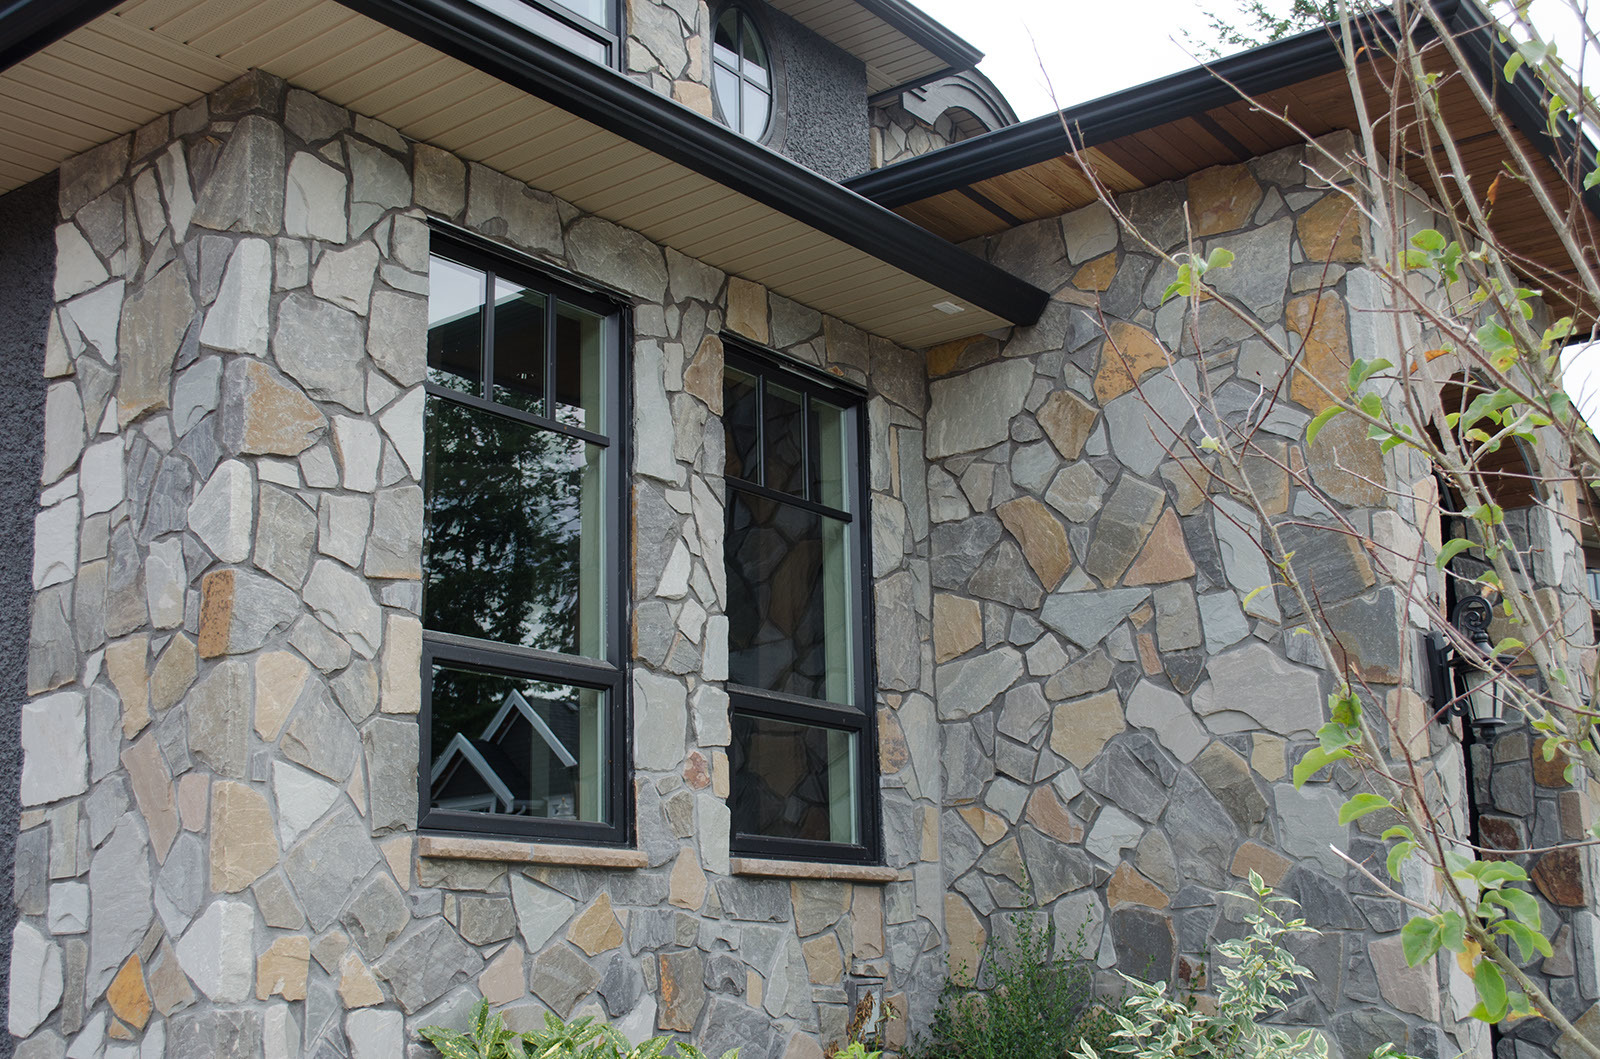
Exterior Stone Applications
Daylight, or more specifically, direct sunlight versus indirect sunlight, affects how we perceive stone color. In the image above, notice how direct sunlight has a dramatic effect on the color of the stone. Direct sunlight can also create dramatic shadow lines, providing increased visual appeal.
As you look at the stone colors in the shaded parts of the home, it begins to take on a completely different look and feel. Colors become less vivid, creating a softer, more subtle look. Shadow lines are reduced and sometimes eliminated.
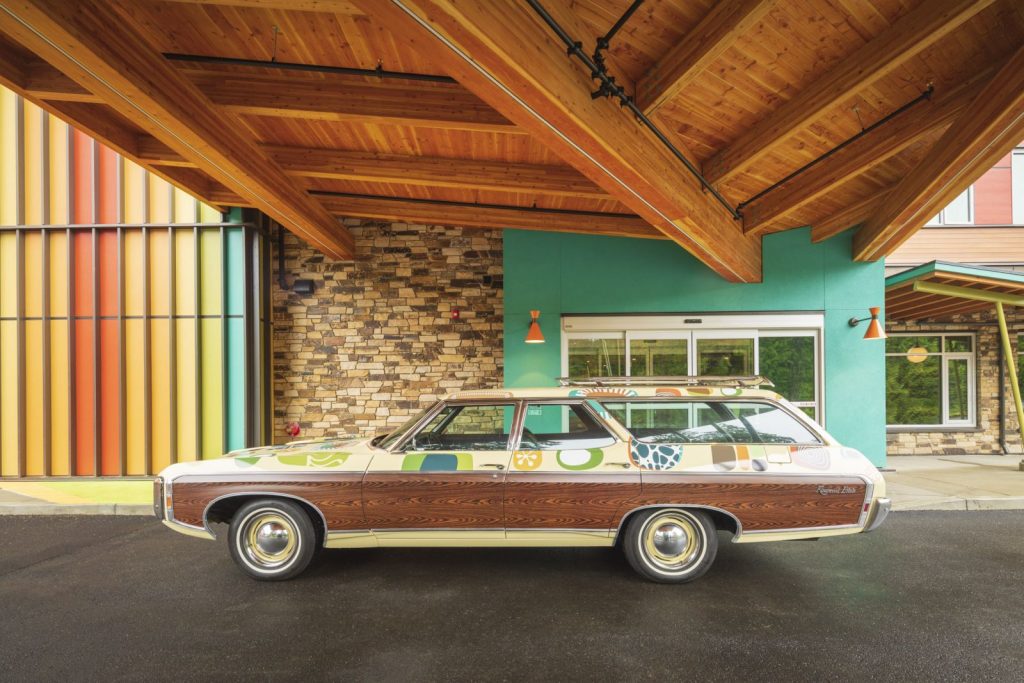
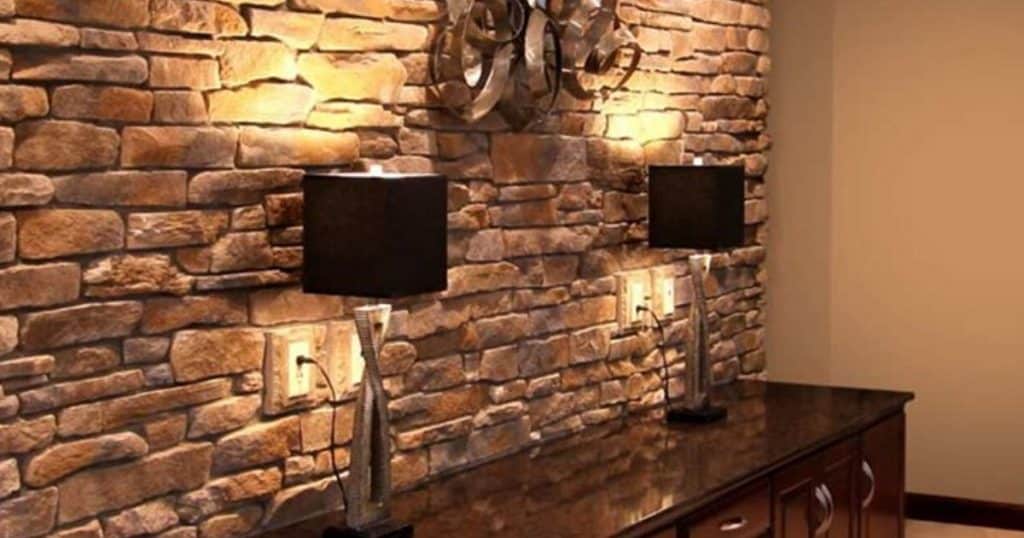
Interior Stone Applications
Lighting can have a tremendous influence on how we perceive color inside the home as well, as shown in the picture above. Light reflected from painted walls, stained wood, and colored carpeting can provide dramatic color shifts that can make the stone color appear different creating an impressive atmosphere within your home.
When choosing manufactured stone veneer products for exterior or interior purposes, be sure to look at samples within the environments in which they will be installed. This will provide a truer representation of what you can expect to see with the finished project.
How to Properly Care and Maintain Installed Manufactured Stone Veneer
Manufactured stone veneer (MSV) is a popular choice for both interior and exterior applications, offering the timeless look of natural stone while being more lightweight and cost-effective. Whether you’re a mason professional or a homeowner, proper care and maintenance are essential for preserving the beauty and durability of the installed veneer.
Toro Stone™ Cream / Canyon Stone
General Care Guidelines for MSV
Regular Inspection
The first step in maintaining MSV is conducting regular inspections. Perform a visual check every few months or at least once per season to ensure there are no obvious cracks, loose pieces, or other signs of wear. This is especially important for exterior applications exposed to the elements.
Key Areas to Inspect:
Weep Holes & Drainage: Make sure any weep holes or drainage systems are clear of debris to prevent water buildup behind the veneer, which could lead to mold, mildew, or structural issues.
Mortar Joints: Look for any gaps or cracks in the mortar, which could allow water infiltration or compromise the veneer’s stability.
Cracks or Chips: Examine individual stone pieces for cracks, chips, or discoloration.
Toro Stone™ Chardonnay / Fieldstone
Cleaning the Veneer
Manufactured stone veneer can accumulate dirt, dust, and environmental debris over time. While it doesn’t require intensive cleaning like some other surfaces, periodic cleaning helps maintain its aesthetic appeal.
Steps for Cleaning:
Gentle Wash: Use a soft-bristle brush and mild soap solution (preferably a pH-balanced cleaner) to scrub the surface. Avoid harsh chemicals or power washing, as they can damage the finish or grout joints.
Rinse Thoroughly: Always rinse with clean water after cleaning to remove any soap residue.
Avoid Abrasive Tools: Steel wool or wire brushes can scratch the surface, so use non-abrasive materials for scrubbing.
Stain Removal: For stubborn stains, you can use a stone-safe cleaner or a mixture of baking soda and water but always test in an inconspicuous area first.
Prosoco products are recognized by industry professionals to be the most effective, reliable and practical products for final clean down on new construction projects. For more information, please visit www.prosoco.com
Proper Moisture Management
Water is one of the primary culprits when it comes to damage to stone veneers. While MSV is designed to handle some exposure to moisture, it’s important to manage water infiltration properly.
Seal the Surface
Applying a high-quality water repellant or penetrating sealer can help protect the veneer from moisture damage. These sealers reduce water absorption and prevent staining, while still allowing the stone to “breathe.” A sealer should be applied every 2-3 years, depending on the local climate and the type of exposure the stone experiences.
Check Flashing and Drains
Ensure that proper flashing is in place to direct water away from the stone veneer, especially around windows, doors, and joints. If water is allowed to collect behind the veneer, it can cause structural damage or create conditions for mold and mildew growth.
Toro Stone™ Blanc / Reclaimed Brick
Repairs and Touch-Ups
Over time, minor damage to the stone veneer can occur, whether from weathering, accidental impacts, or general wear. The good news is that MSV is relatively easy to repair.
Fixing Cracks and Chips:
Small Chips: For small chips, a simple touch-up with matching grout or mortar may suffice. Use a grout filler that matches the color and texture of the stone.
Larger Cracks: For larger cracks or damaged stones, you may need to replace the individual stone veneer. Carefully remove the damaged stone, clean the area, and install a new piece, ensuring the mortar is properly applied.
Repointing Mortar Joints:
If mortar joints start to deteriorate or crack, it’s essential to repoint them promptly. This helps maintain the structural integrity and aesthetic of the veneer. To repoint, scrape out the old mortar, clean the joints, and apply fresh mortar. Be sure to match the color and texture of the original mortar for a seamless look.
Toro Stone™ Lone Peak / Canyon Stone
Protection During Extreme Weather
In regions with harsh winters or extreme heat, it’s important to take additional precautions to protect the stone veneer.
Winter Care:
Ice and Snow: Avoid using deicing chemicals (such as salt) on or near your stone veneer. These chemicals can cause surface damage over time.
Freeze-Thaw Cycles: Water that infiltrates the stone and freezes can cause it to crack or pop loose. Make sure the surface is sealed properly and ensure that the veneer has good drainage to prevent water buildup.
Summer Care:
Heat Exposure: While manufactured stone is quite resilient to heat, prolonged exposure to high temperatures can cause surface discoloration or fading. Use shade structures or awnings if the stone is exposed to intense sunlight for extended periods.
Toro Stone™ Intense Red / Vintage Brick
Final Thoughts for Masons and Homeowners
Maintaining manufactured stone veneer isn’t complicated, but it requires a consistent effort to inspect, clean, and repair as needed. Regular inspection and maintenance not only enhance the aesthetic value but also extend the lifespan of the veneer, making it a wise investment for any property.
For masons, ensuring that the installation is done correctly in the first place, with proper flashing, drainage, and joint construction, is key to minimizing future maintenance. Homeowners, meanwhile, can rest easy knowing that with just a little care, their stone veneer will continue to look as beautiful as the day it was installed.