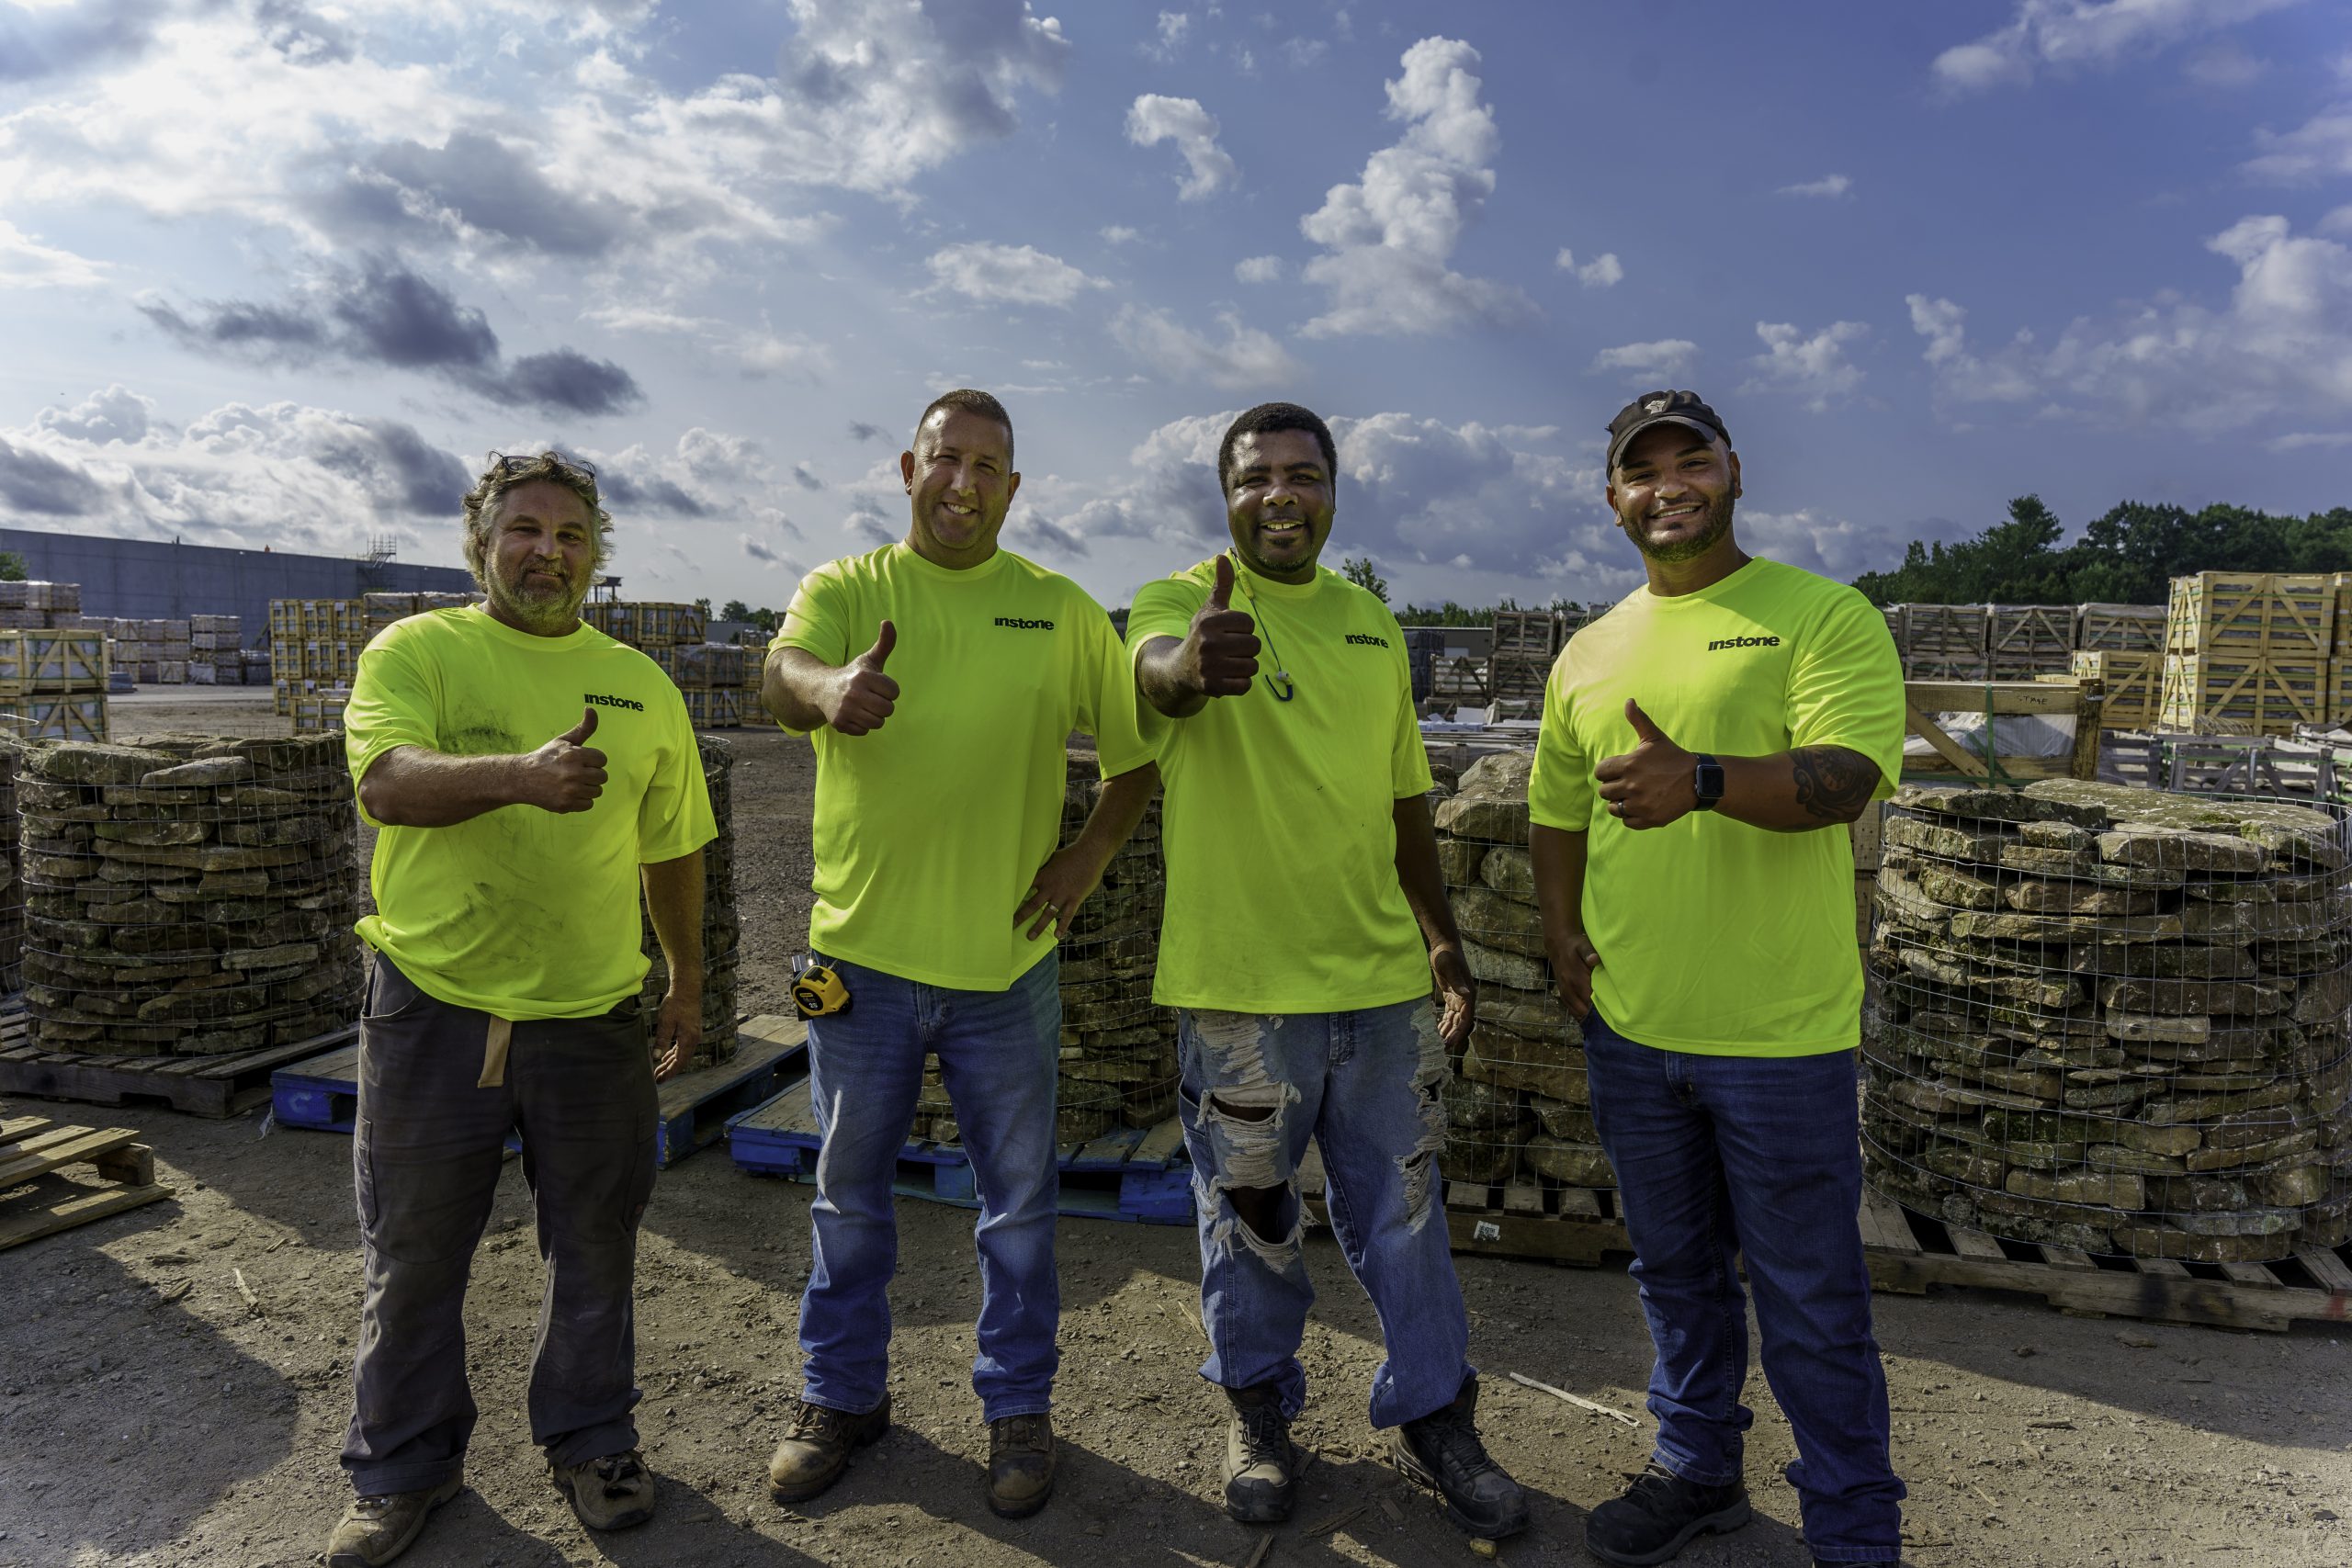
Behind the Beauty: What Really Goes into Proper Hardscape Patio Planning and Preparation
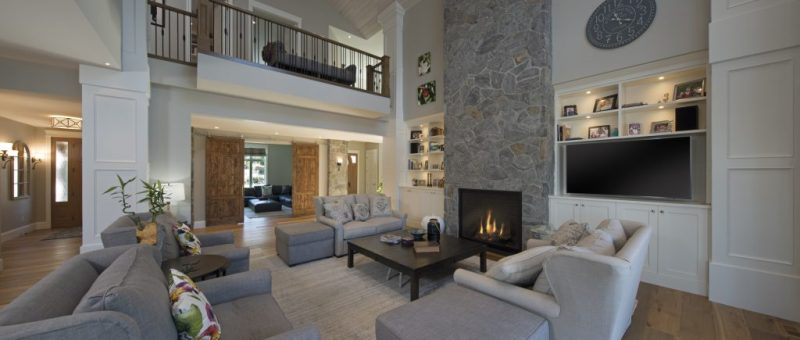
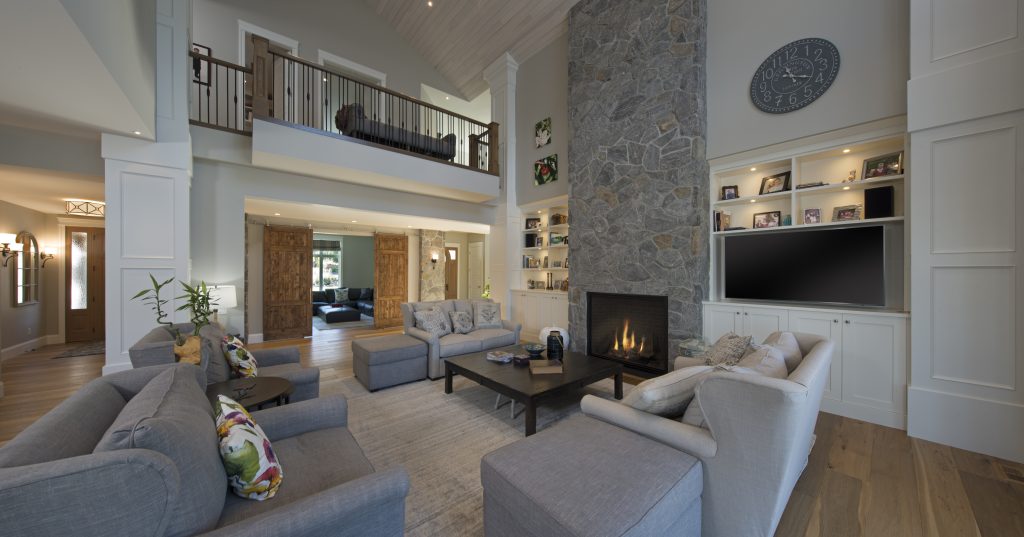
Embarking on a hardscaping project is akin to crafting a masterpiece. It’s not just about laying stones or constructing patios; it’s about sculpting an outdoor oasis that exudes beauty and functionality. To the untrained eye, a nice patio can look deceptively simple – you just pull out the grass, flatten the dirt, and lay the stones on the ground, right?
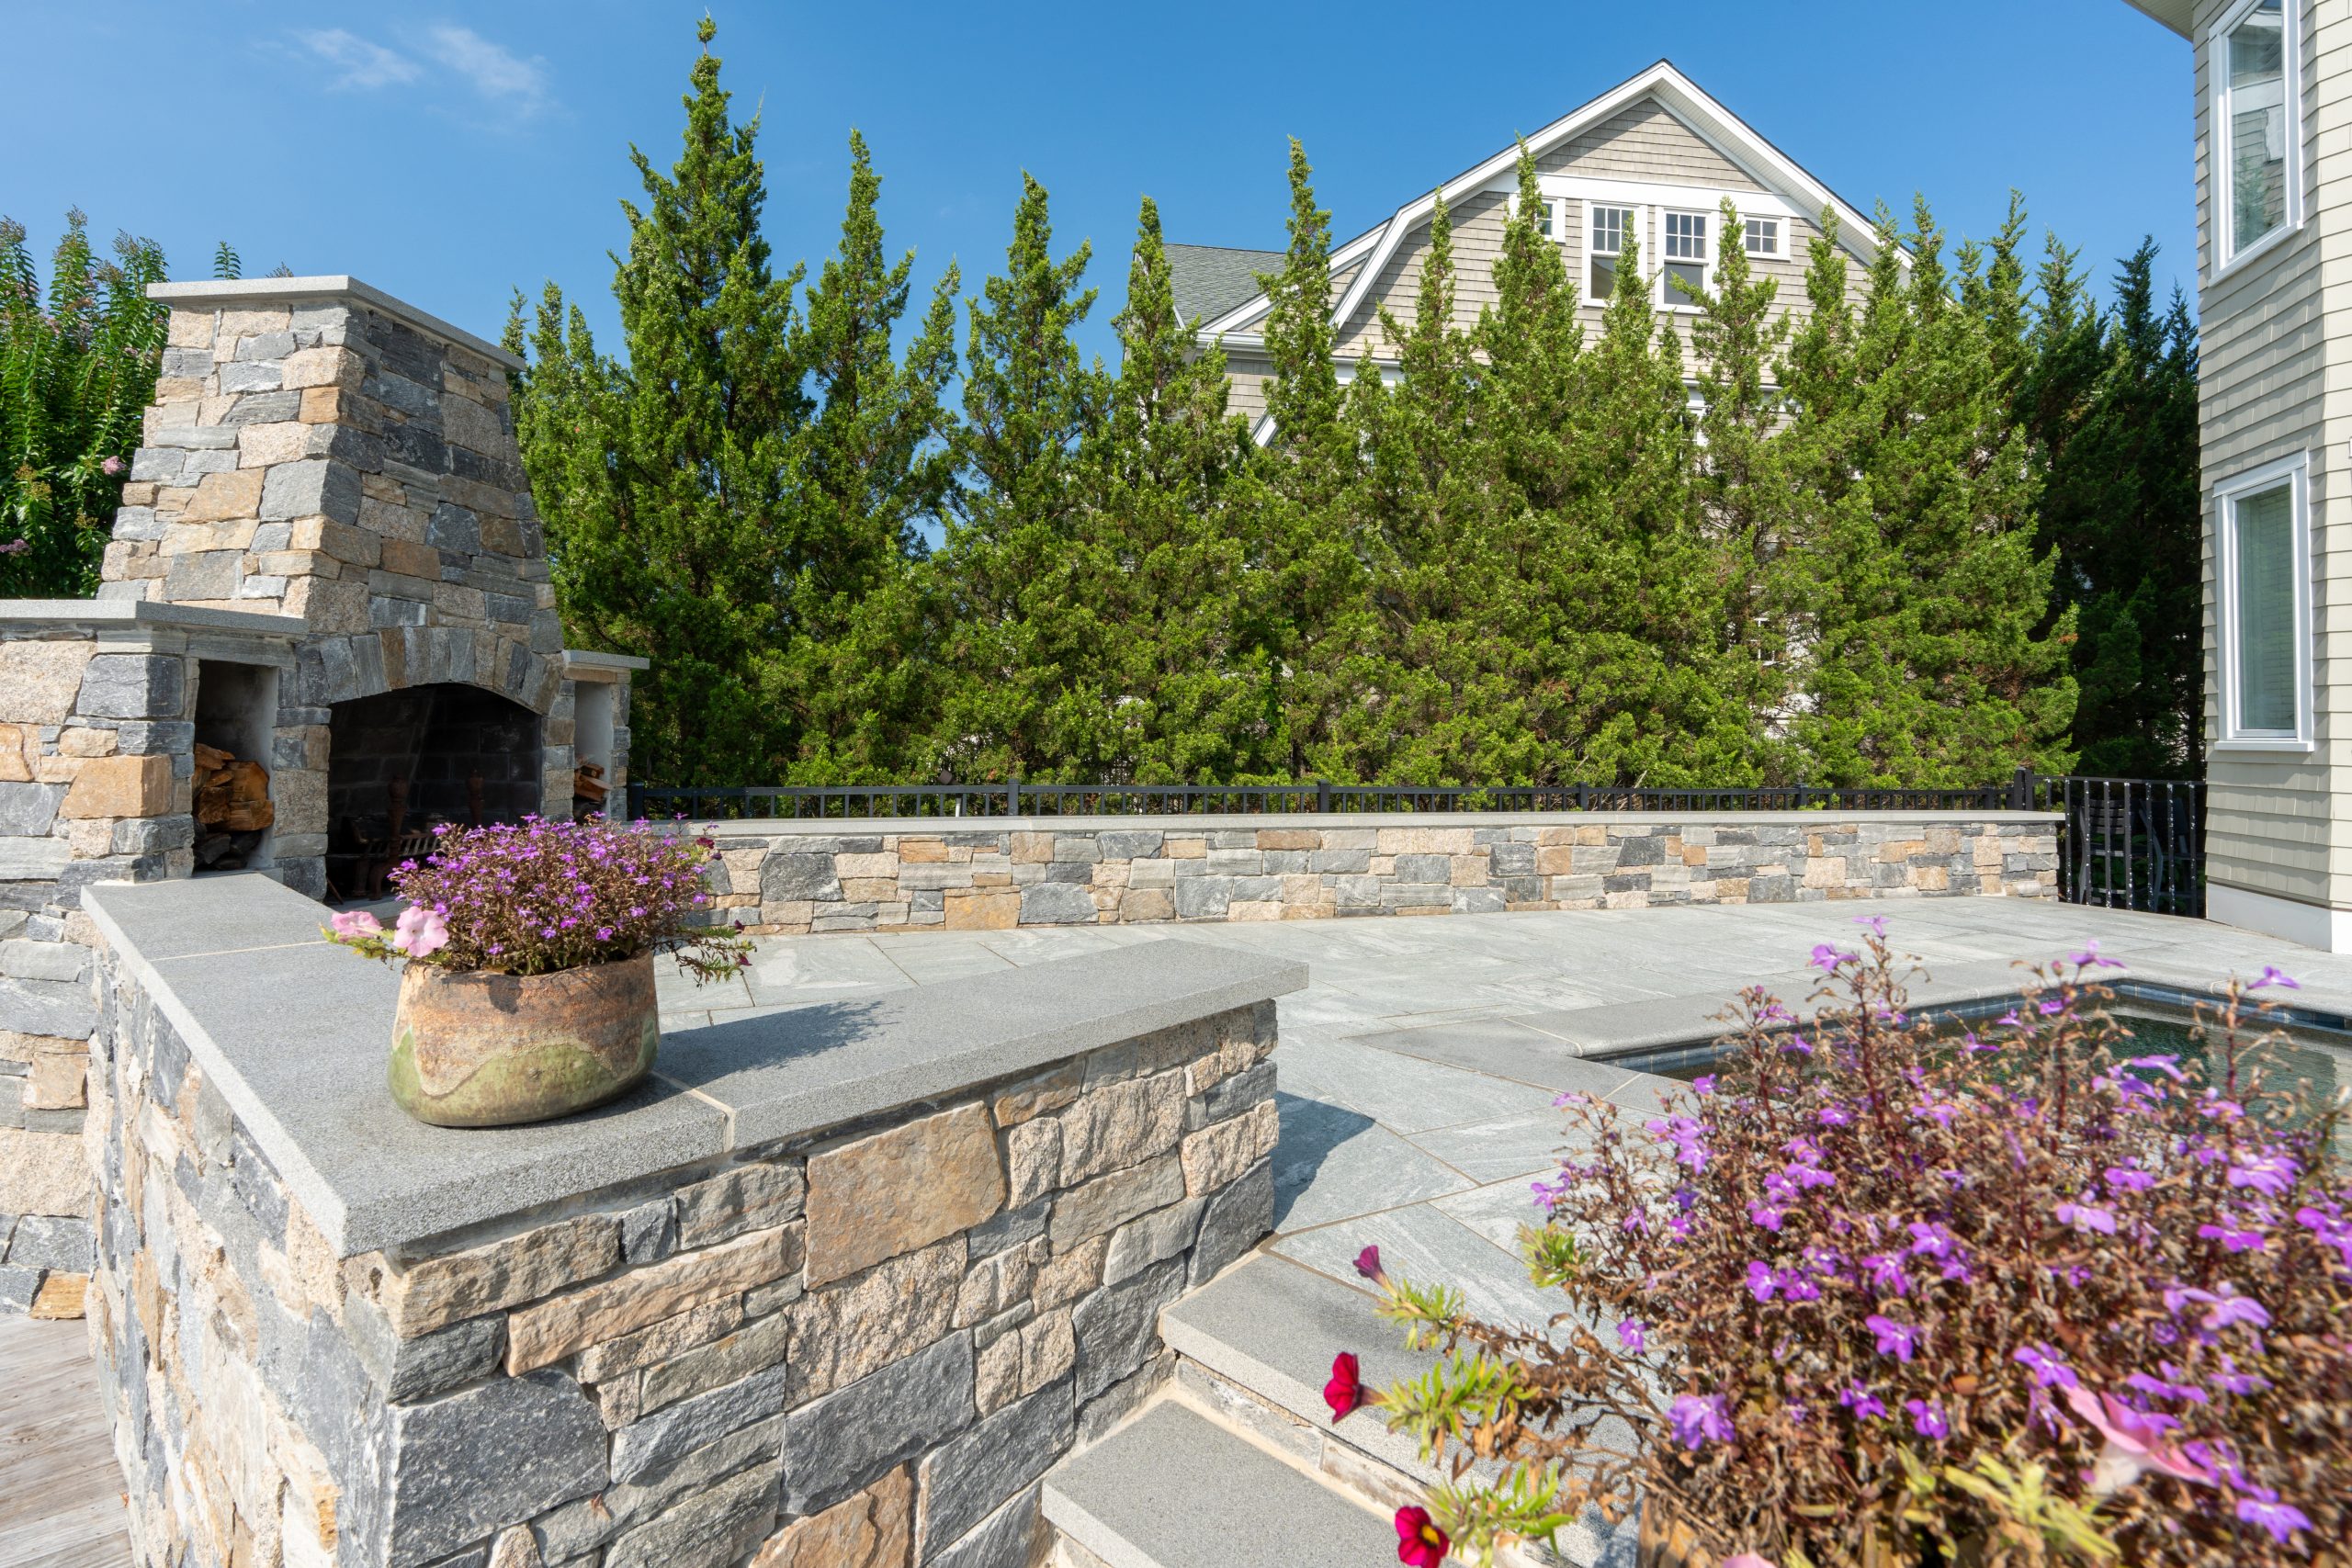
The reality is, the area where you’ll have pavers installed should be regarded as a construction site. The beautiful layout of stones will be what catches everyone’s eye, but beneath is a foundation that was painstakingly prepared to ensure your surface remains stable for a lifetime.
This is specialized work that requires experience and often heavy equipment and should not be approached as a do-it-yourself project. For property owners getting ready for backyard makeover, the following is an overview of the basic steps of the installation process so you’ll know what to expect.
Planning and Preparation
The first part of the process could be described as a research phase, and you may be able to help. Your contractor will want to learn everything they can about the spot where the stones will be installed. The drainage, soil composition, and existing masonry that needs to be removed or built around can all impact the design. So can mature trees with bulky roots and the natural grade of the yard.
The team will also need to know if there are any underground pipes, cables, tanks, or other features in or close to the construction area. This may require a review of construction records in your local government office. Any knowledge you can share about the property’s condition and history could be useful.
You may also need to make a trip or two to the town hall to take care of permitting paperwork. Regulations can vary widely from jurisdiction to jurisdiction, but beyond the standard construction approvals, it’s possible you may need soil and erosion permits, waivers if your land is on a sensitive waterbody, or zoning board approvals if the project will exceed impervious surface or setback regulations. Consult your contractor and check with your municipal government at the start to make sure you have everything covered.
With all of the needed permits and site information in hand, the masonry team can now finalize its plan to make your vision for a backyard oasis a reality.
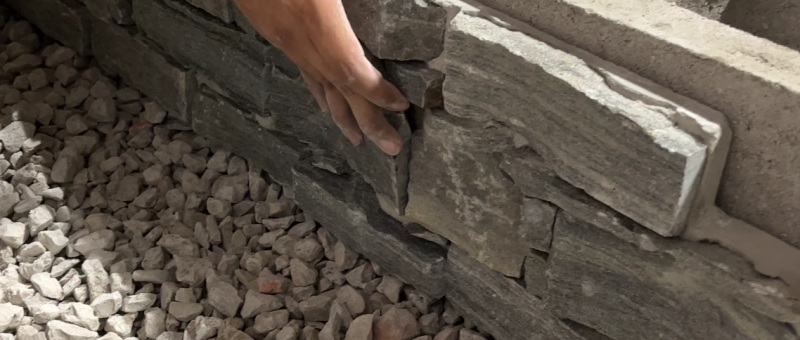
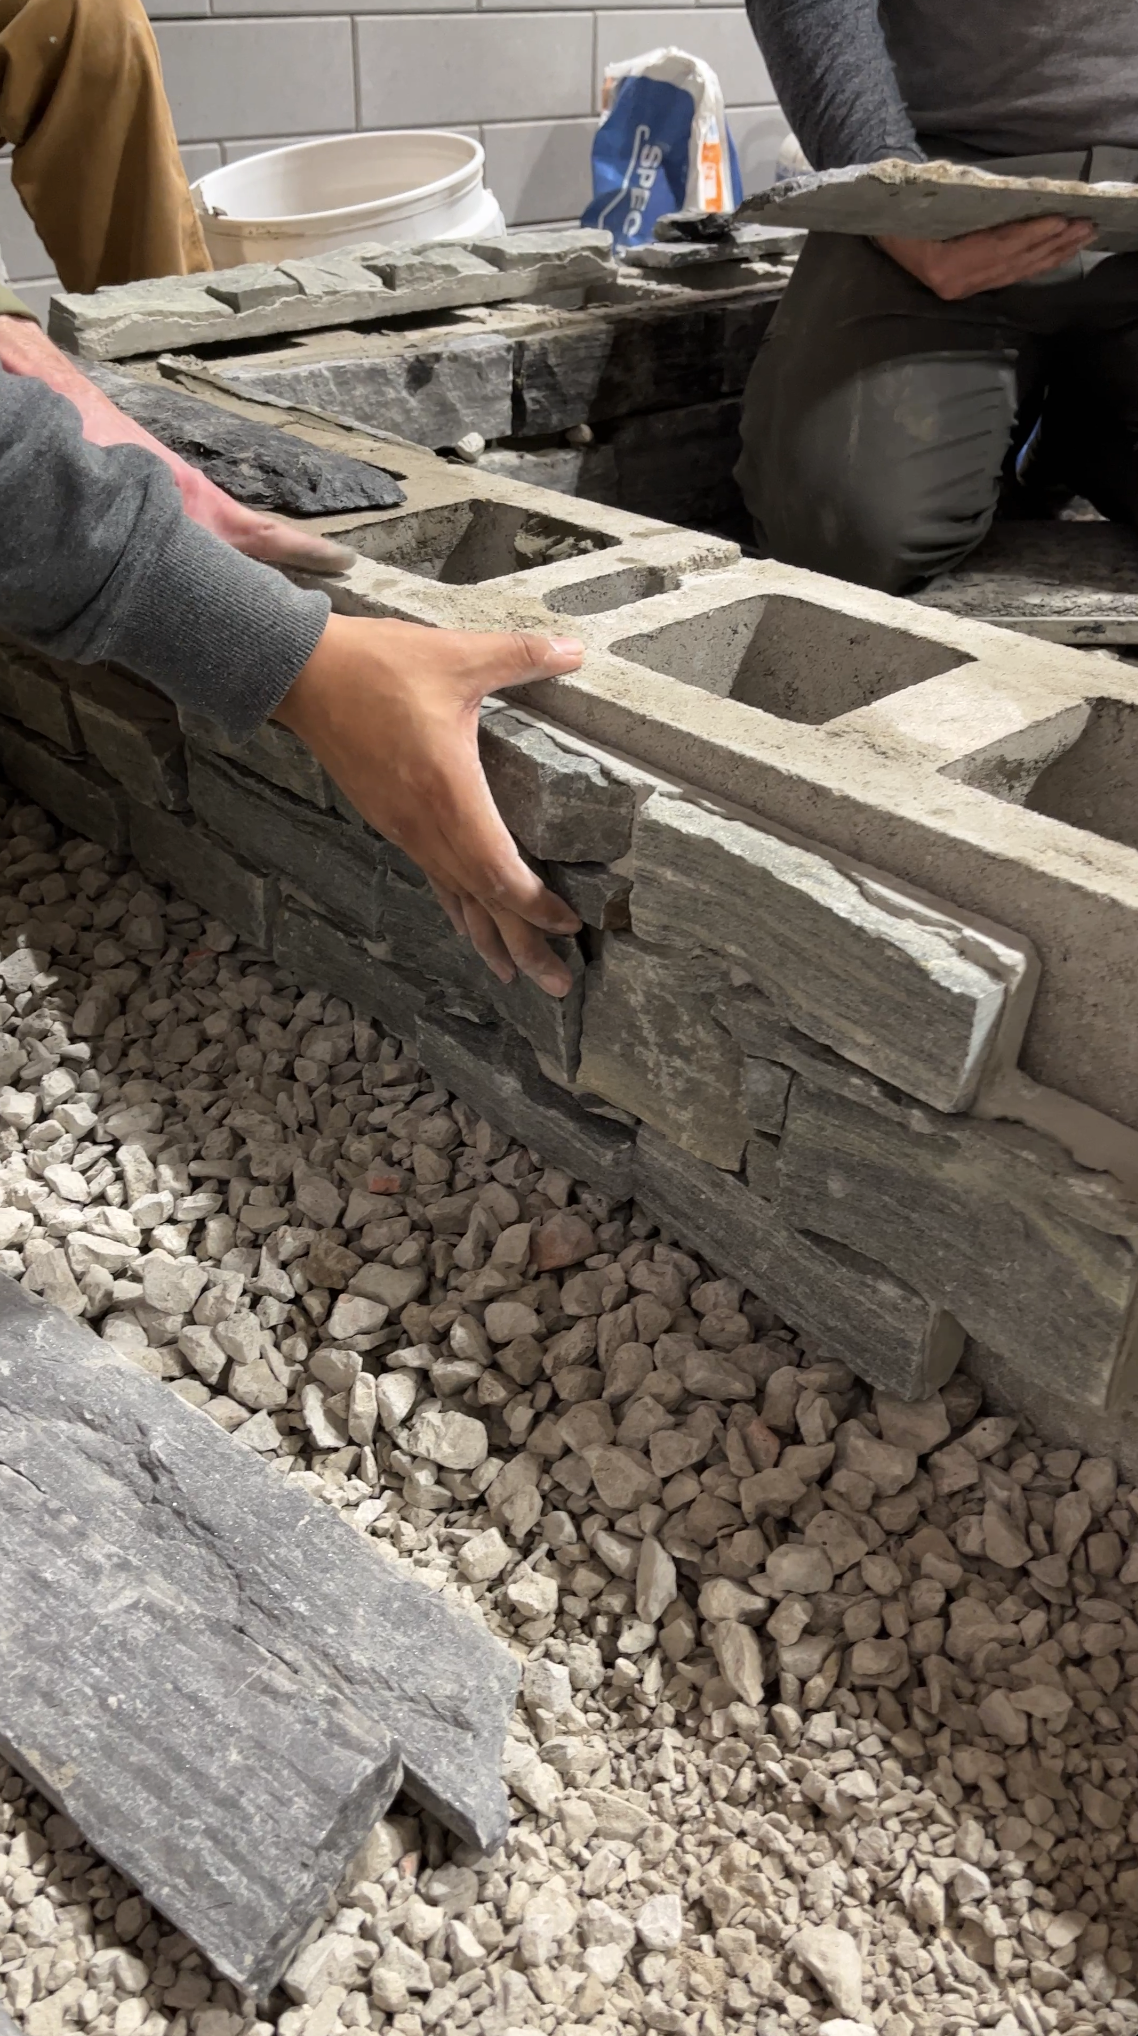
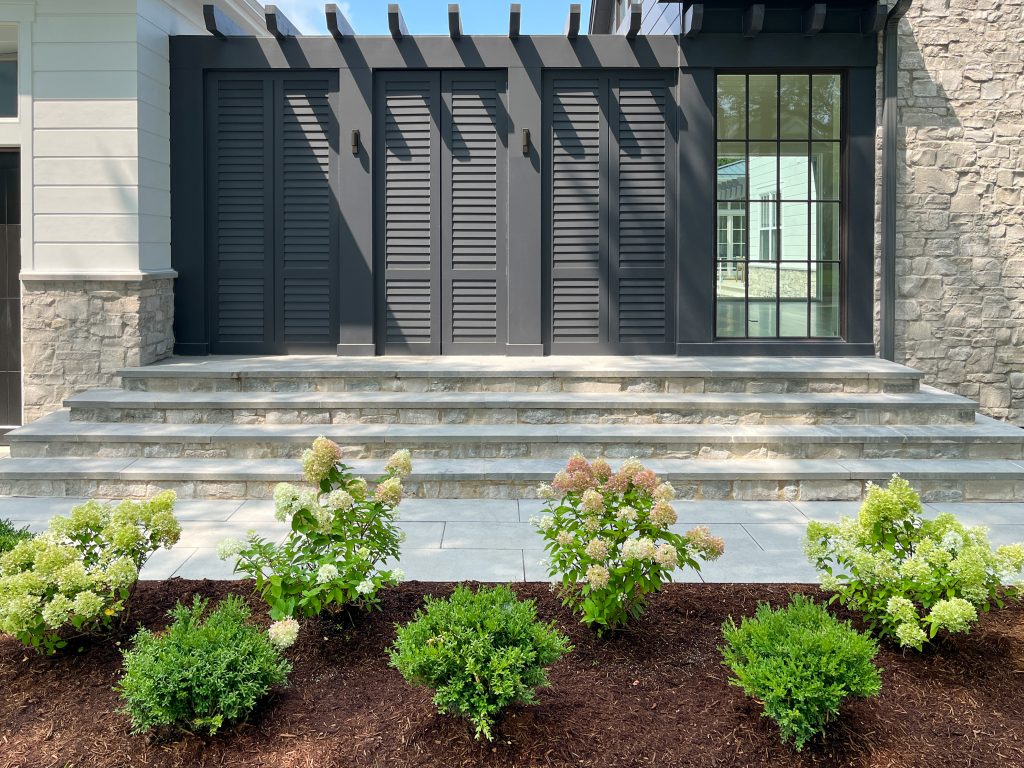
Preparing the Base
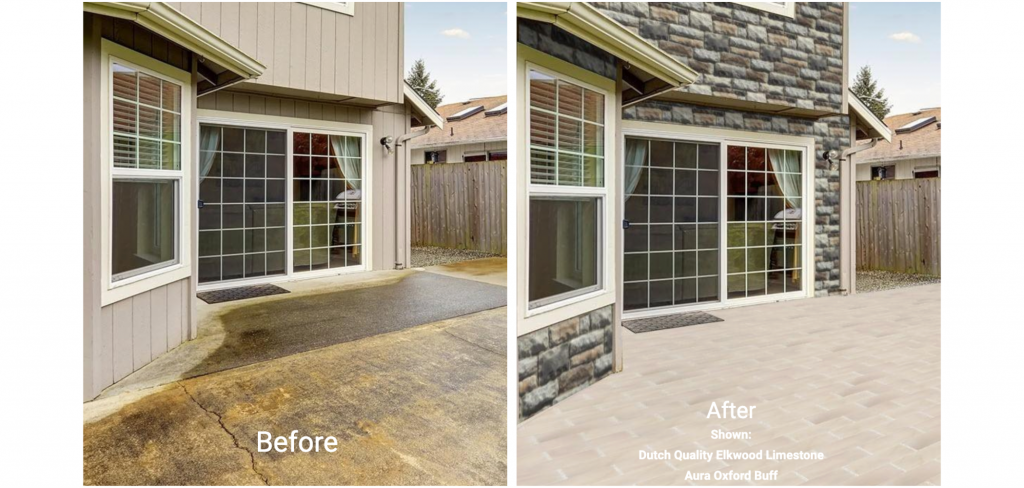
The “Ultimate Backyard Makeover” episode of Instone’s InBuilding Design video series offers an excellent glimpse at what a typical foundation preparation process looks like. Once the dimensions of the patio or paved area are determined, the contractors will begin clearing soil to make room for a new foundation. The depth will be calculated based on factors like the ground conditions and the desired elevation of the pavers.
In the video above, the crew begins by filling the hole with a layer of large rocks, then covers it with a layer of medium-size gravel and compacts it. They then add a sand-like layer that can fill the gaps between the stones and compact it once more.
The result is a base of material that is strong enough to support heavy pavers without any risk of shifting or crumbling due to freeze-thaw cycles, heavy rains, extreme heat, or other conditions they’ll endure over the years. Natural stone pavers (e.g., granite, sandstone, marble) are significantly less susceptible to these issues than concrete products and can better withstand the pounding of foot traffic. Visit Instone’s Aura Natural Landscapes page to learn about its wide variety of stone types and color options.
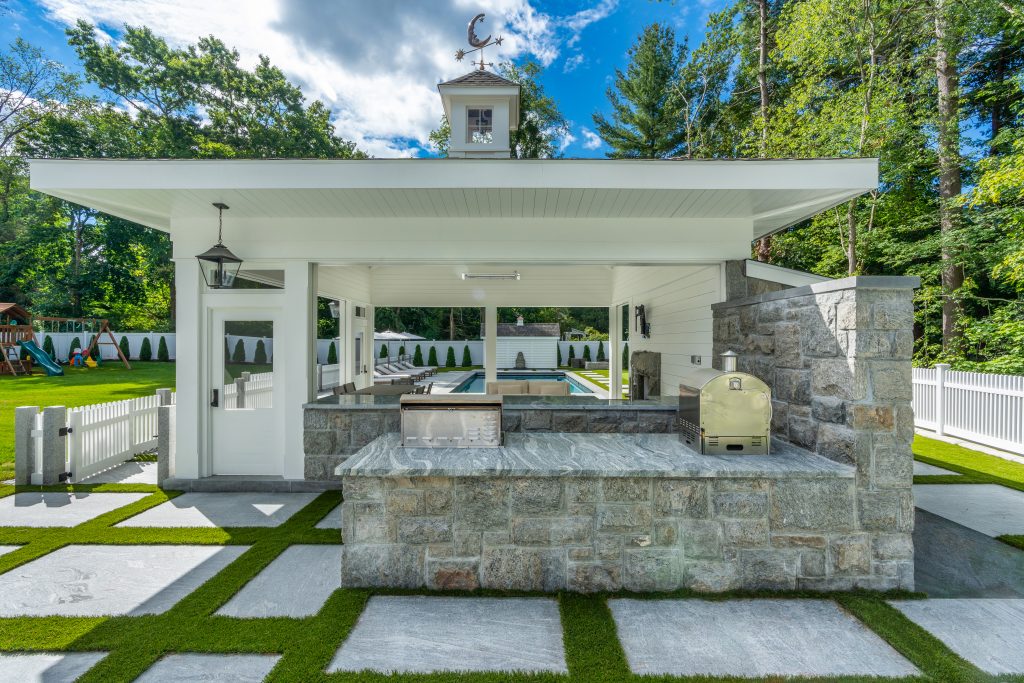
If your design includes heavyweight features like an outdoor kitchen and fireplace, the crew will dig further and fill the ground with concrete for support. They may also lay a tarp-like liner called a geotextile beneath the foundation materials to help control drainage, weeds, and erosion.
When the foundation is set, work may need to pause briefly to allow the town to complete an inspection. Contact your local construction office before the project begins or talk to your contractor, who should be familiar with your town’s requirements.
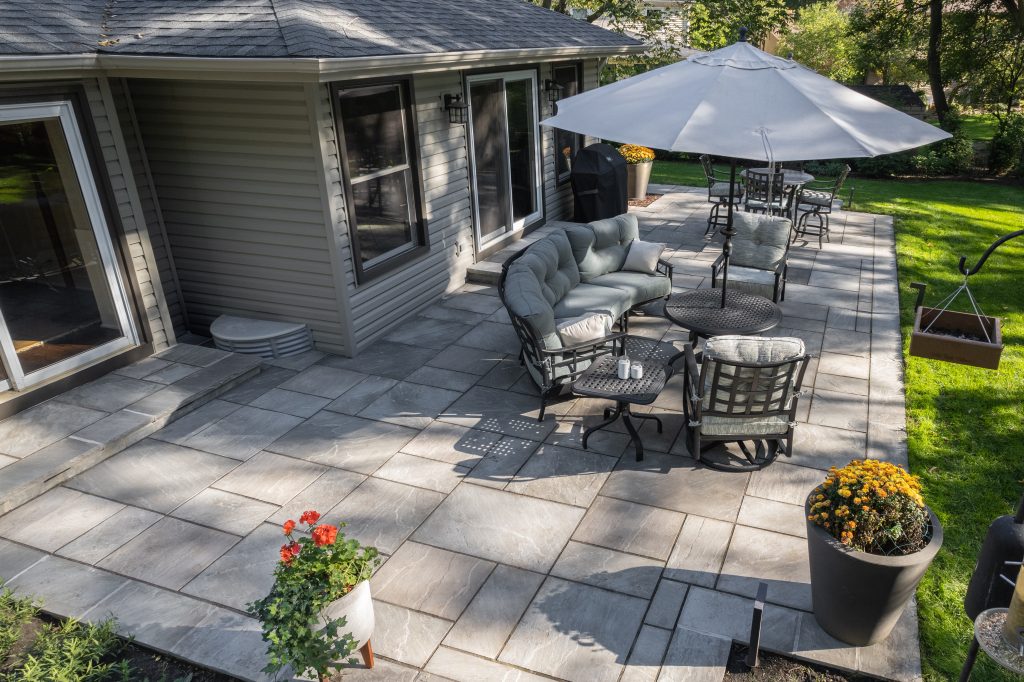
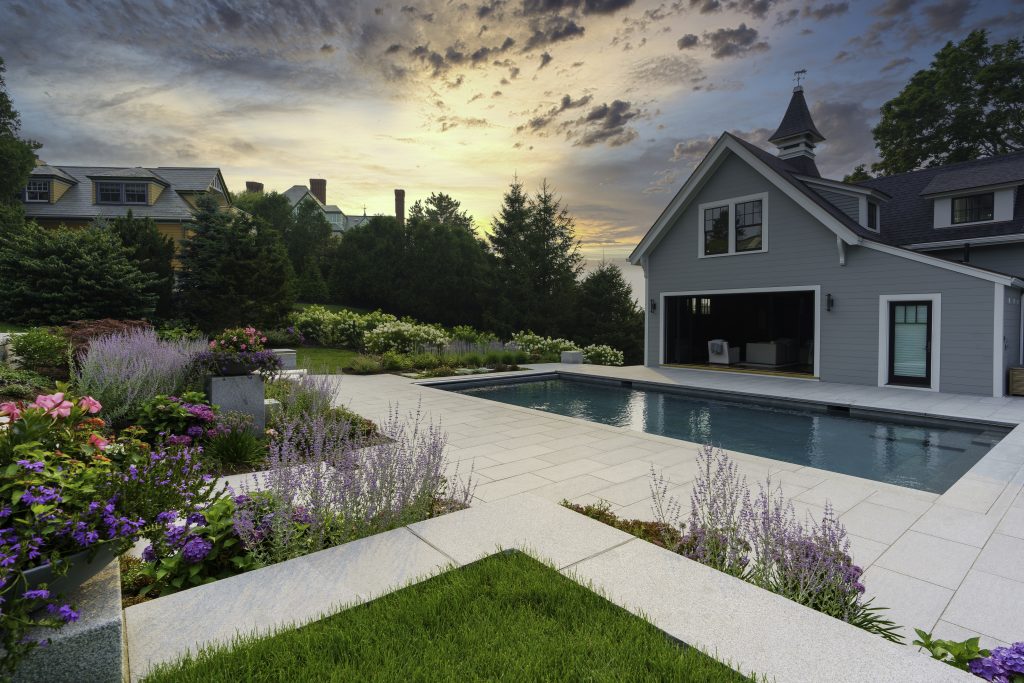
Laying the Pavers
As a homeowner, here’s where the excitement really begins. With every stone that’s laid, you’ll see your dream yard design emerge before your eyes.
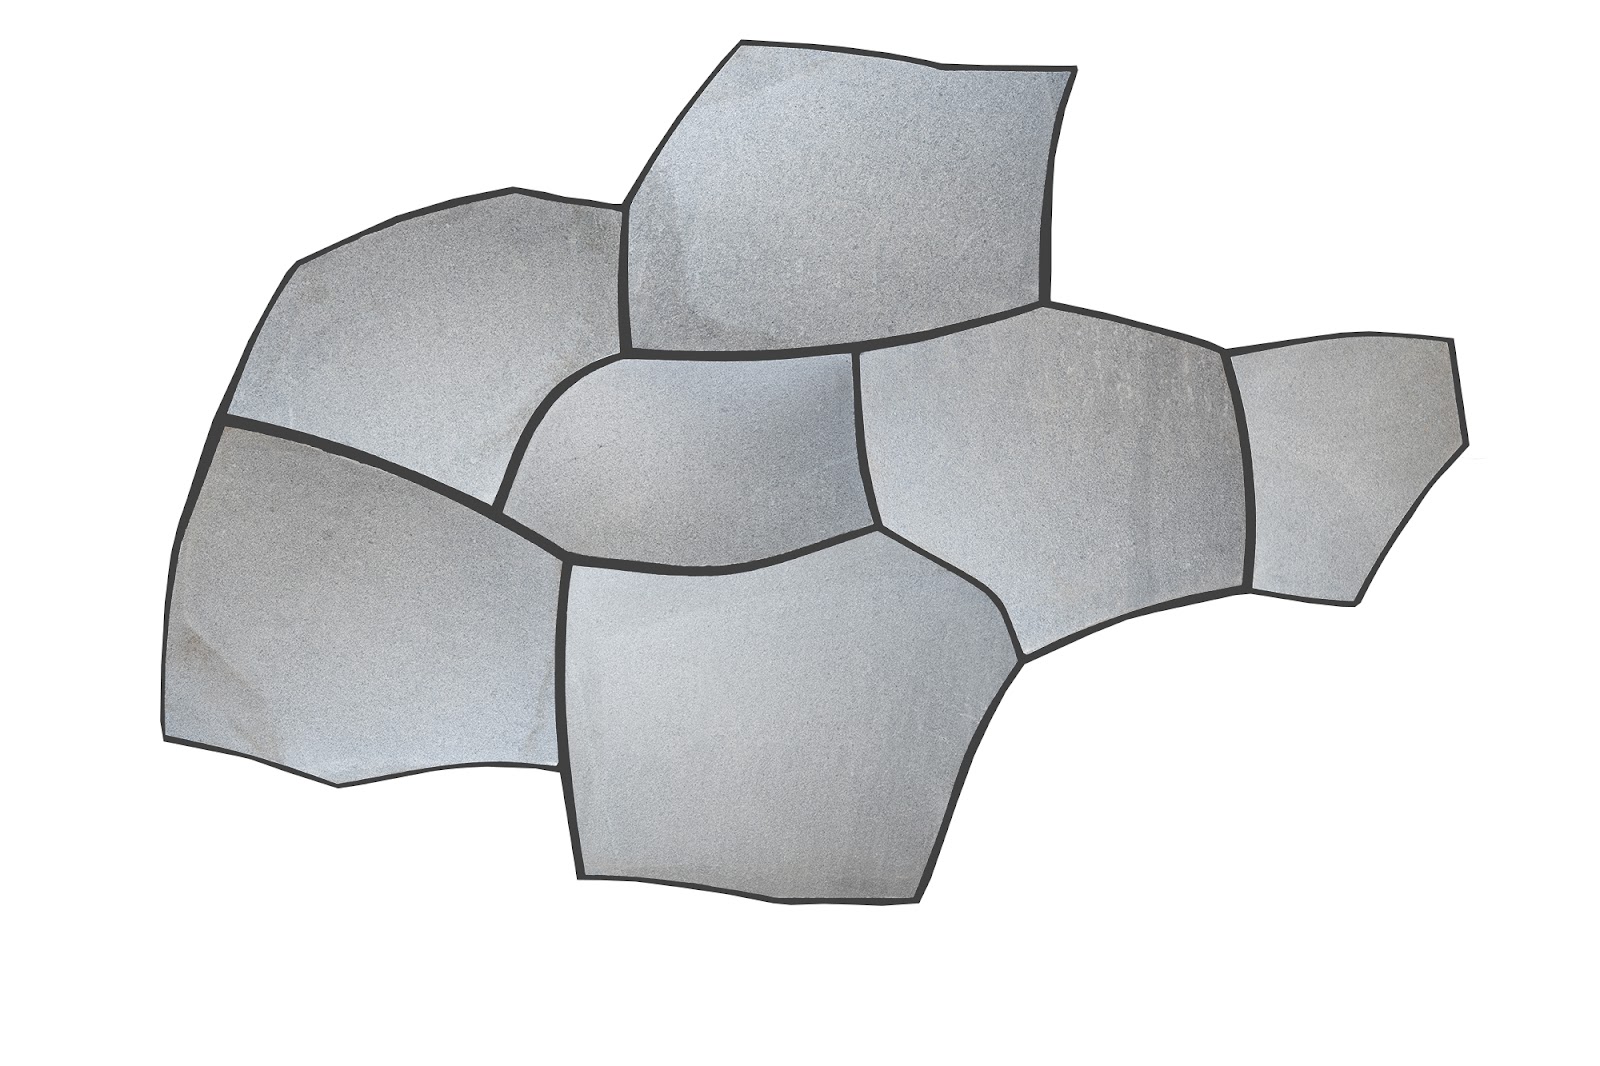
This is where the artistry of your masonry team will shine through. While your overall project design will have been worked out well before the first stone is laid, there are many details and decisions that will be sorted out on the ground. Among them are how to arrange the stones, which may come in a variety of shapes and sizes, in beautiful patterns. Another highly popular style right now is irregular flagging, pavers that are not uniform in shape and size. Arranged together, they create attractive mosaics with a rustic appearance.
Aura Blue Mist Irregular Pattern
Aura Silver Ridge Irregular Patio
Aura Silver Ridge Irregular Pattern Patio
Aura Silver Ridge Irregular Pattern Patio
Styling choices and careful measurements will determine how to cut edge pieces in ways that look symmetrical and artful. Sometimes a few custom-cut pieces can make or break a project. In these cases, your team may look to the Instone Fabrication and Design Services crew for help with the cuts and shapes that can only be accomplished with specialized equipment.
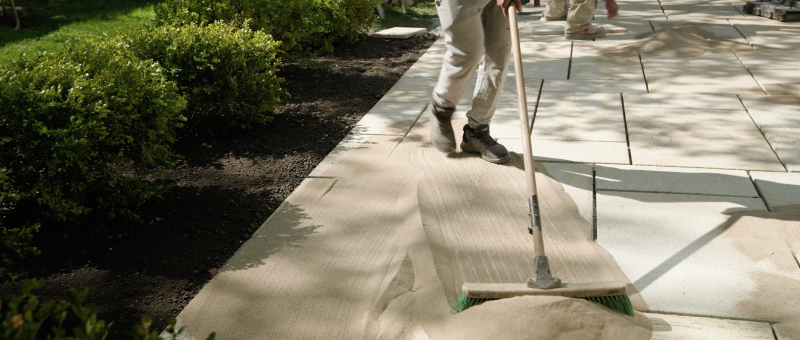
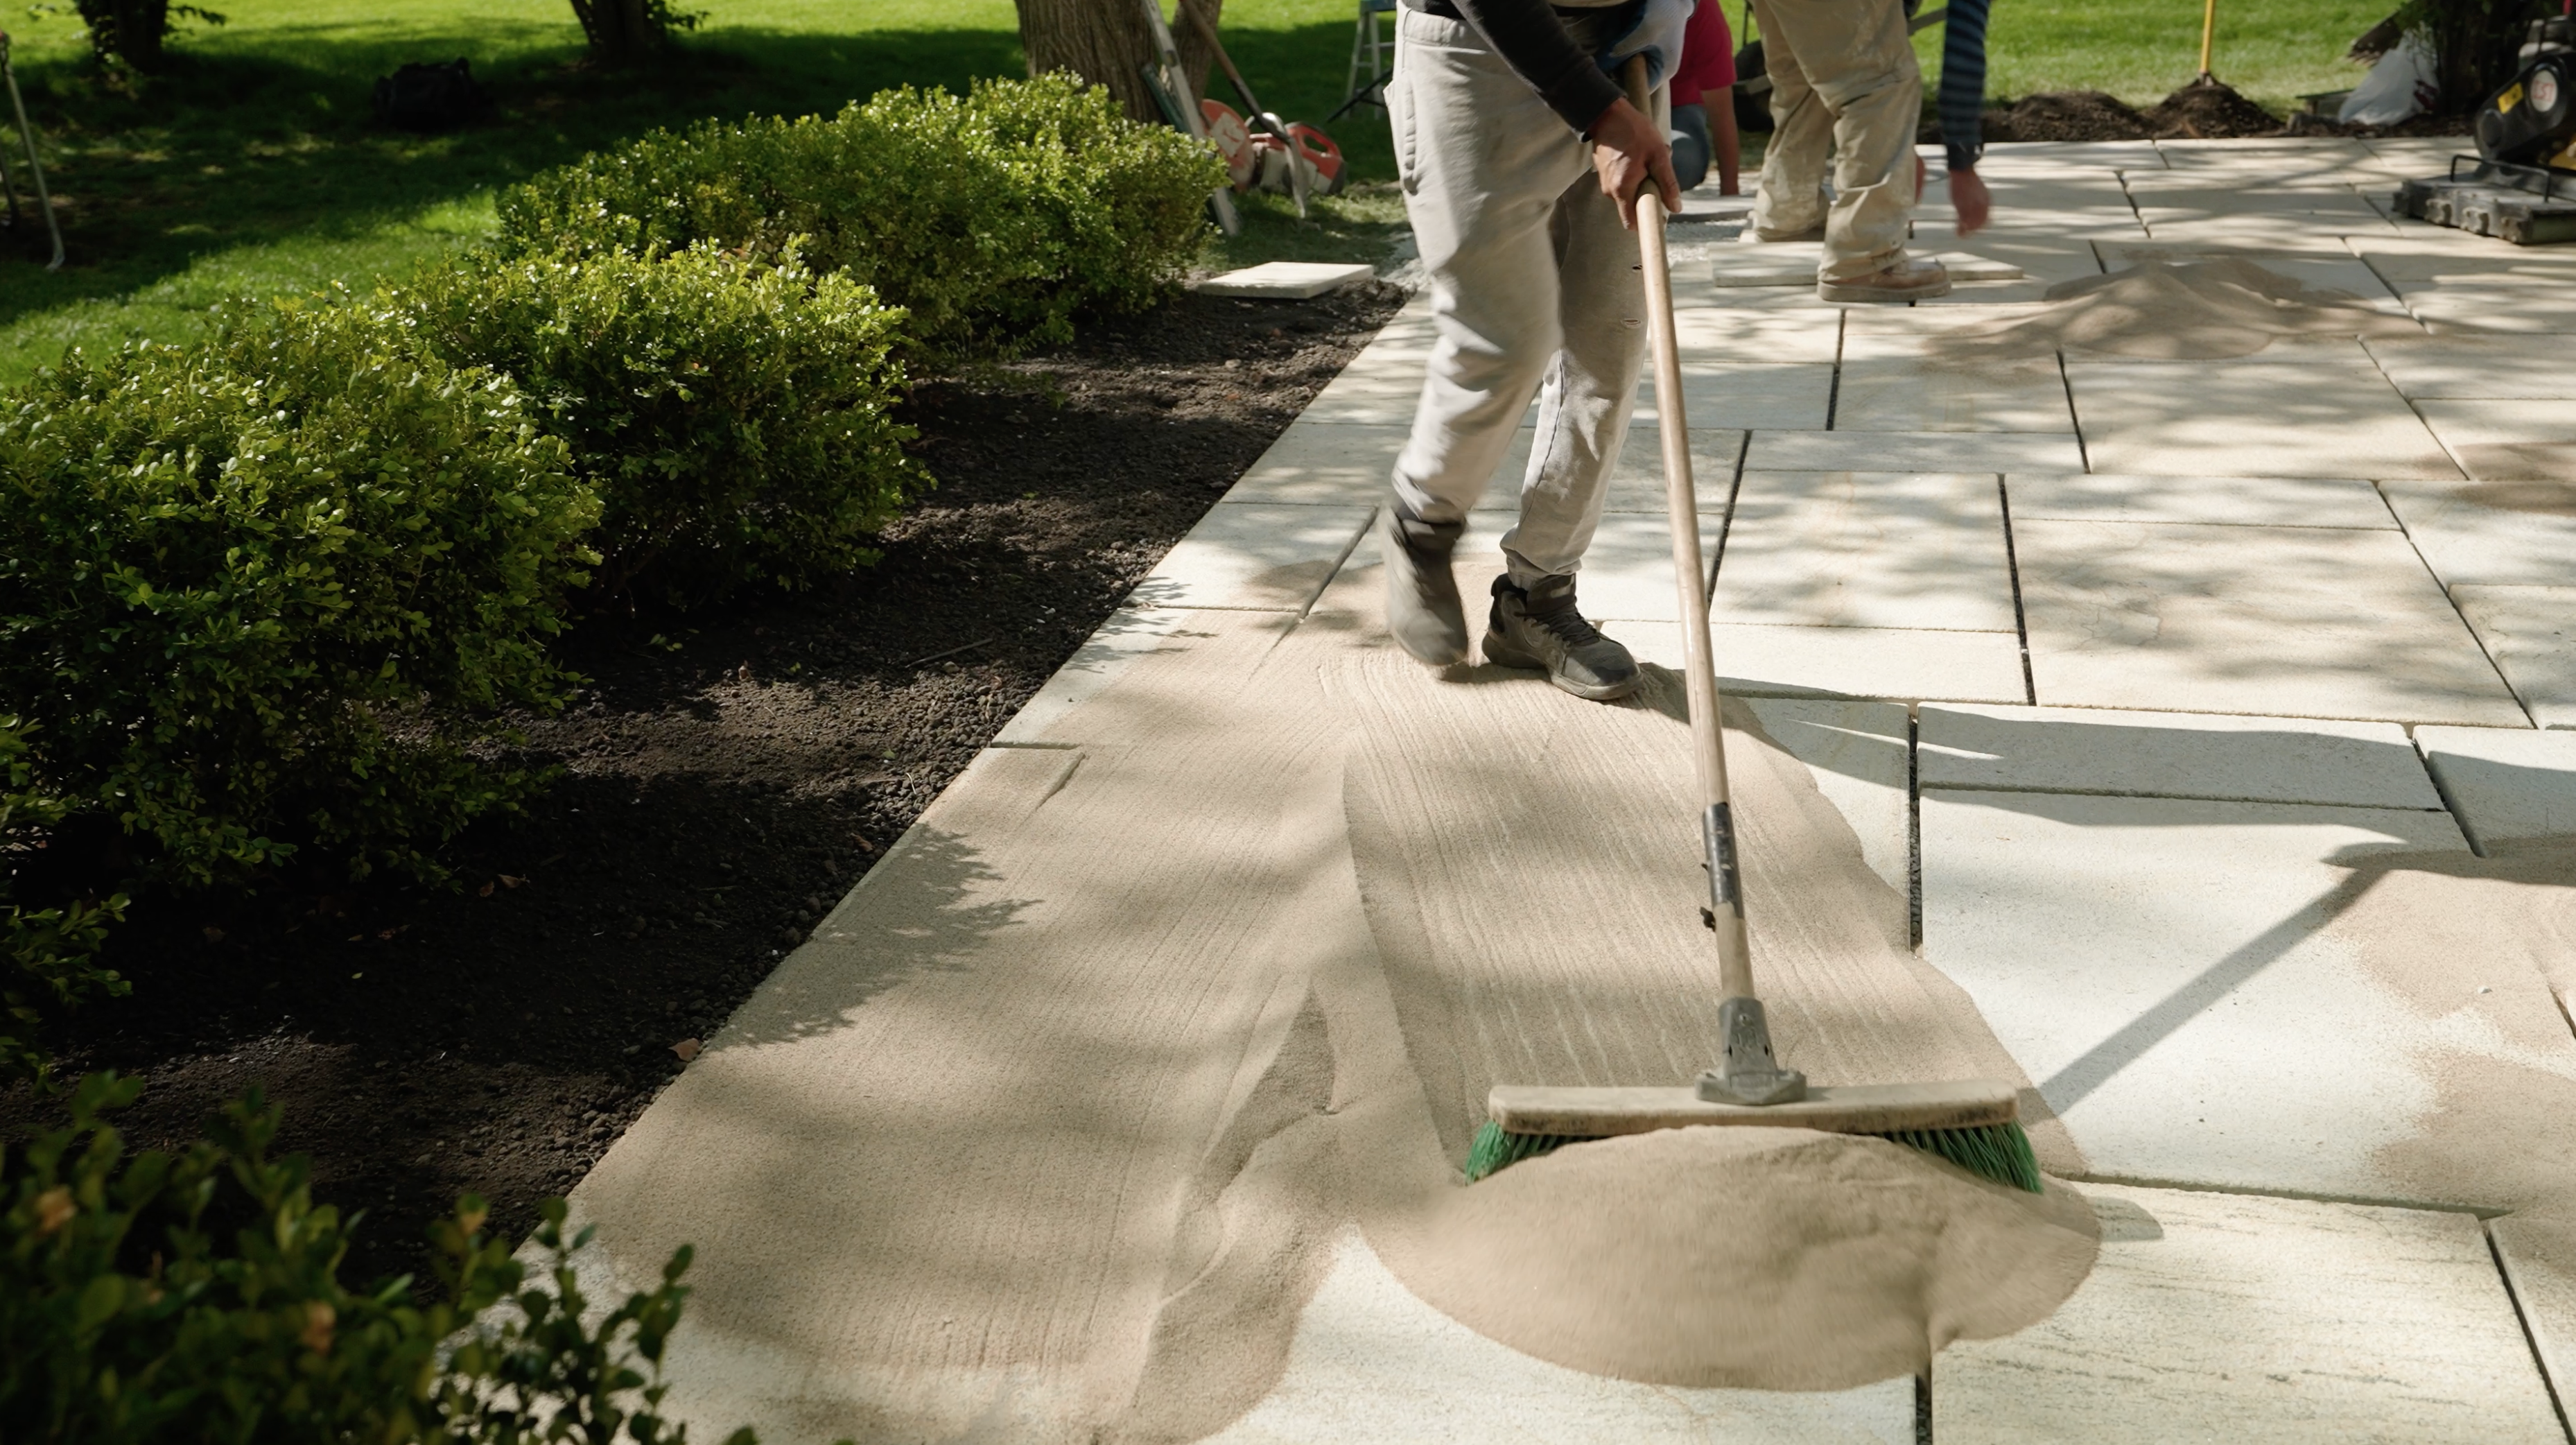
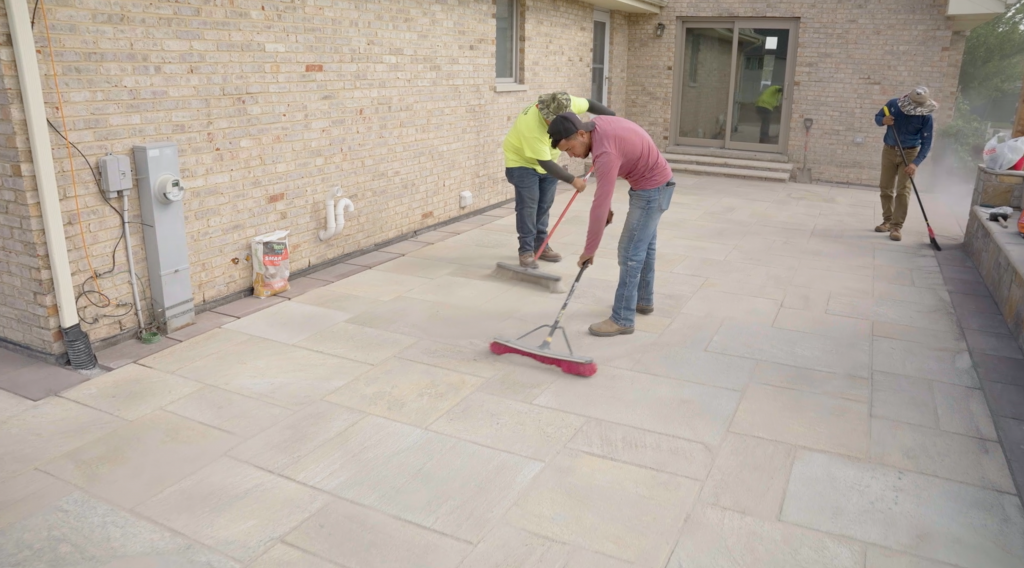
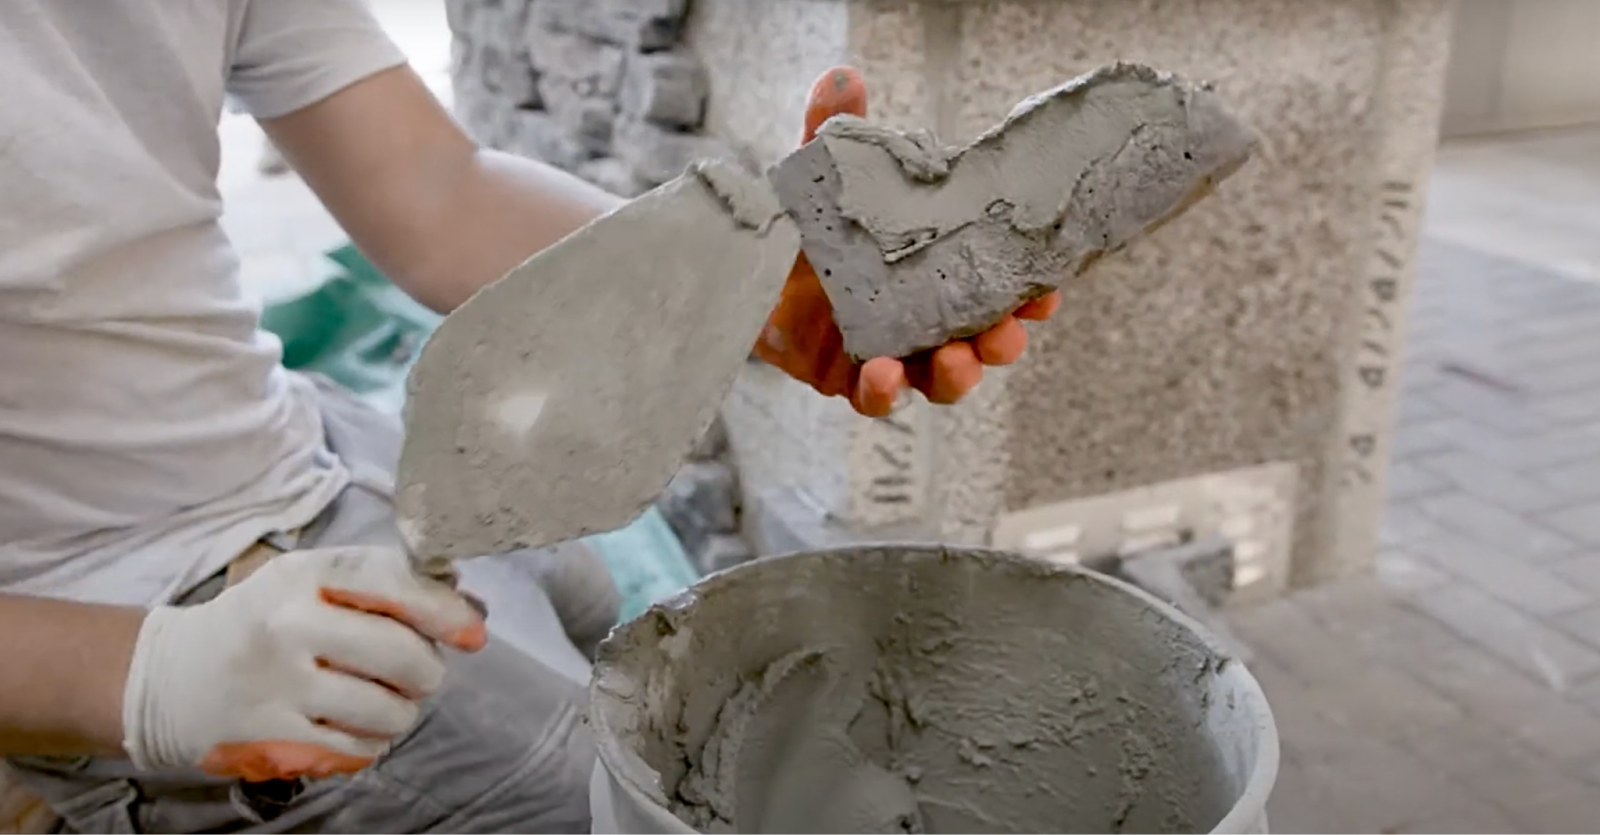
With the stones laid, a final step is to fill the joints (gaps) between them with a sand or polymeric sand filler of your color choice. Polymeric sand is a type of material that bonds together after its exposed to water, tightly sealing the spaces to prevent problems like excess rainwater intrusion, weed growth, and ants carrying away the grains. The clip above shows a crew applying polymeric sand to a Mid West patio project.
Learn More
No one knows stone like Instone. Whether you have a large-scale backyard hardscaping project or a small stone veneer accent wall coming up, we have the materials and experience to help.
Precision in Every Cut: A Guide to Handling Manufactured Stone Veneer
Published:
Last Updated:
Author:
instone
Precision in Every Cut: A Guide to Handling Manufactured Stone Veneer
Aura Natural Landscapes revolutionary new product wows installers and homeowners
This seasons’ most sought-after product for backyard patios bring a rustic, natural look that standard backyard pavers can’t beat. Thanks to consistent cuts, and stone pavers that fit together like pieces of a puzzle, irregular flagging is in high demand. Irregular flagging is showing up in backyard patios, walkways, and poolside hardscaping.
Installers commonly assume that irregular flagging projects take more time and money than standard ones. This is because the stones used have different thicknesses and shapes. However, Aura Natural Landscapes is turning this notion on its head by producing precut, consistent stones. They are 10 times faster to install than other irregular flagging products. .
Irregular flagging, sometimes called irregular pavers, are flat pieces of stone that are not uniform in shape and size. Arranged together, they create attractive mosaics that can call other patterns in nature to mind, like the turtle shell or rocks scattered along a brook. Irregular stones are often also spread apart as stepping stones. They can form a paver walkway on surfaces like grass lawns, gravel paths, or mulch bedding.
Eliminate Joint Pains in Paver Installations
“Irregular flagging is most attractive when masons can work the stone and create consistent joints throughout the whole patio or surface,” Instone’s Vice President of Natural Stone Products Justin Alicandro said. He noted that many irregular flagging applications aren’t completed this way, though, due to the cost of installation. With most products on the market, achieving consistent joints requires the mason to shape each stone so it fits smoothly next to the other irregular shapes. This is a process that can be laborious and lead to waste.
“Just in a 2-foot stretch of one joint, you’ll see some installers go from 3 inches to a half-inch wide,” Alicandro said. “They just shape it quickly and throw it down, even though it looks sloppy.”
Aura’s irregular flagging solves this issue thanks to its signature precut, repeating pattern of seven stones that fit easily together. The eye sees an irregular pattern, but for the installer, it’s a no-hassle job.
Consistent Thickness Reduces Time and Waste
Another challenge with installing the majority of irregular flagging products is their varying thickness. Most are extremely inconsistent in thickness which creates installation issues. This forces the mason to either shape or cut the stone to a routine width in order to lay the pavers. Or, they need to add/remove subbase material beneath every stone to ensure they don’t bulge or dip.
Aura eliminated the need for that work by producing its irregular flagging stones at a consistent 1.5” thickness. Installers can simply screed the sub-base and start laying stones one after another. Installing Aura irregular pavers proceeds at a pace no different than regular pavers.
“With most install jobs, the cost is 70 percent labor and 30 percent material,” Alicandro said. “Because Aura is precut and the thickness is gauged, it saves a tremendous amount of labor.”
Landscape designer Cysilia Schaub chose Aura irregular flagging when she needed hardscaping materials for an extensive lakefront backyard project. The job called for materials that accentuated the property’s natural environment and were durable enough to withstand heavy foot traffic and could be delivered and installed on a tight deadline.
“The way this product came – precut, premeasured in each pallet to fit the pattern, the material was gauged, thermaled on the top, the joints were perfect – the installation was really quick,” Schaub said.
Aura’s irregular granite stones range from 4 square feet at their smallest to 12 square feet at their largest. The larger stones can be faster and less complicated to install because they each cover so much ground and are easy arrange. DIY installers should ensure they have proper help to handle the materials, Alicandro advised, as the largest stones can weigh in the 200-pound range.
Versatile for Outdoor Living Designs
Aura has two attractive colors of standard stock irregular stones available for a quick order: Blue Mist and Silver Ridge granite. For projects with lead times greater than about four months, Aura can make just about any other color in its stone catalog available for order, Alicandro said.
The stones can be cut easily with a regular masonry saw to fit them against a house, steps, or other structures. Instone’s in-house fabrication and design service is available to assist with any special cuts needed for your project. Coordinating treads, coping and widestock are also available for a cohesive outdoor space.
Irregular flagging projects have been especially hot in markets like the Midwest and northern New England, where people tend to have larger properties that can showcase the sizable stones. Although they are commonly used in projects 1,000 square feet and larger, Alicandro said it ultimately comes down to the taste and vision of the property owner.
To learn more about the possibilities for a property you own or are working on with irregular pattern products, visit our Aura Natural Landscapes page.
How to Achieve Superhero Status With Clients & Boost Sales
We all know that spring signals the start of a busy season for those in the construction, masonry, and hardscaping fields. Homeowners are eager to kick off their long-awaited renovation projects. This is an excellent time to lay the groundwork for a successful sales year.
Achieving success goes beyond simply providing top-notch materials. It demands a strategic approach that prioritizes quick and efficient service, outstanding product quality, and, most importantly, the satisfaction of your clients.
This guide is designed to arm you with actionable advice to enhance your interactions with customers, ultimately helping you secure more contracts and boost your sales.
Prompt & Accurate Quotes: First Impressions
The first step towards a successful spring should be no surprise: communication is key. Many homeowners will shop around when starting a large home project. Swift, detailed, and professional quotes are essential and do more than provide numbers; they showcase your engagement, dedication, and professionalism.
You can influence their hiring decisions from the start by ensuring your quotes exude clarity, accuracy, and a comprehensive outline of expectations and deliverables. A messy quote can come across as unprofessional and unbothered and be seen as a reflection of your work on the job site.
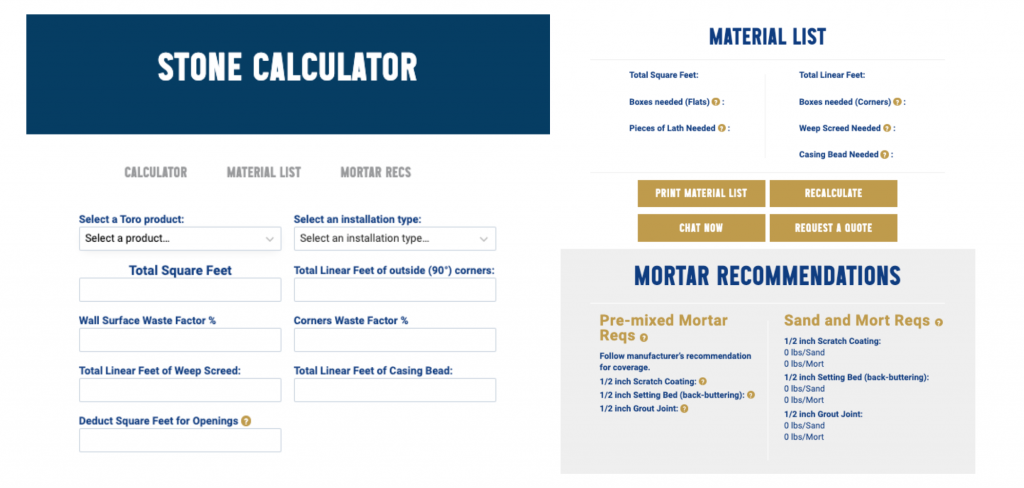
Toro Stone Calculator
Use tools like the Toro Stone Calculator to help you estimate how much stone and other materials you need for a project. Additionally, Instone dealers can easily log in, create a quote in minutes, save the quote, and send it or print it for the customer, ensuring a professional-looking quote is provided instantly. Of course, you can always reach out to us for swift and detailed quotes as well. A precise quote reflects your professionalism and can be the deciding factor for potential clients.
Advise on Material Choices: Quality Meets Budget
While some homeowners will have researched materials independently, many only know what they want the final product to look like — but not how to achieve it. You can help guide homeowners through a maze of options to find what suits their desired aesthetic best. Your expertise can help them make informed, budget-conscious decisions. This is where you can highlight the value of investing in Instone’s premium materials for lasting satisfaction and peace of mind.
Incorporate Innovative Techniques: Building for the Future
Stone masonry is an ever-evolving art that shifts as innovative new techniques and tools emerge. That’s why it’s so important to be aware of — and to quickly incorporate — industry-leading building techniques, like new moisture management systems, into your work whenever possible.
It is important for you to educate homeowners on the benefits of using these industry-leading systems and solutions in their projects. Understanding these long-term advantages ensures that their investment is not just for the present but a contribution to their home’s future. Plus, it helps build your authority as an industry leader.
instonecoNov 4
Experience the true power of natural stone with @pangaeanaturalstone’s innovative GripSet® Technology.
Increasing the surface area where mortar is applied, GripSet® maximizes the friction between the stone and the vertical substrate, allowing the stone to attach quickly and proficiently. With this exclusive technology, you can experience simplified installation and unparalleled resilience and durability for your stonework.
Discover what sets Pangaea apart and learn about their commitment to innovation and quality with President and CEO Sanjay Nikhanj in our #InBuildingDesign episode. Check the link in our bio to learn more. * * * * * #buildingsupply #curbappeal #exteriordesign #interiordesign #naturalstone #usenaturalstone #homeconstruction #constructionproject #hardscapers #landscapers #buildersofInsta #hardscapebrotherhood #builder #construction #pangaeagripset
Experience the true power of natural stone with @pangaeanaturalstone’s innovative GripSet® Technology.
Increasing the surface area where mortar is applied, GripSet® maximizes the friction between the stone and the vertical substrate, allowing the stone to attach quickly and proficiently. With this exclusive technology, you can experience simplified installation and unparalleled resilience and durability for your stonework.
Discover what sets Pangaea apart and learn about their commitment to innovation and quality with President and CEO Sanjay Nikhanj in our #InBuildingDesign episode. Check the link in our bio to learn more. * * * * * #buildingsupply #curbappeal #exteriordesign #interiordesign #naturalstone #usenaturalstone #homeconstruction #constructionproject #hardscapers #landscapers #buildersofInsta #hardscapebrotherhood #builder #construction #pangaeagripset...
30
0
Promote Upselling Opportunities Wisely: Enhancing Value
Any upselling must be done strategically for the homeowner’s benefit and must align with the homeowner’s budget and expectations. This approach not only improves the outcome but also enhances customer satisfaction.
Here’s how you can apply this strategy effectively:
Offer bundled product options that enhance the overall project—like combining landscape stone with stone veneer for outdoor kitchens or fireplaces. This not only simplifies the purchasing process for your clients, making your shop a one-stop solution but also enhances their space’s aesthetic and functional value.
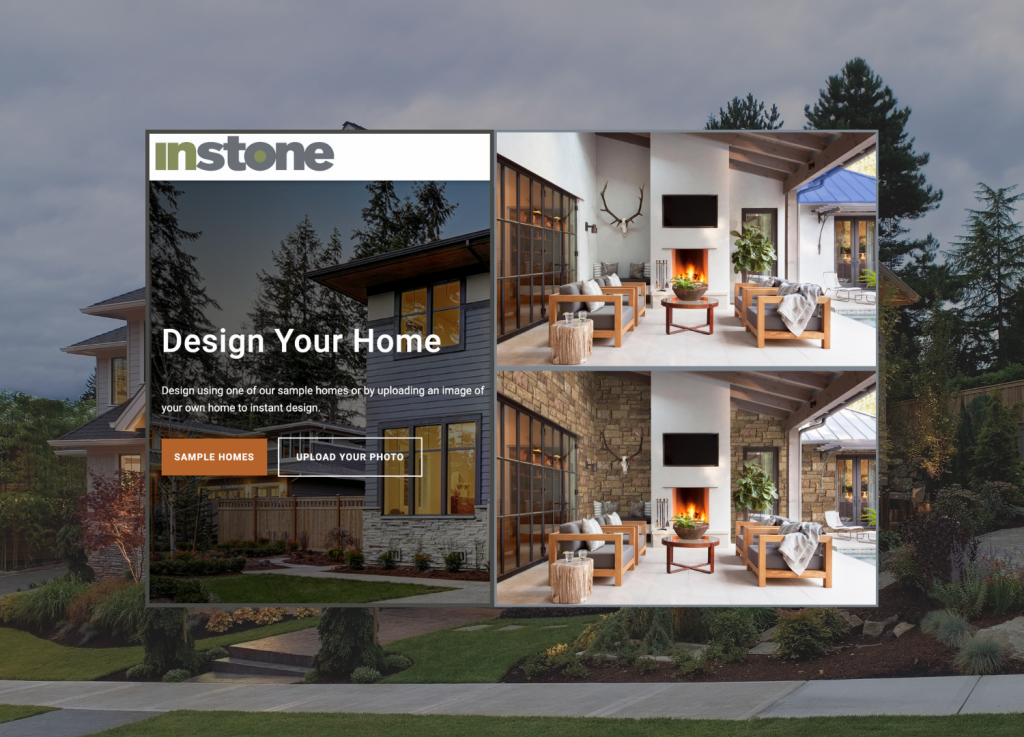
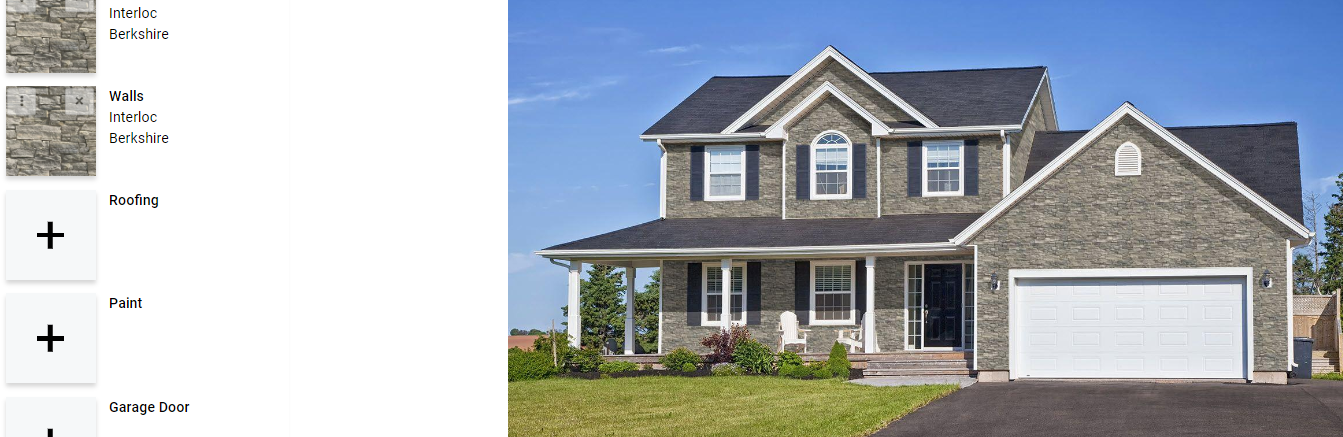
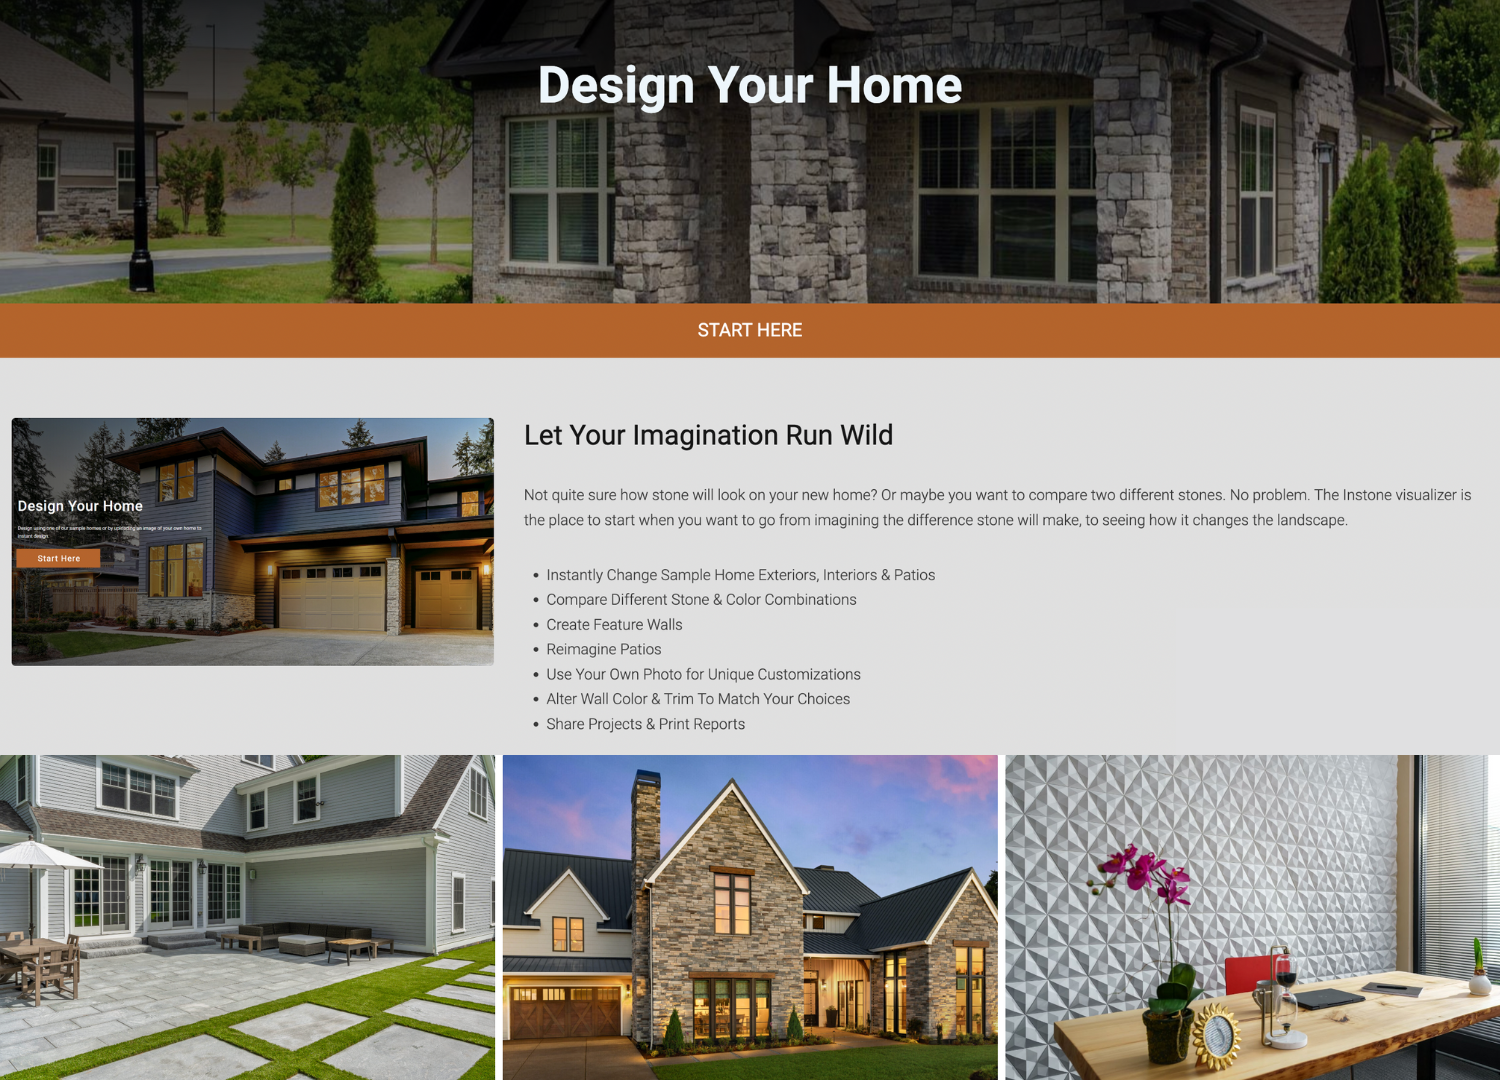
Instone’s Visualizer
Utilize Visualization Tools: Seeing is Believing
Looking for ways to stand out from the competition? Elevate your proposals by incorporating visualization tools. These innovative tools can transform your quotes from simple documents into engaging visual experiences that better communicate the value and vision of your work. By allowing your clients to see their projects’ potential outcomes, you’re enhancing their understanding and excitement and establishing your commitment to transparency and quality. In a market where first impressions are crucial, leveraging visualization tools can be a game-changer in convincing homeowners to choose your services over others.
Maximize the benefits of this approach with the Instone Visualizer, a powerful tool designed to bring your client’s vision to life right before their eyes. Here’s how you can integrate this tool into your sales strategy:
Interactive Kiosks: Establish interactive kiosks at your business locations where clients can actively engage with the visualizer. This allows them to visualize the impact of different stone and color combinations on sample home exteriors, interiors, and patios, enhancing their decision-making process with an immersive, hands-on experience.
Staff Training: Ensure your staff knows how to guide clients through the visualizer. Well-trained employees can assist clients in exploring a variety of design possibilities, helping them reimagine their spaces from creating feature walls to transforming patios.
Website Integration: Embed a link to the Instone Visualizer on your business website, giving clients the convenience to start their design exploration from home. They can effortlessly modify wall colors, trim and compare different stones to ascertain which aligns best with their aesthetic preferences.
Before and After with the Instone Visualizer Tool
The Instone Visualizer allows clients to use sample homes for their design endeavors and allows them to upload their own photos for unique customizations. This tool simplifies decision-making by providing a realistic preview of the finished project. Clients can share their designs, print reports and even access tutorial videos on how to use advanced editing tools within the visualizer. With these capabilities, designing a home with stone has never been easier or more accessible, making the Instone Visualizer an essential part of your sales and marketing arsenal.
Maintain Clear Communication: Building Trust
Trusting someone to work on or in your home can be a challenge. Reliability and trust are built through clear and consistent communication. One way to do this is to regularly update homeowners with project timelines and delivery times. This demonstrates your commitment to meeting their needs and provides them with a sense of comfort, as they aren’t left wondering about these details.
Understanding the importance of prompt service is why we offer optimal lead times that can be conveniently checked on our website—just enter the quantity for an approximate lead time. This feature allows homeowners and dealers to plan precisely, knowing when to expect their materials.
Our commitment to efficient service delivery is a testament to our dedication to ease and efficiency. Our route truck delivery system is designed to simplify the delivery process, removing any uncertainty by utilizing pre-scheduled weekly lanes that service our dealer network from one of our three distribution centers. It’s a testament to our dedication to ease and efficiency—when you need the product now, we make it easy.
By integrating these logistics details into your communication strategy, you promise reliability and deliver on it. This reinforces trust with your clients, ensuring they feel well-informed and confident in their choice to work with you.
Respect the Workspace: A Reflection of Professionalism
It is essential to remember that your ‘workspace’ is someone else’s home. Keeping this in mind and respecting their personal space will go a long way to making for a happy homeowner.
No matter how good the results are, a disrespectful contractor will likely cost you work in the future, while a well-executed job done by someone respectful can lead to good word of mouth and more jobs.
Aura Blue Ice Natural Sandstone
Document Your Projects: Showcase and Inspire
Visual storytelling is a powerful tool that should not be overlooked. Keep homeowners engaged with your work with pictures. Document the various stages of your projects and use them to enhance your social media and website presence.
The adage “seeing is believing” rings particularly true here; providing tangible examples of your completed work highlights the quality and diversity of your offerings and inspires and attracts potential clients. In today’s digital age, a visually compelling portfolio is indispensable for standing out in a crowded marketplace and fostering trust in your craftsmanship.
Leverage Social Media: Build Your Brand
Social media platforms like Instagram are invaluable because they are indispensable extensions of your professional portfolio. These platforms serve as a vibrant showcase for the photos you capture while documenting your work and the testimonials you garner from satisfied clients. Social media amplifies your visibility and significantly enhances your credibility in the eyes of potential clients. A robust social media presence does more than just display the quality and scope of your projects; it also creates a dynamic platform for attracting new clients and engaging with your community.
By actively sharing updates, progress shots, final reveals, and client testimonials on social media, you effectively broadcast your commitment to quality, transparency, and customer satisfaction. This ongoing dialogue with followers and the broader community fosters a sense of engagement and belonging, transforming your social media space into a lively forum for exchange and inspiration. Plus, social media offers an easily accessible avenue for prospective clients to discover your work and envision the potential transformation of their own spaces.
Consider creating events like a customer appreciation day or an open house to thank your existing customers and also entice potential clients. Promote these events through your social media channels and feature highlights and updates on your website to showcase your active community involvement and commitment to customer service.
Keeping Your Website Updated: A Digital Storefront for Your Brand
Speaking of your website, remember it’s the digital storefront of your business and is just as crucial as your physical location. It’s the hub where potential clients land to explore what you offer and make decisions. That’s why regularly updating your website with your latest offerings and ensuring that the digital reflection of your brand is current and comprehensive is valuable time spent. This step is vital and often missed, which can be a significant oversight in a digitally-driven market.
By consistently refreshing your website content with the latest product information and updates, you’re not just aiming for more sales; you’re enhancing the value and experience for your clients. This dedication to providing up-to-date and accessible information aligns with client needs and reinforces their decision to choose your services. A well-maintained website, paired with a vibrant social media presence, builds credibility and solidifies your position as a forward-thinking and client-focused leader in your industry.
Looking for assistance to keep your website fresh and your marketing on point? Instone has got you covered. Our dealers have exclusive access to our wide array of resources from web developers to social media experts, ensuring your marketing stays updated and search-friendly.
IG: @brickworkssupplycenter
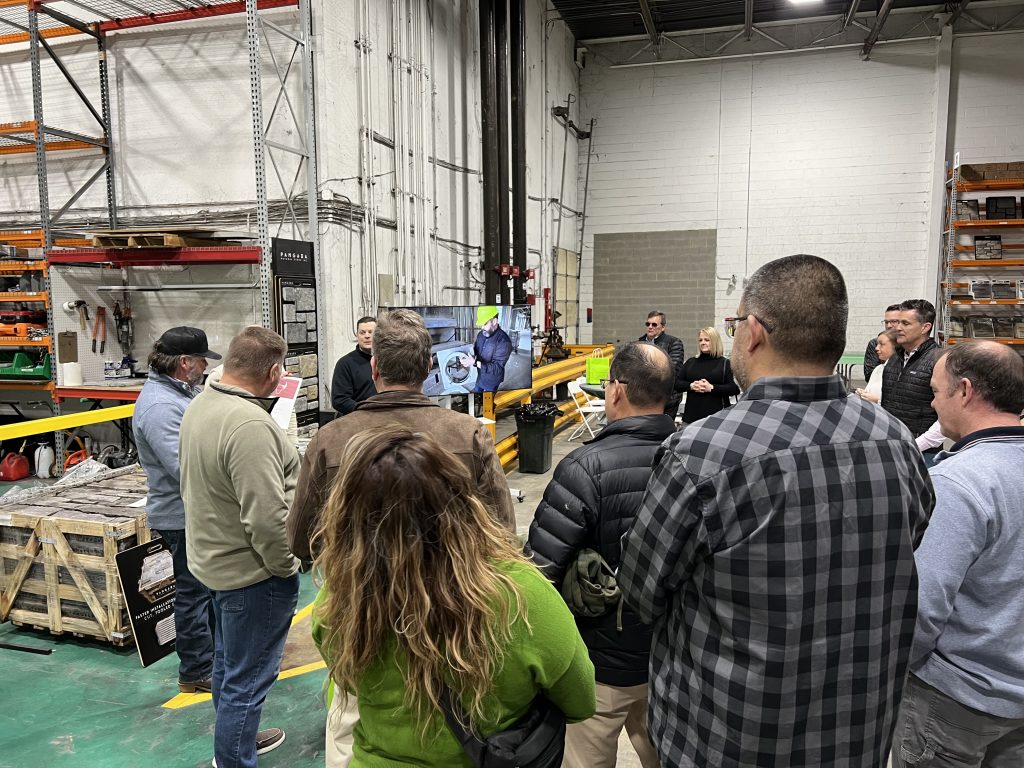
Dealer event held at Instone’s Alsip location.
Obtain Certifications: The Power of Education
Securing a competitive edge in the construction, masonry, and hardscaping industries is crucial for winning contracts and building a reputable business. One strategy to achieve this is through a commitment to continuous learning and professional development. This commitment to professional growth does more than just elevate your technical capabilities; it signals to prospective clients that you are a forward-thinking contractor who values innovation, safety, and the highest standards of quality.
The certifications and knowledge you acquire become powerful tools in your marketing arsenal, allowing you to confidently articulate the value you bring to every project. Plus, staying on top of the latest industry trends, techniques, and materials ensures that you can offer cutting-edge solutions that resonate with homeowners looking for modern, durable, and aesthetically pleasing outcomes.
Enhancing Your Expertise: Instone’s Educational Resources
Deepen your knowledge of stone masonry by leveraging Instone’s comprehensive suite of educational and training resources. Videos covering state-of-the-art stone veneer techniques, on-site installations, and specialized instructional content are just a click away. Gain valuable insights into our premium natural stone collections, like the Aura Natural Landscape line and Pangaea Natural Stone veneer, and learn to confidently recommend the best solutions to clients. By subscribing to our YouTube channel, you ensure you’re always at the forefront of the industry, ready to deliver excellence to your clients with the best-in-class materials for veneer, hardscaping, and fireplaces.
Spring is all about growth and opportunity. You can achieve sales and build long-term relationships with your clients by providing prompt service, utilizing high-quality materials, and ensuring customer satisfaction. Let this season bring you to new heights of professional excellence and customer delight.
With the Instone Visualizer, you can complete a wall-to-wall virtual home makeover in a matter of minutes. The free online tool allows you to simulate what a home or property would look like after a renovation with any combination of stone products from Instone’s expansive catalog.
Powerful yet simple, the Visualizer offers installers and dealers a way to show clients renderings of projects that can be used to assist with sales, and homeowners a way to browse their options for veneers, pavers and other stone products. Users can upload photos of a job site and redo a wall or patio area with new masonry in a couple of clicks.
Instone Vice President of Natural Stone Products Justin Alicandro said the Visualizer has made the need to assemble stone samples or create mockups for clients obsolete.
“This is so much more efficient than the way we used to do things,” Alicandro said. “Homeowners can come out of a session knowing pretty much what they want, and if they don’t like the products once they see real samples, they can tweak the project again in the Visualizer and try a plan B. The Visualizer is such a great tool.”
Visit the Instone Visualizer Page for More Tips & Techniques To Create The Perfect Rendering.
How It Works
To get started, find or snap a digital photo of your project area and add it to the Visualizer. (If you don’t have an image available, you can browse our samples for one that resembles your property.) Photos should be at least 1600 pixels wide and not exceed 16 MB. A standard camera phone pic will do nicely.
With the photo now online, the Visualizer’s AI will scan its features and automatically identify areas most likely for stonework. The technology will also recognize features like windows and doors and omit them. If it misses a wall or ground section you’re interested in, don’t worry – you can draw a polygon to highlight the area manually.
You can then click on any of these areas and choose the interior or exterior Instone masonry product you’d like to see applied there. Once it appears, you can try different brands, profiles, and colors to see how they look, and even change the stone sizes on the fly. The images you create can be saved, shared, and easily edited later.
Fine-Tuning
The Visualizer has multiple editing tools to help fine-tune your renderings and make them more realistic. You can adjust the opacity of the masonry to totally block out the surface beneath it or to allow important features to peak through. Another tool allows you to adjust the perspective, which can realign the stone if it’s not quite level or doesn’t track the angle of the surface accurately.
For the best results, we recommend taking your photos facing straight ahead toward the surfaces that will be clad. If possible, it’s best to move any furniture or other obstructions out of the way.
The Visualizer will even help you simulate the appearance of non-stone upgrades. You can apply paint colors to your banisters and doors or try out new shingle styles and colors on the roof. These features can be combined with the stone improvements to give you a full picture of how all of the materials will look together.
Before and after using the Instone visualizer with Pangaea® 3 Course Ashlar Oxford
Share & Create a Report
The Visualizer offers a range of options for sharing before and after images with clients or anyone else who may be interested in giving feedback. You can quickly export the renderings as JPG and PNG files or use share buttons to email them or post them to Facebook, Twitter/X or Pinterest.
Of high value to masonry professionals, the system can generate attractively formatted reports showing the finished home and thumbnails identifying all of the products featured in the project.
“For a contractor trying to win a job, price is obviously important, but if you can demonstrate for a homeowner what their house is going to look like when it’s complete, that will definitely set you apart from others trying to quote the job,” Instone Chief Operating Officer Rob McKay said. “Ultimately, a lot of people will still want to see a sample and feel it in their hands, but the Visualizer is a great tool to help them narrow down their choices.”
Watch Our Full Tutorial
For a full demonstration of what’s possible with the Visualizer, watch our training video (“Pro Tips for Selling With The Instone Visualizer”) above. You can also check our Visualizer page for FAQs and a series of shorter videos with tips and demos focused on specific Visualizer questions.
Precision in Stone: Navigating Complex Cuts with Instone’s Fabrication and Design Team
The Instone Fabrication and Design Services team turns big ideas into reality. Whether you need a tricky stone cut done for a single stair tread or guidance for a large-scale design-build project with elaborate outdoor amenities, Instone has you covered.
Fabrication and Design Services offers project management solutions including value engineering, estimating, and global sourcing of natural stone materials. Its fabrication pros can provide any stone cut or finish needed to complete a project or achieve your target aesthetic.
“Not everything drawn on paper by a landscape architect is always possible for a mason,” said Design Services Manager Zach Beaulieu. “We take the concept they’re shooting for in their project and help them physically create it.”
Among the highlights of Instone’s state-of-the-art fabrication shop in Plainville, Massachusetts, are:
A Jaguar bridge saw with the capability for profiling (designing unique edge finishes, slopes, etc. with software).
Tools used for edge treatments, bullnose cuts, and leathering stones.
A sandblast room for giving a variety of finishes to stones.
A dust booth where stone fragments produced by grinding are extracted, ensuring safe air quality.
Instone’s fabrication capacity is not limited to this one shop. The company has access to a vast network of partner suppliers, vendors and quarries that serve as an extension of the Plainville facility. If necessary, any of these specialized or larger facilities in the U.S., Canada and abroad can be tapped to handle big jobs faster and cheaper.
Scroll below for a glimpse at some projects which exemplify what the Fabrication and Design Services team can do.
Contemporary Pool
Beaulieu views high-end outdoor residential renovations like this one as the Fabrication and Design Services team’s specialty. “This is an example of a project that was designed to the nines and we really needed to help detail that out for the client,” Beaulieu recalled. Instone cut all the steps, walkways and pool coping to complete the architect’s vision. Instone also assisted with the outdoor fireplace’s Blue Mist granite hearth.
Courtyard
The signature feature of this courtyard, constructed for a private high school in Massachusetts, is its large, semi-circle seating wall. “Anything radial is a challenge to do,” Beaulieu said. “There’s a lot of computer software programs that you need to work with in tandem with a saw. You also need a skilled fabricator to finish the stone accurately.” To achieve a cost savings for the client, Instone had the granite blocks cut and given their thermal finish by a network partner in Canada.
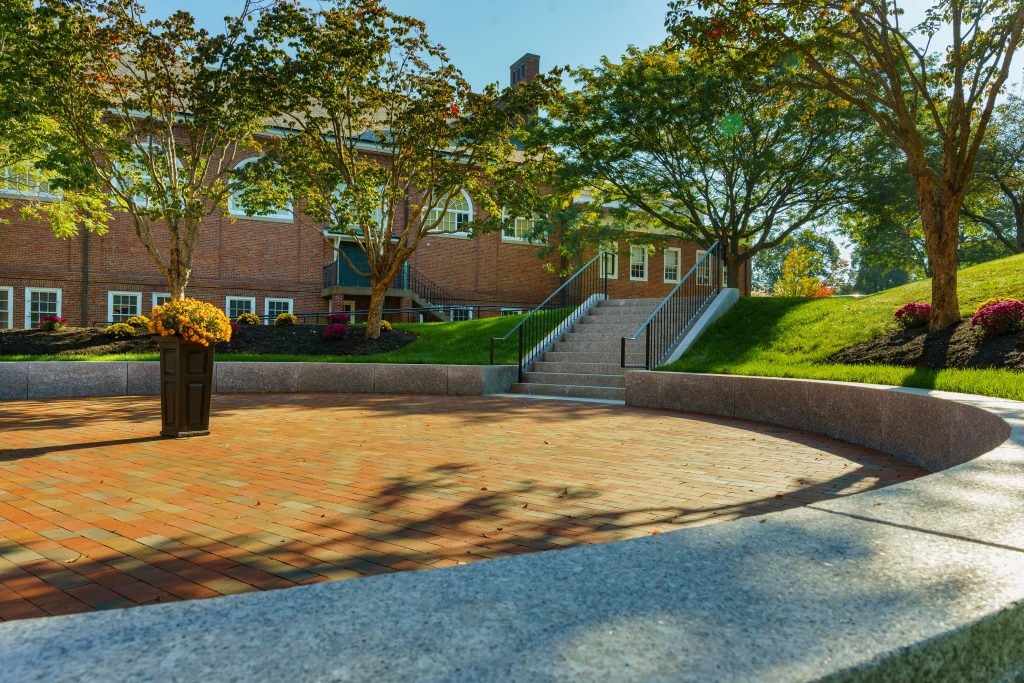
College Campus
Instone supplied all of the veneer to clad these two buildings on the campus of Assumption College in Worcester, Massachusetts. Fabrication and Design Services also handled the stair treads and radial wall caps, designed for students to rest on between classes. Beaulieu recalls this as a massive project, with 30-40 containers worth of material needed to complete it over the course of a year. Since it takes time to accumulate that much finished stone, Instone had containers delivered as soon they were ready to keep the project moving.
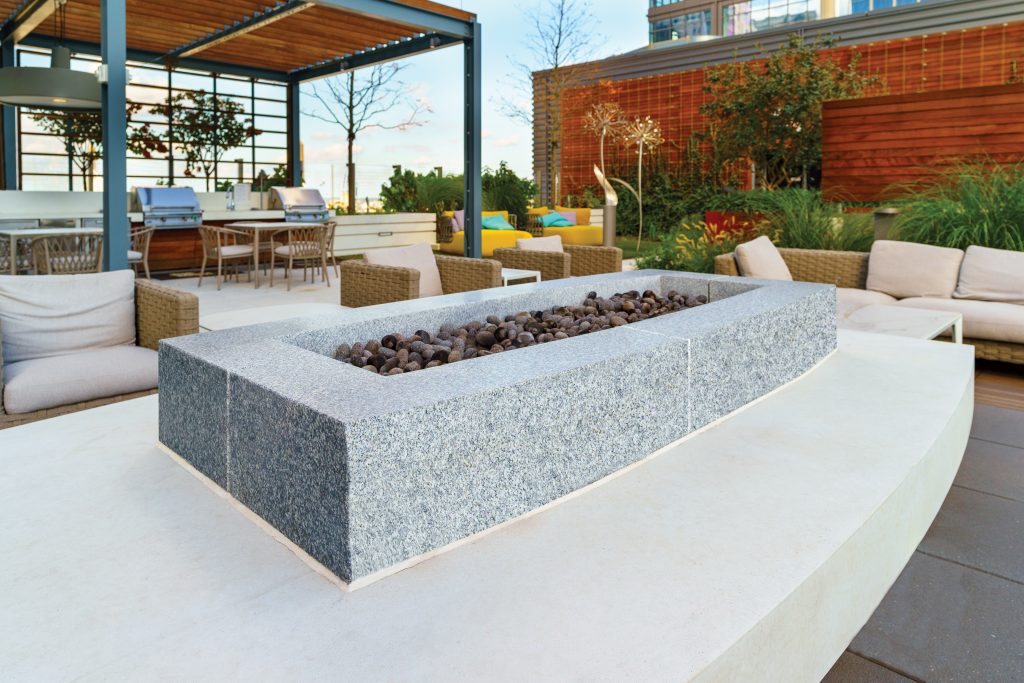
Rooftop Terrace
Fabrication and Design Services handled the stone cuts for this firepit, the focal point of a Boston apartment building’s rooftop hangout. The gray center ring is made of Stanstead granite with a honed finish. Beaulieu said such one-off stone cuts can be complex and expensive, but have the power to make nice projects into special ones.
Learn more about the various places where your outdoor design may need custom fabrication and what’s possible here.
A Cut Above
Visit our Fabrication and Design Services page to view our catalog, meet our team and learn more about how our team can help you accomplish your goals. You can also use our online form to contact our team with questions or get started. Turnaround times for services can vary based on factors like workload, time of year and material needs, but our team will always respond promptly with answers and estimates.
“The goal is always to give the quickest turnaround time for the best price possible,” Beaulieu said.
The Art of Hardscaping: Unveiling the Benefits of Polymeric Sand
Fill the Gaps with Polymeric Sand
Polymeric sand is to hardscaping what grout is to stone veneer. It fills the gaps between each stone, adding an attractive, durable border that protects the structural integrity of the mosaic.
Polymeric sand is what it sounds like: grains of sand mixed with polymers that bond together once mixed with water. While it is not the only type of material used for filling joints – standard fine sweeping sand is still more widely used by installers – it offers advantages that make its modestly higher price point worth it.
Stop Weeds and Ants
Among them, joints filled with polymeric sand can stay intact for up to a decade. Unlike standard sand fill, they are resilient in the face of heavy rains, winds and freeze-thaw cycles, and can’t easily be picked apart by ants.
Patios and walkways sealed with polymeric sand are also less likely to suffer weed outbreaks. Because the grains are bonded tightly together like cement, vegetation can’t push through like they can with loose fill and seeds won’t have cracks to seep through. Once weeds get established, they can spread rapidly and become tough to control.
“Every spring I would go out thinking I could knock the weeds out in one day, and then you realize just how many joints there are. And I’d say wow, I did not anticipate this being as hard as it is,” Instone Video Producer Ken Czechanski recalled of his old patio, which did not use polymeric sand. “It’s long and arduous to sit there on your knees scraping them out.”
Additional Benefits
In a recent episode of InBuilding Design, Czechanski welcomed the crew to his Chicago area backyard to chronicle the replacement of his cement paver patio with one made of Aura Natural Landscapes natural stone pavers. Another benefit he’s noticed to using polymeric sand is its ability to protect the base of the patio. As seen in the episode, his old patio had multiple loose pavers that presented a trip hazard and pooled water during storms. Just as potholes form when water freezes and melts beneath the roadway, excess water seeping through your joints in the winter can chip away at a patio’s stability. Czechanski immediately noticed that the polymeric sand was helping control stormwater more effectively.
“When it rains, as soon as it stops, you can see the stones begin drying immediately,” he said. “Polymeric sand is protecting the base and preventing the stones from shifting.”
Polymeric sand is available in a variety of color blends, giving contractors plenty of options to fulfill the desired look of the project. Czechanski considered three colors that could serve as an accent to his Aura Sandy Point granite stones – a gray, a tan, and a brown.
“We ended up going with the brown because it provided a nice contrast to the stones, which were lighter like the beach,” he said. “It also helped to highlight the pattern, which had brown speckles in it.”
Installing Polymeric Sand
Filling joints with polymeric sand is simple. As seen in the clip above, the first step is to pour the sand onto the patio and use a broom to sweep it into the gaps. Excess sand is carefully swept off the patio to ensure it won’t bond to the stone face later.
Once the joints are properly filled, the installers wet the patio down with a garden hose on a shower setting – strong enough to rinse off any residue, but light enough that it won’t blast out the sand. The water activates the polymeric sand and makes it bond together.
Try out Color Combinations
You can use the Instone Visualizer to help select a stone and polymeric sand combination that’s right for your project. The online tool enables you to upload photos of a property and instantly simulate what it would look like with Instone’s full range of products.
Although Instone doesn’t carry polymeric sand, the Visualizer does model several colors to give users a sense of how it would look with various stone types. Customers may purchase polymeric sand through their dealer or browse product choices at a local home improvement store.
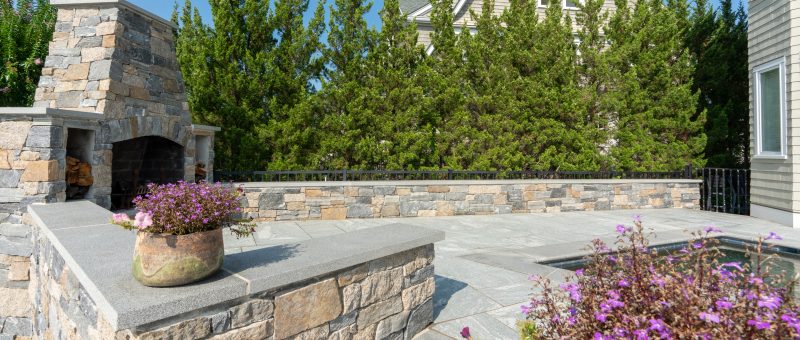
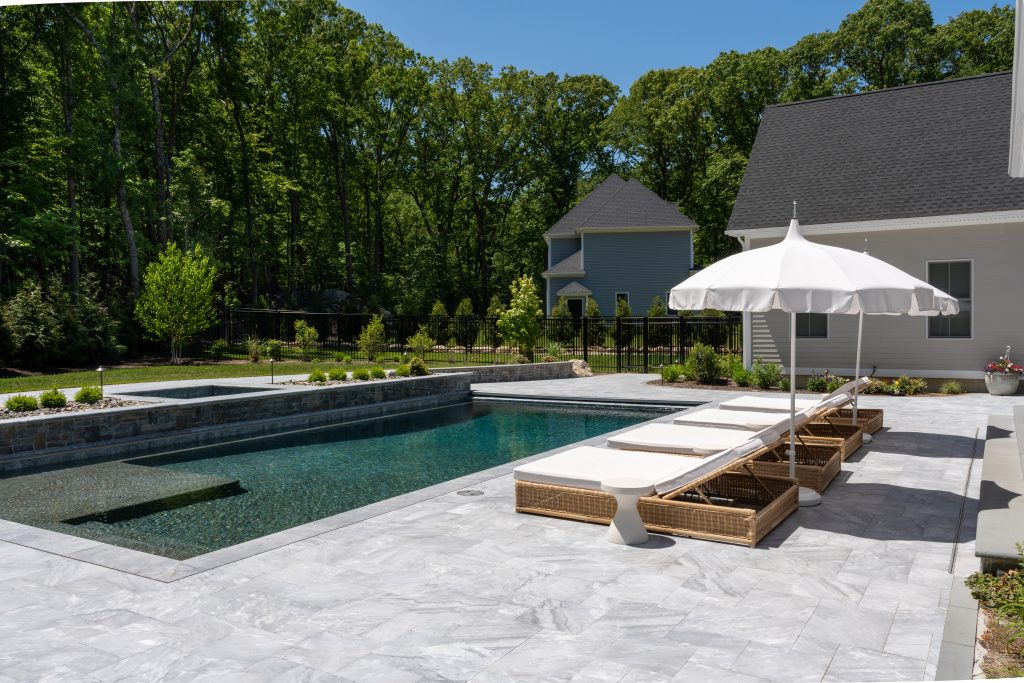
From Patios to Pools: The Secret To Choosing The Right Stone
When it comes to hardscaping choices, applications matter. A property owner may have their heart set on a stone color or finish, but there are times when the available options would be a poor match for the project.
“For a front walkway, you want something that complements the house and front steps, since it’s a focal point,” Instone Vice President of Natural Stone Products Justin Alicandro said. “For a patio, the homeowner can go with whatever they like best because you don’t typically have limitations. But for a pool, you are limited. It’s not as simple as picking a color you like and going with it.”
When limitations stand in the way of a client’s vision, it’s up to masonry, landscaping, and hardscaping professionals to educate them and present options for a plan B.
Justin Alicandro, VP of Natural Stone, Instone
Alicandro offered some key guidelines that buyers and installers should keep in mind when choosing the right natural stone for their projects.
Budget First
A good first step for any project is for property owners to assemble as much information about the job site and their goals as possible to get the most accurate estimate. If installing a patio, they should measure the space, take pictures of the construction area, and provide it to the dealer. A professional can spot details like undulations in the turf that will require extra grading that impacts the cost.
With that done, the client will be better equipped to select a product that fits into their overall budget. Instone carries the largest selection of natural stone in the country, from fine, hard-to-find products available at the highest price point to similar-looking alternatives that cost much less. Alicandro estimates that there can be a 30 percent difference between the most and least expensive natural stone products. With patio projects often topping 1,000 square feet, the material choice can significantly affect the bottom line.
Aura Blue Ice Thermal
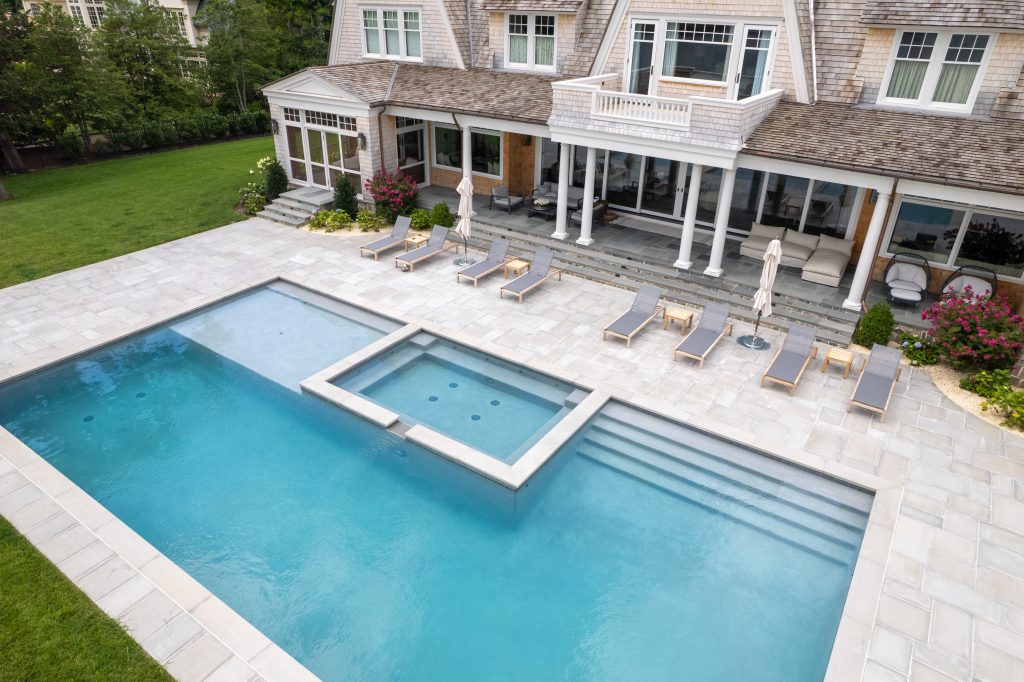
Pool Decking
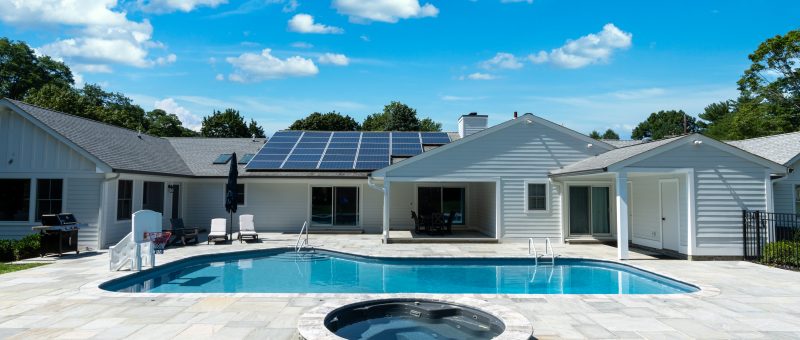
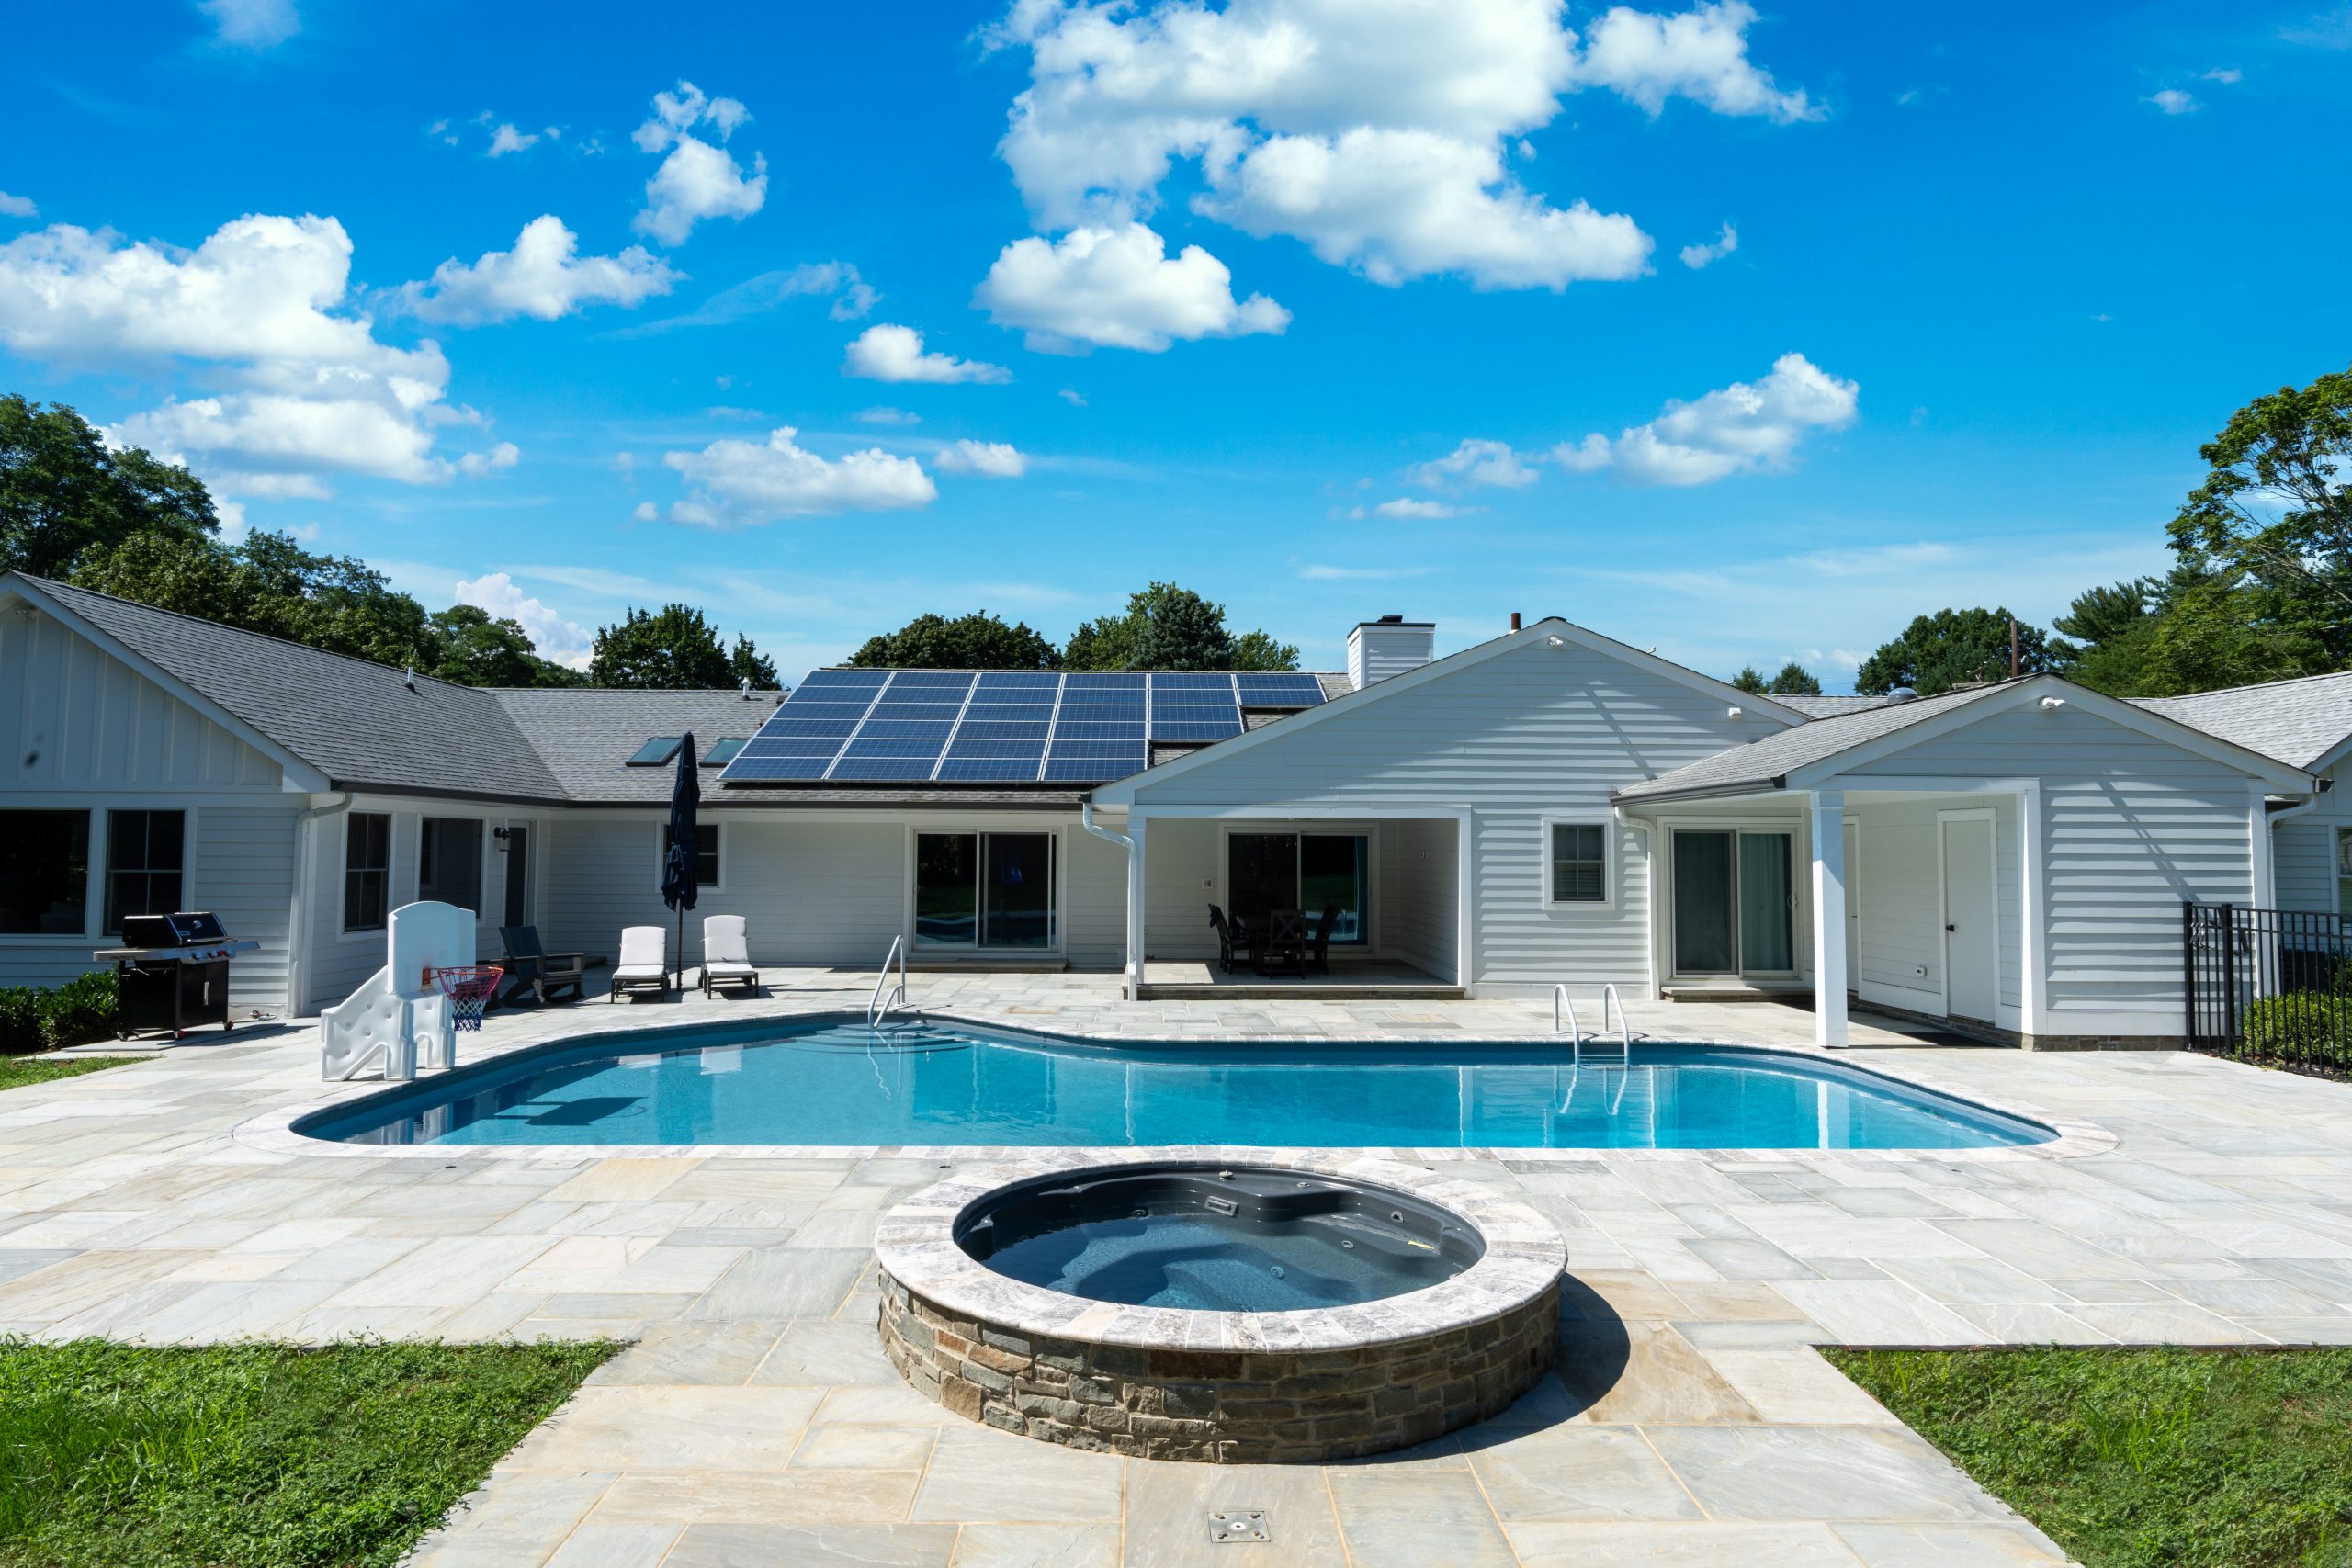
When it comes to surrounding a pool, buyers should think with their feet. Since these areas will be enjoyed with no shoes on, it’s best to avoid finishes that are rough to the touch and stone types that will generate too much heat. Stones with natural finishes can be abrasive, become stubbing and trip hazards, and trigger accidents with children. It’s also best to avoid dark stones that attract the sun – think of the difference between walking on black asphalt and a white sidewalk in the summer. Light color stones like travertine and quartzite are beautiful and more practical.
Alicandro said homeowners often splurge on elaborate pools with top-of-the-line mechanical infrastructure but talk themselves into saving money by using concrete stamp decking. He urges them to resist the temptation to skimp at the end of the project.
“If you’ve already spent $150,000 on pool construction, spend the extra 10 percent or so and go with what you love, and that’s natural stone,” he said. “At the end of the day, this is what your family, friends and neighbors are going to see.”
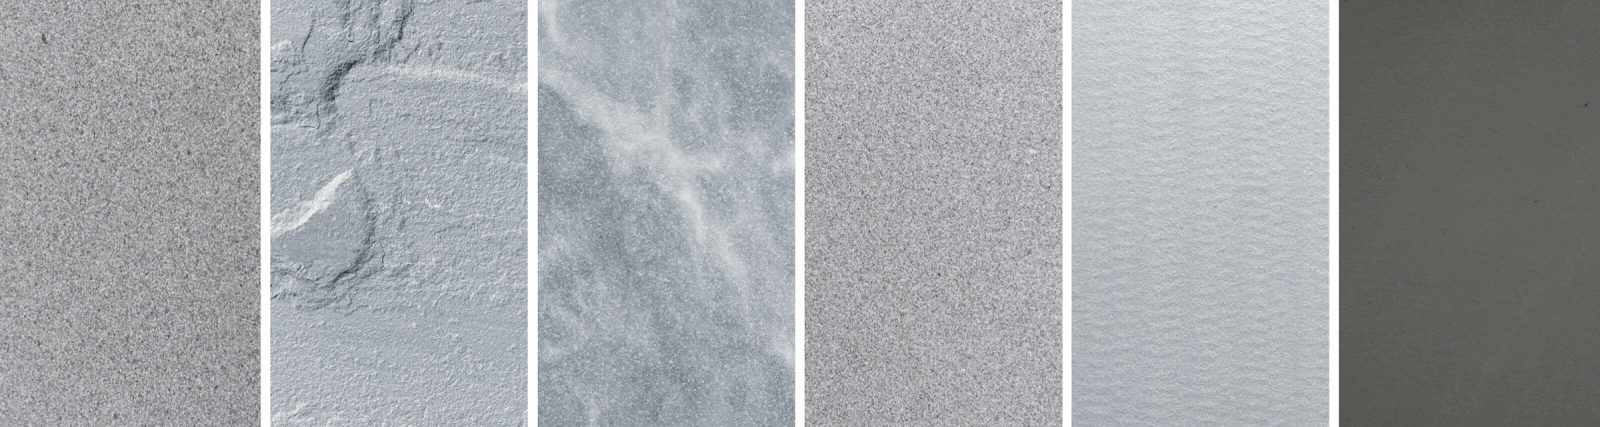
Finishes
Customers should consider the pluses and minuses of the available stone finishes for their specific project.
Natural Cleft: Many would argue that natural cleft is the most beautiful, natural-looking finish on the market. That doesn’t mean it’s the right choice. For those living in cold northern climates, the bumpy, tough surface can make it difficult to shovel snow when used as a walkway stone. It is also rough on the feet as pool decking and its unevenness can cause furniture to wobble as a patio stone.
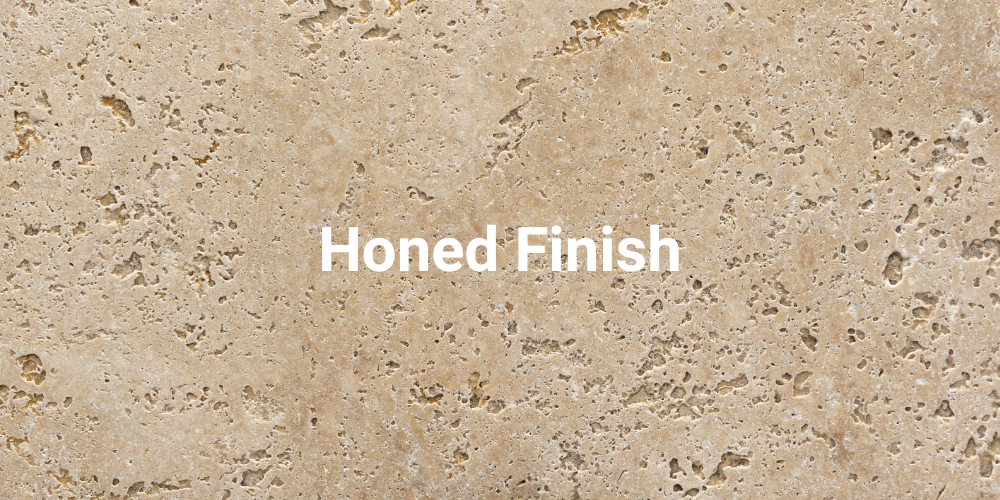
Honed Finish: A high percentage of stones with honed finishes are used for pool decking since it’s comfortable to walk on. Stone with honed finishes are sensitive to exposure to snow salts, though, so they are not advisable for walkways. Since patios aren’t used often in the winter, these finishes can be a sensible choice.
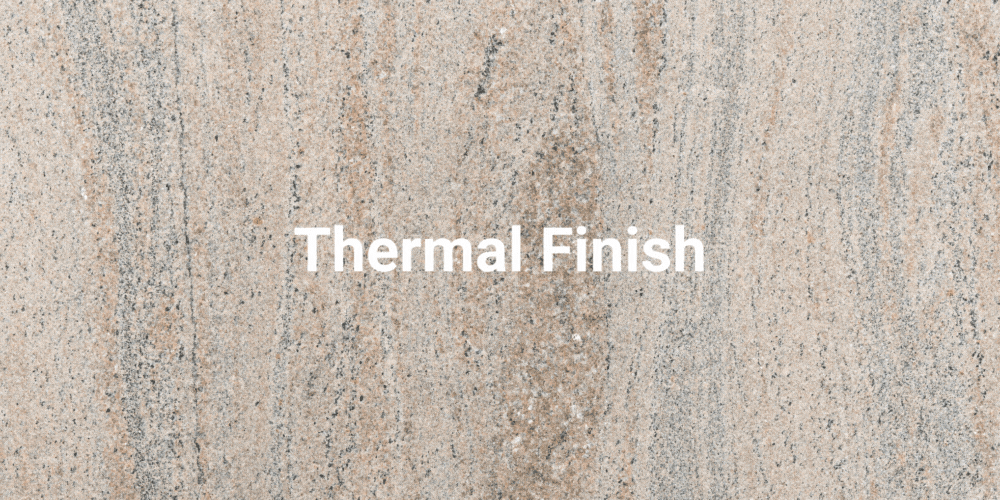
Thermal Finish: The most popular finish of all, thermal has a natural, textured look and feel. It is practical in just about any application – it can be salted, it’s easy to clean, and has the fewest number of drawbacks.
Aura Italian Bluestone Sandstone Stair Treads
Stairs Treads and Sills
Natural stone stair treads are typically placed on top of a veneer, so it should either complement or contrast well with the other material. Although buyers should consider how the stairs will be used when selecting a finish (e.g., will people walk it barefoot, will it need to be shoveled), the selection is less about the physical and more about what looks right with the stone or veneer used for its base.
The choice considerations are similar for natural stone windowsills. For example, Alicandro said a popular trend of late has been to go bold with a black sill over a gray veneer. Sills are all the same basic size and shape, he noted, so the choice is largely one of aesthetic preference.
Aura Silver Ridge Granite
Outdoor Kitchens, Fireplaces and Firepits
Choosing the right stone for outdoor kitchen, fireplace and firepit areas is similar to selecting stone for sills. Since these heated gathering places all typically sit on top of patios, the stone styles should complement one another. If an outdoor kitchen is added to an existing patio, veneers should be selected that work well with it. If they’re all being installed at the same time, the color choices should be coordinated in advance.
Careful consideration should be given to the stone used for an outdoor kitchen’s countertop, though. It is possible for oils and wines to stain stone, so a dark color is the safest bet. But if a lighter stone is desired, Alicandro recommends going with thermal and leathered finishes. The thermal treatment will give it a textured feel, while the leathering adds an antique look that makes it harder to stain.
Getting Started
Homeowners can consult their local stone dealer or supplier for recommendations on materials and top local installers. Dealers will have a list of businesses who they’ve worked with and received positive reviews from their customers. Contact Instone today to learn about dealers in your area or visit Instone’s Aura Natural Landscapes page for catalogs and videos featuring our wide variety of natural stone products.
Exterior Home Design Trends for 2024: Stone Edition
Dark Is In For Exterior House Colors
Not all choices in life are black and white, but when it comes to stone veneer color choices, they increasingly are. As we gaze into the crystal ball of stone exterior home trends for 2024, Instone Northeast Territory Sales Manager Mike Kornele predicts that we can expect to see more veneers where black takes the leads, complemented by white or light gray highlights.
“It seems like over the last couple of years, everything has been trending to that more modern look – squared off, smooth facing, contemporary finish. Darker colors are definitely in,” he said.
While the timeless grays and earthtone veneers that sell well every year continue to hold their ground, the allure of dark stones is on the rise. Homeowners looking to make their indoor and outdoor spaces stand out are opting for those bold alternatives. Kornele points to Pangaea Natural Stone’s Black Rundle and Cambrian color Ledgestones and Castlestones as prime examples and hot sellers.
Pangaea® Natural Stone Black Rundle
Pangaea® Natural Stone Cambrian Ledgestone
Pangaea® Natural Stone Cambrian Fieldstone
Pangaea® Natural Stone Cambrian Fieldstone
In the world of manufactured stone veneers (MSV), Kornele envisions a continued embrace of stones that offer an “in and out” look to them – those with depth and interesting textures that draw the eye. With the market now offering an array of MSV colors and finishes, customer preferences have moved away from the flat planes that once dominated the industry.
However, it’s important to note that exterior home color trends can vary by region. Kornele observes that the modern veneer trend is thriving along the East Coast, while new inland areas are leaning towards stones that blend seamlessly with Colonial and farmhouse-style architecture.
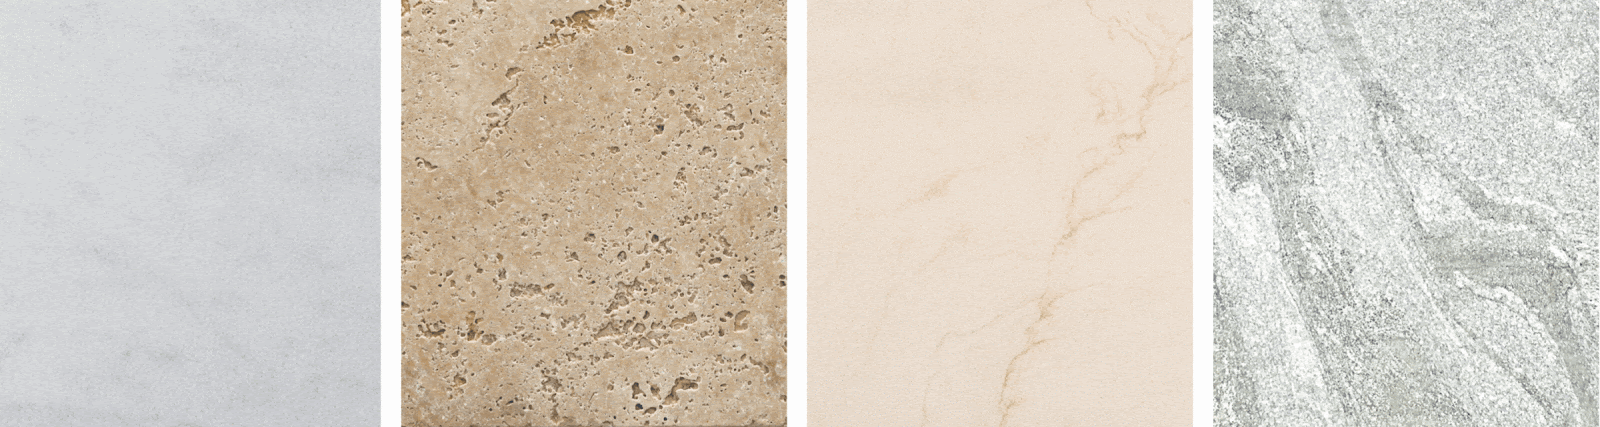
The Color Palette for Outdoor Pavers and Hardscaping
When it comes to outdoor pavers and hardscaping, shades of gray and blue have consistently dominated year in and year out, according to Instone Vice President of Natural Stone Products Justin Alicandro. Instone boasts one of the widest selections of blues and grays in the country, thanks to Aura Natural Landscapes, ensuring there’s a color to suit every design vibe.
Aura Misty Blue Marble & Blue Mist Granite
For those leaning towards a darker tone, Blue Mist granite is a top contender. If you prefer a lighter touch, check out the Blue Ice Natural, Blue Ice Thermal, Imported Gray, or Silver Ridge granites. Alicandro notes that Misty Blue Marble and Silver Travertine are in high demand for pool pavers.
However, Alicandro has noticed a surge in stones for pool areas that are pure white or close to it, like Arctic Cloud marble. This white marble is loved for its subtle grey veins that flow through each stone. “This is extremely popular for pools because it stays cool, and the sandblast finish provides texture for a non-slip patio,” he said.
Alicandro also expects earth tones Oxford Buff, a light tan/cream-colored stone, to maintain its strong momentum from last year. Customers view it as a more durable, attractive, and budget-friendly alternative to Midwest limestones, he said.
Another intriguing trend Alicandro has seen is the use of natural stone accents to complement manufactured hardscaping materials. For example, contractors are pairing natural stone pool coping with concrete pavers; natural stone stair treads with concrete retaining walls; and natural stone widestock to cap concrete walls. This trend is gaining traction as natural stone pieces can be larger, providing a more appealing look. For example, concrete coping is typically produced only 18 inches long, while natural stone sections can extend up to 4 feet.
“It’s less jointing for the capping. It’s a more attractive look and a trend that’s happening more and more each year,” he said.
Outdoor KitchenPopularity Is Surging Stone Veneer Adds The Distinctive Touch
For masonry professionals, get ready to shift your gears when it comes to veneer installations on outdoor kitchens. Modular outdoor kitchen materials, like those offered by Isokern Fireplaces & Chimneys, have significantly reduced installation time and complexity, making projects that were once the domain of only wealthy homeowners attainable for a broader audience. But homeowners are cladding these outdoor kitchens in stone veneer to give these modular structures a distinctive style.
“It seems now more and more Mrs. Smith wants a kitchen that’s going to be more unique than Mrs. Jones’s kitchen, so they’re getting into a lot more veneer work,” Kornele said. “Everybody is always going to be doing their water tables, foundations, entryways, stoops, and things like that, but outdoor kitchens are definitely on the rise. That’s a market that’s going to be pretty solid for the next couple of years.”
Of course, the right veneer style is just one part of the equation – homeowners also need to select pavers that harmonize with them. Kornele suggests most people prefer a healthy contrast in stones so that they stand out without being overly flashy
“When you’re choosing your colors, you want things that are going to complement each other, but you don’t want things that are exact, because you don’t want to step back from your project and see a blob of one color,” Kornele said. “You want the colors to stand out and be distinct, but you don’t want them to battle each other.”It’s a decision driven by personal preference, but it can be made simple by Instone’s Visualizer. The tool allows users to create instant digital overlays showing how stone products would look on photos of their home or property
“It is a very efficient tool,” Alicandro said. “In the old days, you had to get physical samples of stones and put them next to each other to see how they’d look together. Now you can look at multiple combinations in a matter of minutes.”
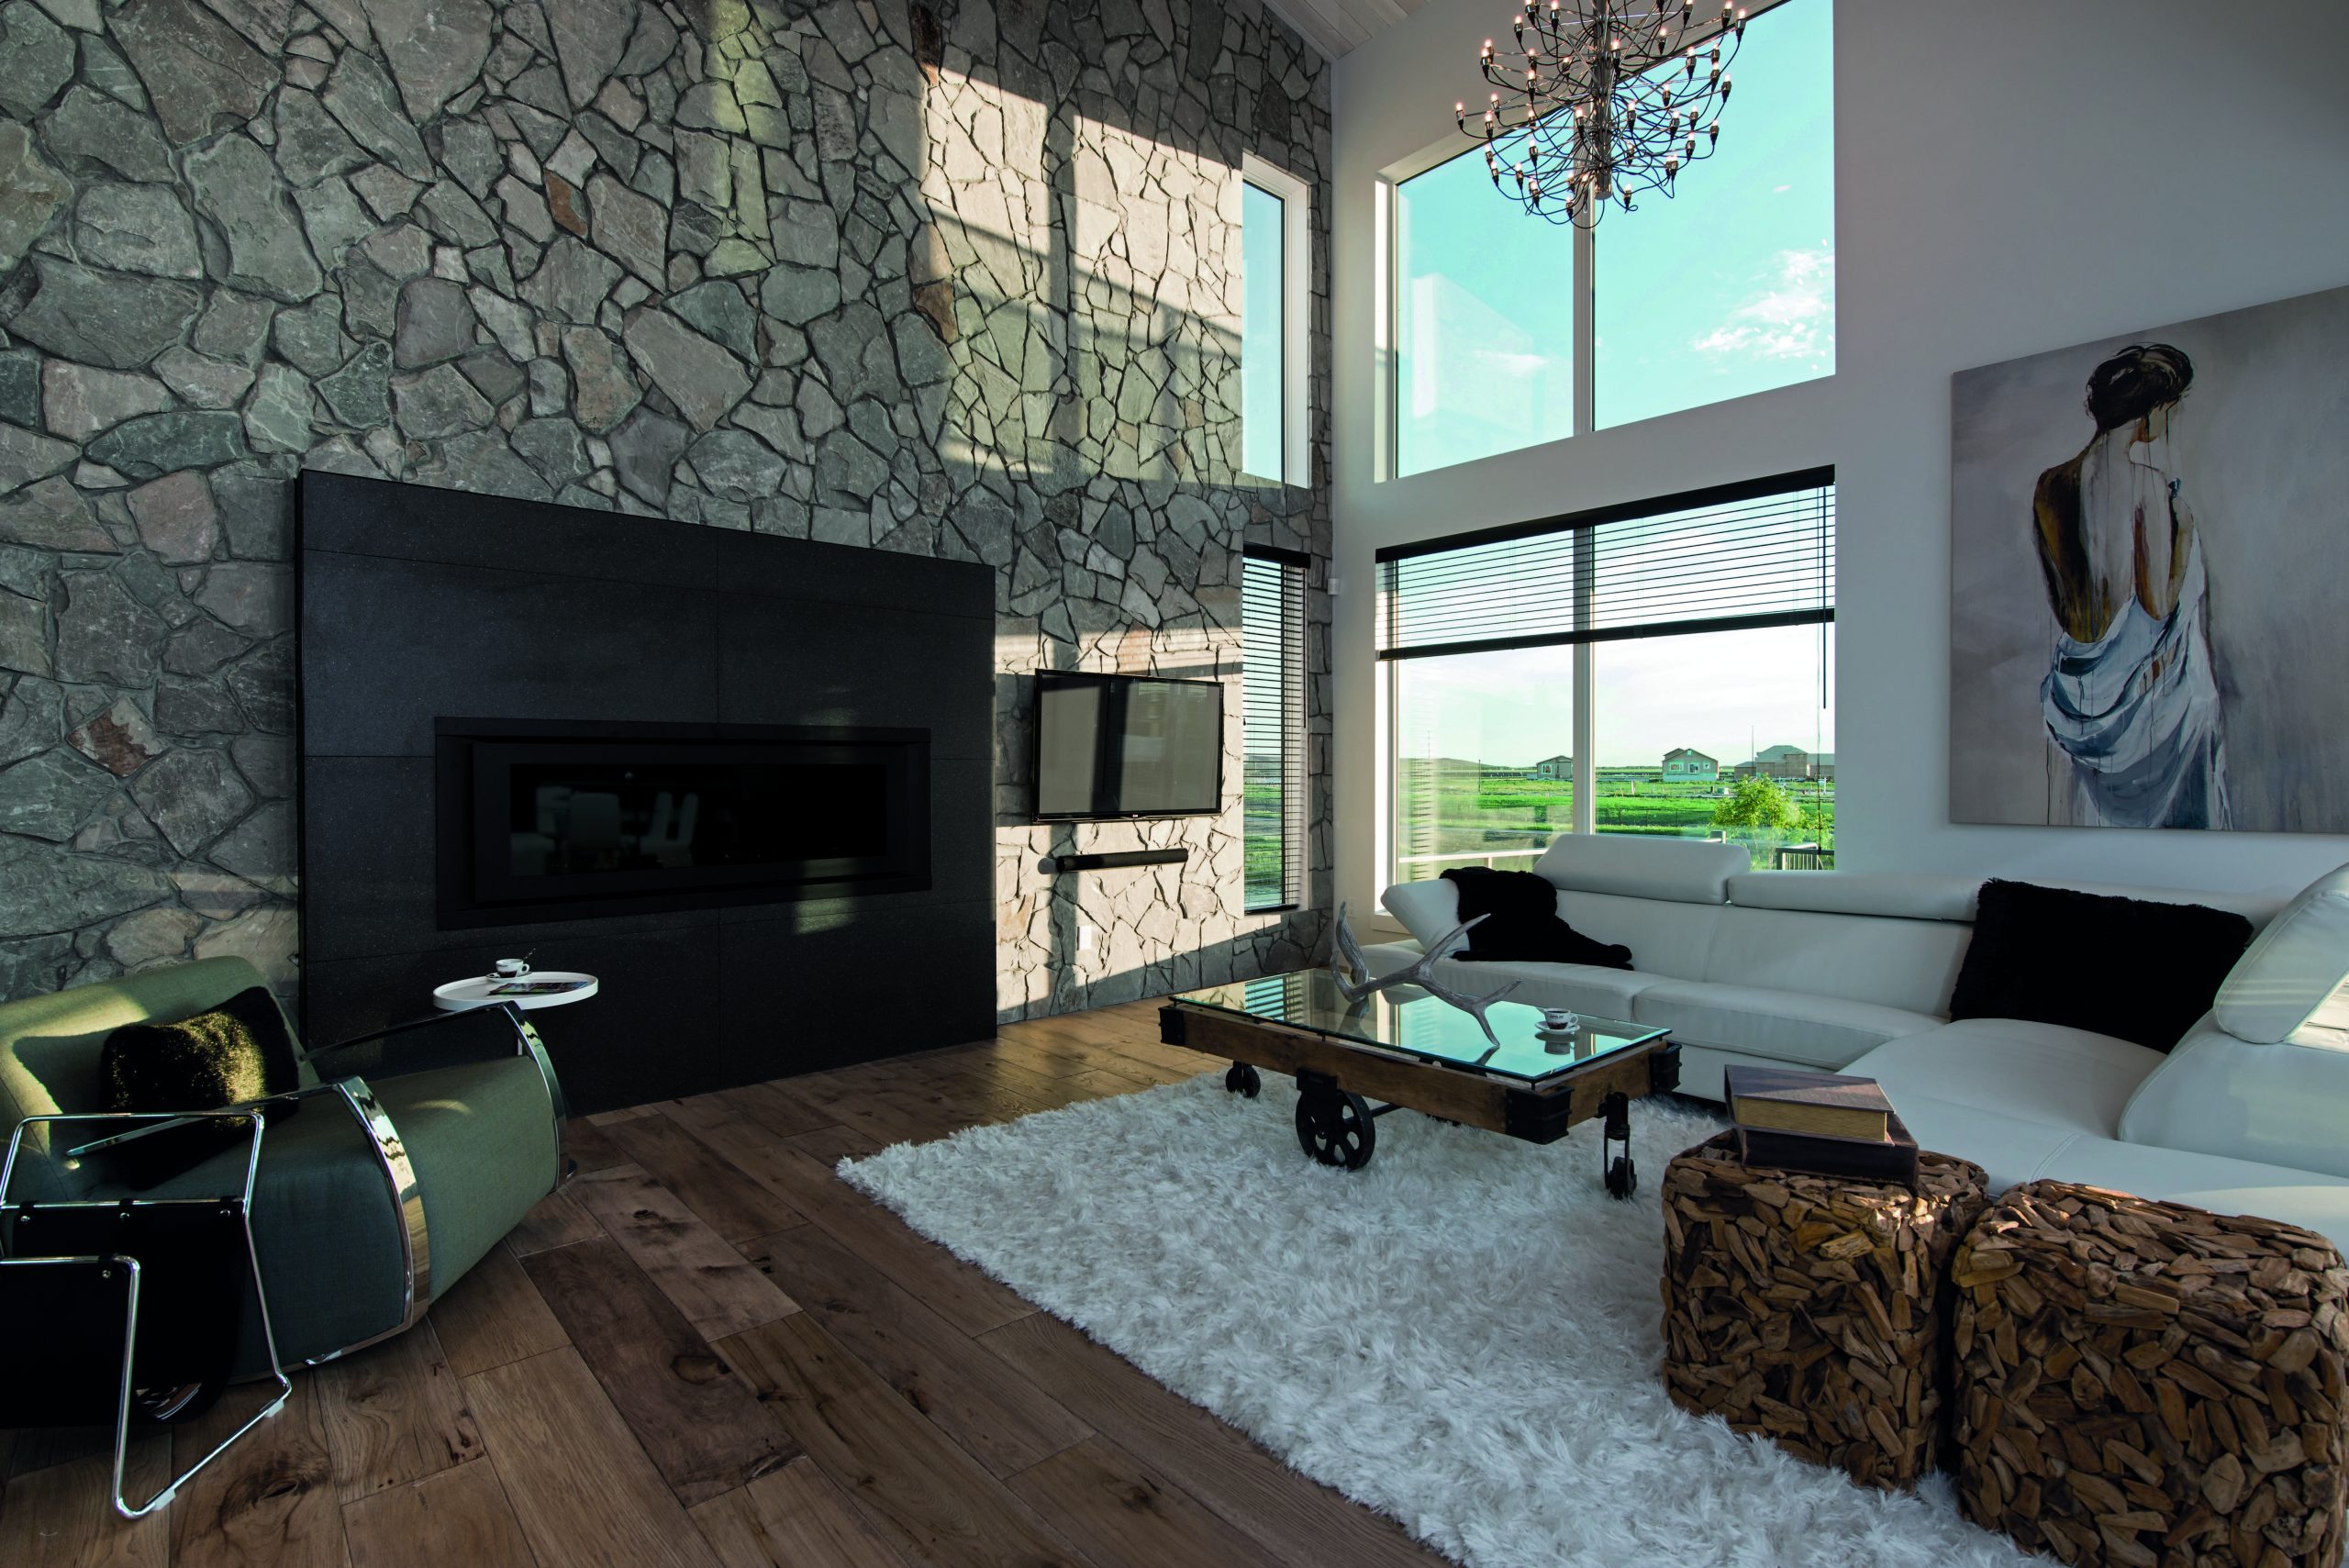
Elevate Your Home with Stone Veneer: 5 Perfect Places for Accent Walls
In the world of home construction and DIY, creating an accent wall isn’t just about aesthetics; it’s about making a bold statement. These accent walls, also known as feature walls, are where craftsmanship meets character, and they’re more than just a visual interest; they’re a game-changer for your project.
While paint and wallpaper have their place, they can’t match the enduring value and impact of stone veneers and architectural tile. Accent walls not only elevate the aesthetics but also add substantial value to a property, and it’s simple to maintain, ensuring your home interiors remain a source of awe for decades.
Choosing the right spot for an accent wall might seem challenging, but often, the room itself provides strong cues. Here, we delve into five strategic settings perfect for your stone veneer accent wall.
Artepiso Orchid
1.First Impressions Matter
Remember, you don’t get a second chance to make a first impression. Stone veneer on a wall greets your guests and sets the tone for your entire space. It’s the introduction that demands attention and admiration.
The placement of the Artepiso Orchid wall tiles in the space above acts as a focal point for anyone who may walk through the front door. These playful tiles, like any framed art, are sure to get the conversation started and create a welcoming atmosphere as soon as guests enter the house.
Light and easy to install, Artepiso 3D architectural tile adheres to most surfaces with a simple and inexpensive installation. They can also be painted for an attention grabbing splash of color.
Beon Stone® Carbo Classic
Pangaea® Fieldstone Cambrian
2.Accentuate the Architecture
Craftsmen know that great rooms deserve great features. Stone veneer can turn ordinary walls into stunning showcases. Fireplaces, floating room dividers, and walls with architectural details become canvases for your creativity.
A masterful example of this approach can be achieved with Be.on Stone® Carbo Classic veneer panels. Rather than installing shelves in the cutout section of the kitchen shown above, a stone matching the style around the adjoining room was applied, with artwork placed over it. From this vantage point, it gives the appearance of a window that offers a peak at the stone wall continuing behind it.
Ready to accentuate your home walls with another quick renovation, then look no further than your dated fireplace. Building materials like thin stone veneer and Pangaea® Fieldstone Cambria, seen above, transform any drab fireplace wall or surround into the family’s room’s best feature. See more fireplace inspiration in our blog, 5 Interior Projects To Tackle This Winter with Stone Veneer.
Pangaea® New England Quarry Ledgestone
Artepiso Andes
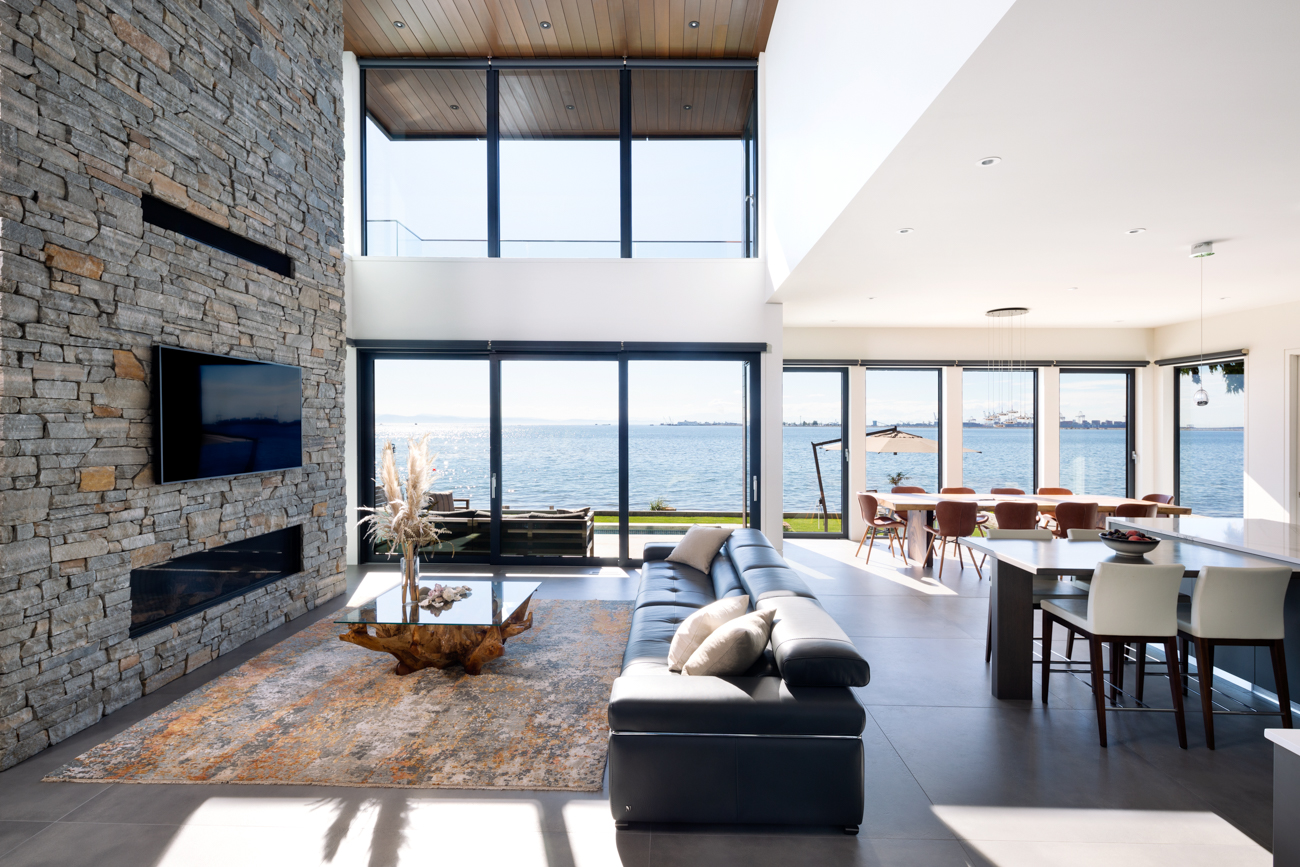
3. Chase the Light
Sometimes, all you need to find the perfect spot for your accent wall is to follow the light. Let the natural light be your guide, drawing visitors’ eyes to your masterpiece. However, be cautious with walls that get intense backlighting or the window views will overshadow the veneer.
When crafting the room with those captivating waterfront views in mind, practicality was key. The choice of Pangaea® New England Quarry Ledgestone veneer wasn’t just about aesthetics; it was a smart decision. It blends seamlessly with the elegant wood paneling on the ceiling, all while ensuring the natural light from those massive windows takes center stage.
For those of you who like to get creative with lighting, consider adding some excitement with Artepiso 3D architectural tiles, seen here in hexagonal Andes shapes. These tiles boast intricate grooves and peaks, creating a mesmerizing interplay of light and shadow. And if you want to kick it up a notch, apply a coat of vibrant, glossy paint to make them shine even brighter.
Cultured Stone® Echo Ridge Country Ledgestone
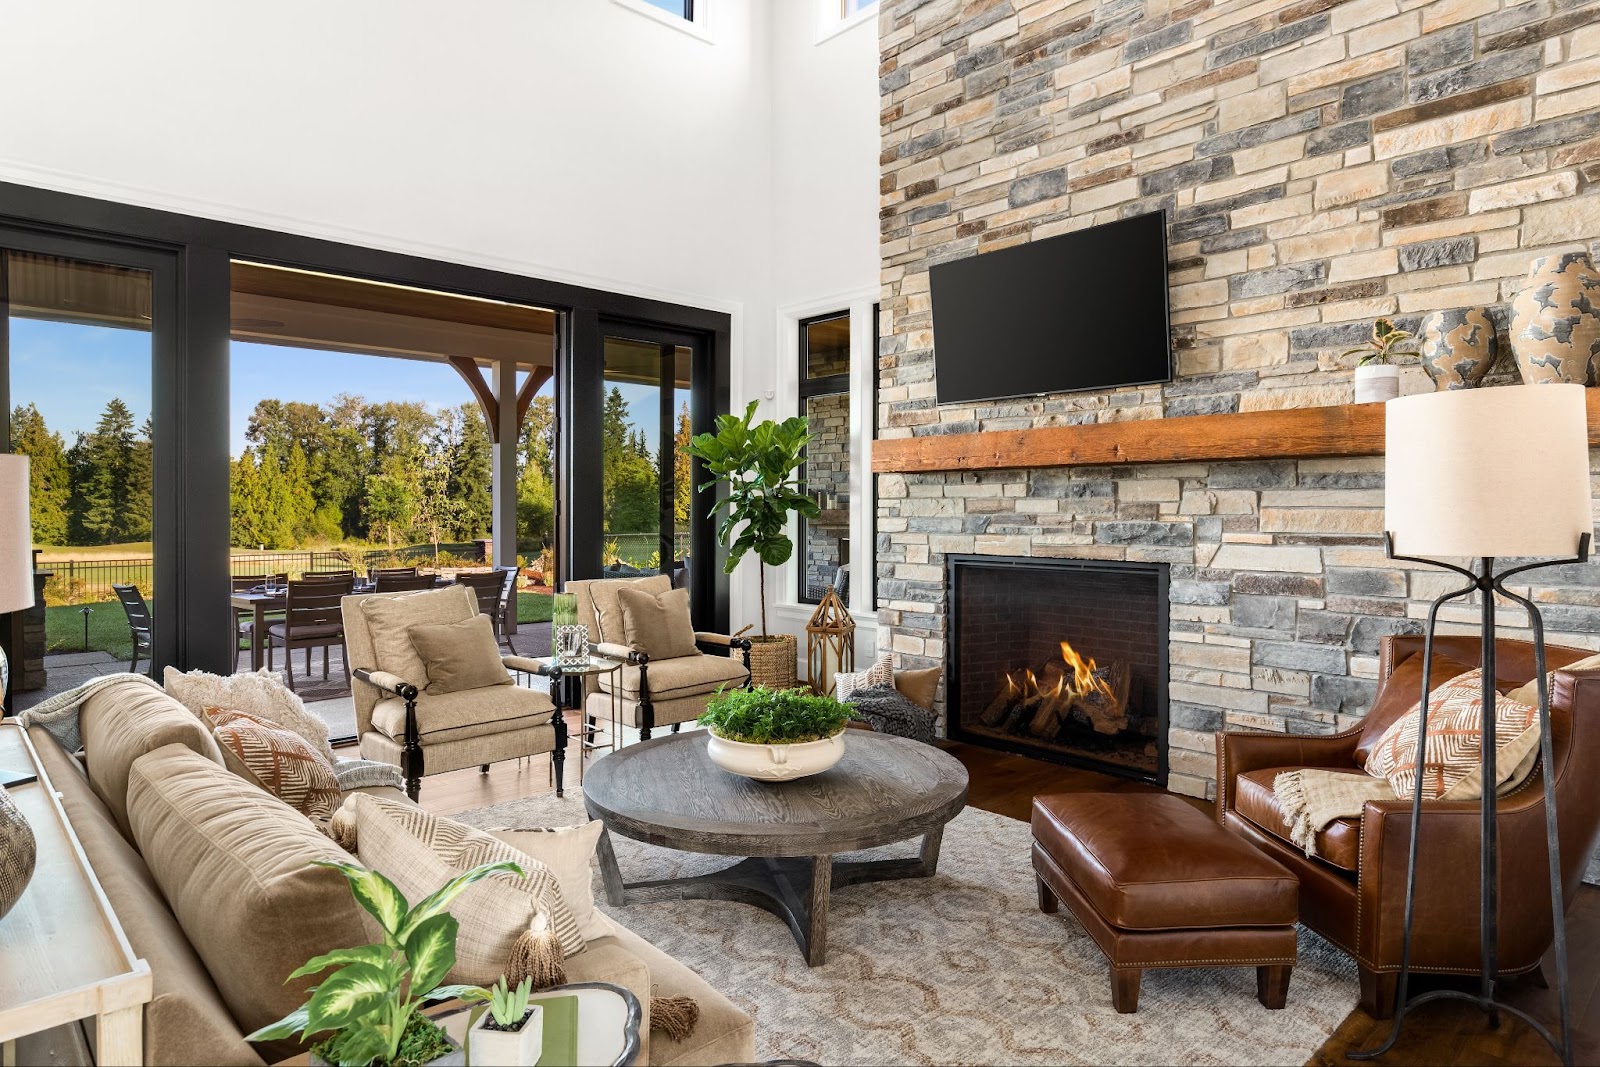
4. Read the Room
Look at the room’s layout; it often reveals the ideal accent wall location. Is there a wall where all the furniture converges? Maybe one housing a fireplace or TV? That’s your focal point, and that’s where stone veneer shines.
Take a look at the arrangement of the above living room, featuring Cultured Stone’s® Echo Ridge Country Ledgestone veneer. Would a feature have made better sense anywhere else? Note how the veneer calls out to the stone visible through the window on the home’s exterior.
Dutch Quality Winesburg Plank 4&6
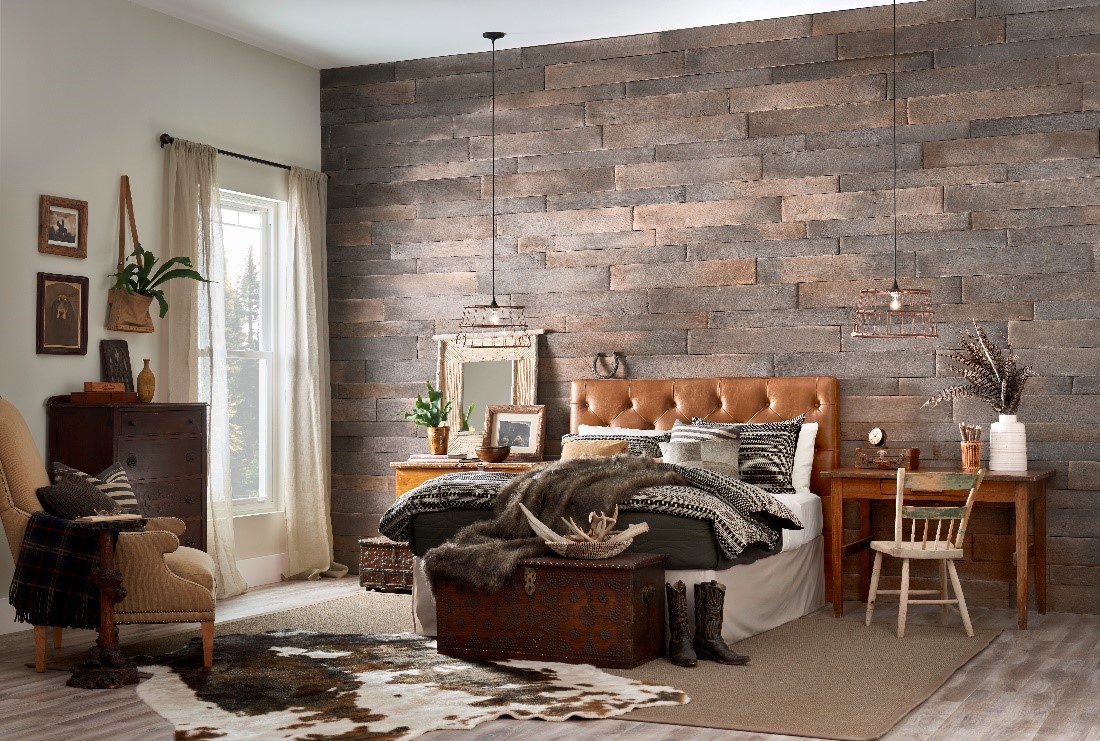
5. Beside Views
In the bedroom, the most impactful accent wall is typically the one behind the bed. It highlights the bed as the most important feature of the room (which it is), and with the right material choice, can look like an extension of the headboard itself. And when you’re laying in bed, the view of an accent wall straight ahead may not have the calming effect you need.
Take a look at the red and brown hues of the Cultured Stone® Winesburg Weathered Plank 4&6 veneer. This manufactured stone was molded to precisely replicate the grain and character of reclaimed barn wood; its artistry and craftsmanship are molded to replicate the warmth of reclaimed barn wood.
We Make It Easy!
Creating a statement with stone veneer has never been easier. six brands of natural and manufactured stone veneer products available in hundreds of colors, shapes and sizes, Instone is your partner in making your vision a reality.
A Step-by-Step Guide to Stone Veneer Fireplace Upgrades
Ready for a decorative fireplace makeover? If that old brick fireplace doesn’t quite match your home’s new vibe, there’s no need to fret. Think of it as an opportunity rather than a challenge.
Swapping out the dated look for a stylish stone veneer fireplace is simpler than you might think. And guess what? In most scenarios, you can leave those bricks right where they are.
Sure, red brick fireplaces have that quintessential American charm. But, if yours looks a bit weary after years of cozy fires, it might be time for a change. While some folks opt for a quick brick fireplace makeover with heat-resistant paint, nothing beats the elegance and value boost of a naturalstone facade.
Wondering about the how-tos? Whether you’re thinking of adhering stone veneers directly onto the bricks or using nifty tools for an extra-sturdy bond, we’ve got the lowdown. Take a look at your options and tap into Instone’s treasure trove of resources to guide you every step of the way.
Prepping for Interior Stone Veneer
Before you dive into your fireplace transformation, it’s essential to set the stage for a smooth installation. Start by laying a tarp around the fireplace area. This step ensures that any stray mortar or debris doesn’t play havoc with your floors.
Next, give those bricks some TLC. It’s important to remove any dirt, dust, or loose materials that could compromise the adhesion of the stones. A vacuum with a brush attachment should do the trick for most of the cleaning. For stubborn spots, a gentle wipe with a damp sponge will work wonders. And if you come across areas of the brickwork that are crumbling or a bit unstable, consider giving them a light sanding to create an even surface.
Choose Your Backing
Option 1: Metal Lath
Want to ensure that your stone veneer clings on like a champ? Enter the metal lath. This meshy marvel is not only strong but also flexible. Shape it around your fireplace, get it to hug those corners, and even trace out that fancy mantel.
After drilling or nailing the lath into the bricks, you’ll want to apply a scratch coat over its entire area. Fill all of the gaps with mortar, build about ½ inch layer on top of the lath, and comb over it with the trowel’s teeth to create grooves for the stones to grip to. Once the scratch coat dries, you can begin applying mortar to the back of the stones and attach them to the surface.
Option 2: Cement Board
Want a simpler DIY? Then cement board might be your best bet. It offers a clean slate, making your veneer application smooth and easy. After fastening the cement board to your fireplace, you’ll want to spread a scratch coat, groove it nicely, let it dry, and then give it time to dry.
Then you can apply mortar to your stones and install them with ease.
Option 3: Direct Application
Got a fireplace in tip-top condition? Why not skip the lath or cement board and go direct? Apply the veneer straight onto the brick, but make sure those bricks are ready for the spotlight — means no crumbling faces, loose bricks, unstable cracks, or other substances on the fireplace that could weaken the bonding.
A tiny caveat: if your bricks have a paint job, it’s best to opt for either Option 1 or 2.
If you choose traditional stone veneer take the time to do a little prep. Before you begin, make sure your stones are clean and lay them out in your desired pattern.
Be sure that you have all the necessary materials at hand. Always follow the manufacturer’s guidelines for installing your chosen type of stone veneer. In most cases, you’ll need your trusty trowel, type S Mortar, and a masonry saw before getting started.
For more detailed instructions, check out these comprehensive guides for Cultured Stone and Pangaea.
If you’re seeking inspiration for your fireplace makeover, take a look at these inspiration pages.
And if the DIY route isn’t your cup of tea, you can find a certified installer near you by searching our database.
Let Instone Make it Easy
Navigating the world of stone veneer fireplaces can be overwhelming, but don’t sweat it! Instone’s network of suppliers is ready to guide you. They’ll help you pinpoint the perfect method and materials tailor-made for your project. Ready to rock that decorative fireplace transformation? Contact Instone today for a dealer in your area.


